


The Azure Naming Tool’s new Identify Provider support allows administrators to identify site users, track activities, and designate admin accounts. This is one of the most requested features from the community and we are thrilled to be able to offer it in the tool. Let’s look into how the Azure Naming Tool achieves this new functionality.
The new Identify Provider integration DOES:
The integration DOES NOT:
The Azure Naming Tool was designed from the beginning to be a free-standing, completely isolated application. This means everything needed to run the tool is contained within the app itself, requiring no dependencies on any outside system or service. While this approach allows the tool to be deployed in an isolated environment, it does present challenges for adding robust capabilities, such as user management and passwords. User management presents an especially challenging scenario, as the administration and management of logins (user creation, password management, etc.) often require backend components to store data.
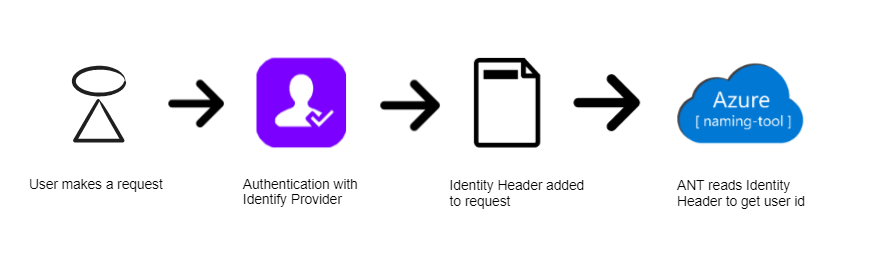
In keeping with the “free-standing” design, the new Identity Provider capabilities are based on implementing an Identity Provider for the tool and authenticating users prior to them accessing the site. When hosting in Azure App Services, this can be accomplished very easily by enabling Authentication and selecting an Identity Provider. When a user accesses the site, the selected Identity Provider will authenticate the user then pass them onto the site, along with specific headers in the request.
Here is a visualization of the process:
If the Azure Name Tool is hosted in Azure App Services with Authentication enabled, the tool will display a message in the Admin utility under the Identity Provider Settings section. This message will detail the Current Identity Provider (Azure AD, GitHub, Google, etc.), as well as the Default Identity Header Name.
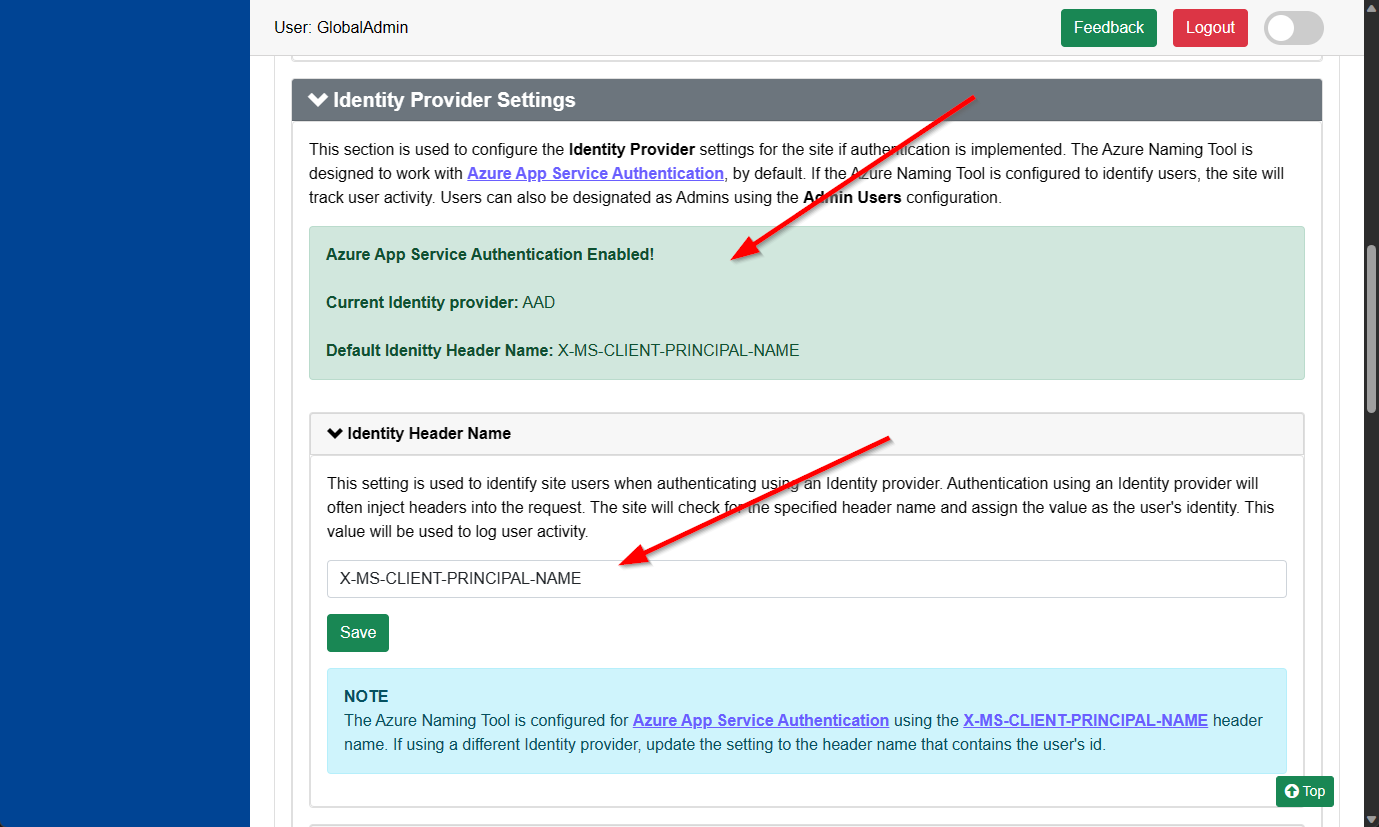
The Identity Header Name can be set to any value, based on the Identity Provider selected. By default, the tool is configured for Azure AD authentication (which uses the X-MS-CLIENT-PRINCIPAL-NAME header name). The configured header name should contain a unique value for the user’s identity.
The Azure Naming Tool will look for the configured header name and use the contents to identify the user. When an authenticated user accesses the site, the user’s identity will be displayed in the header.

The Identity Provider Header Name may be different for various providers. Be sure to set this header name to the appropriate property to identity the user.
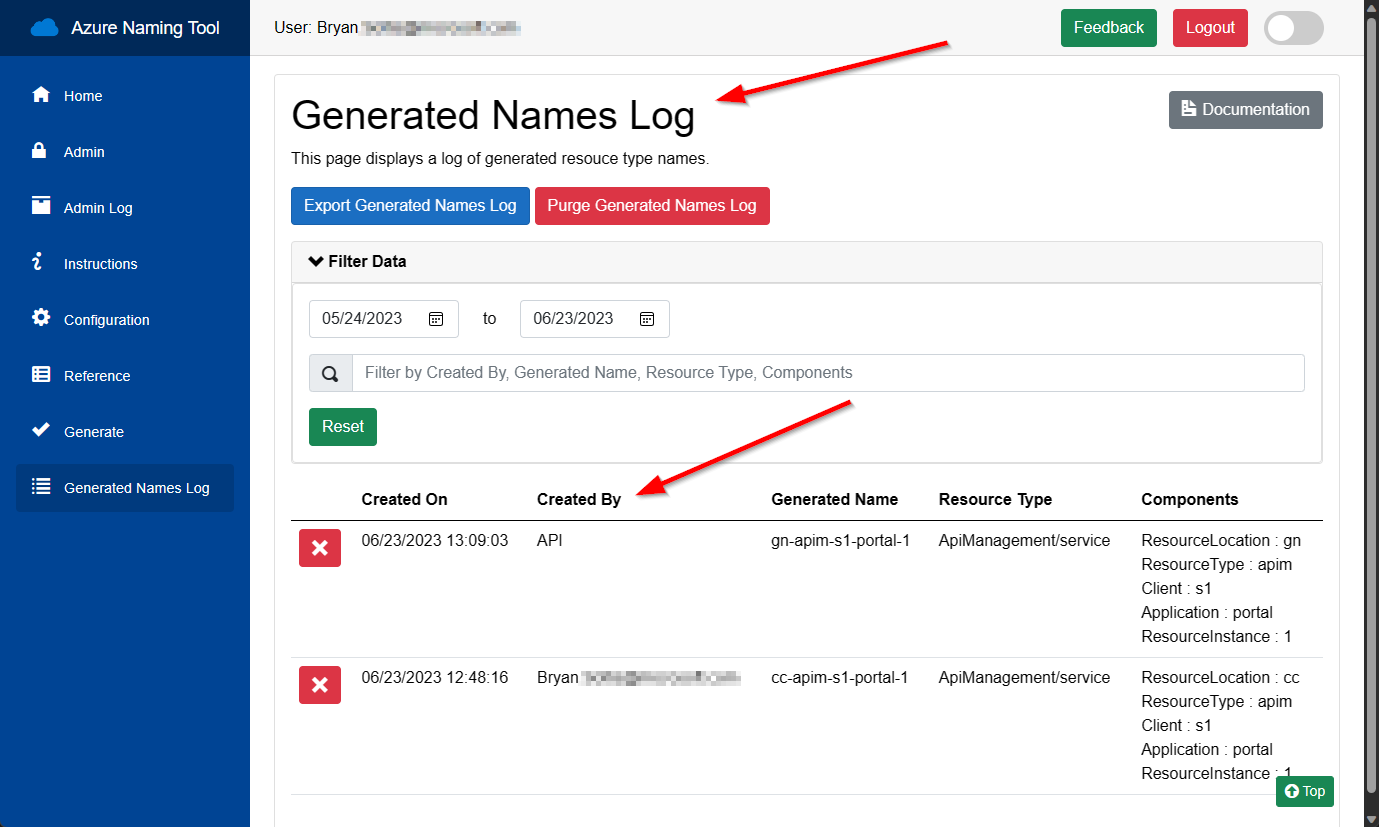
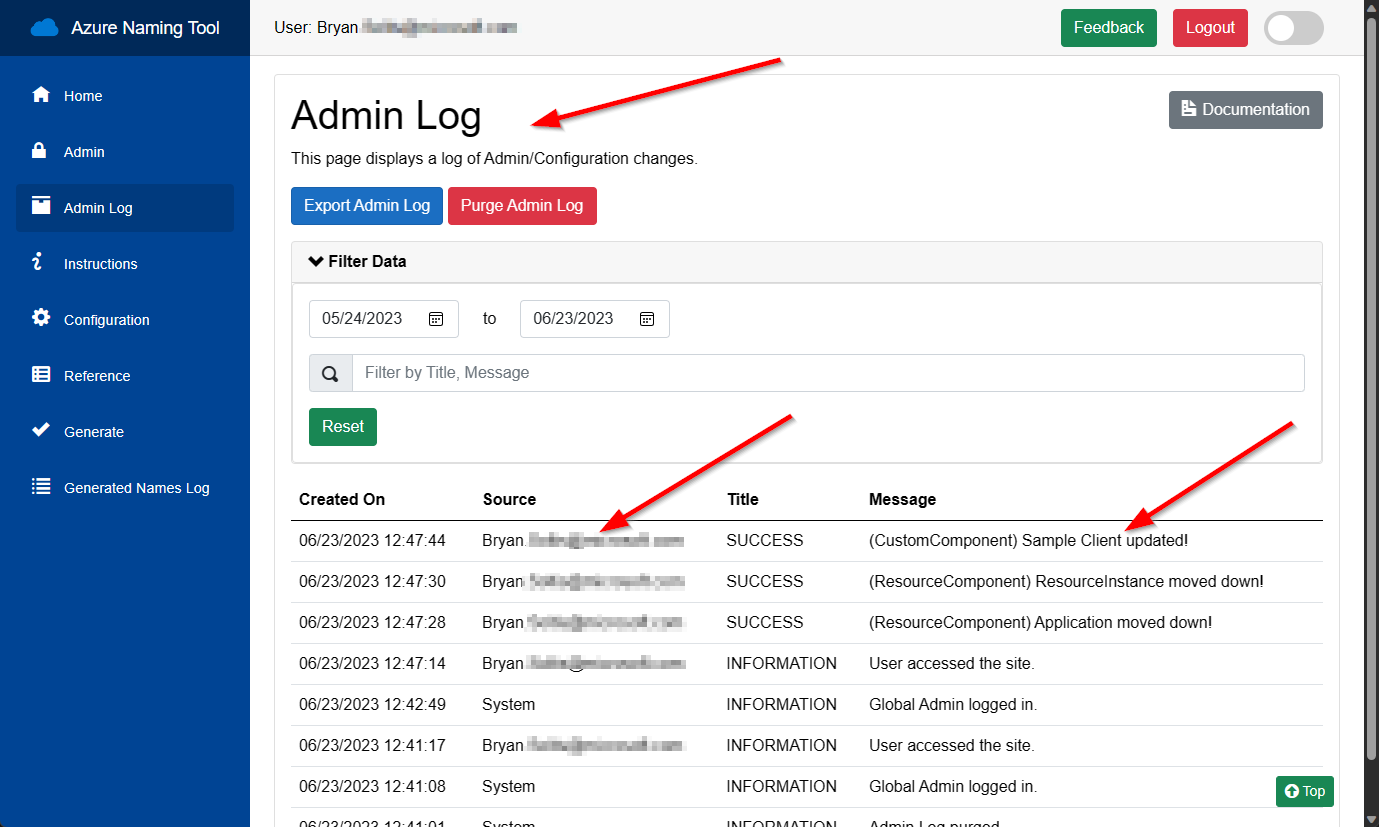
Once identified, the Azure Naming Tool will track the user’s activity on the site, log generated names, and record all actions to the Admin Log. These logs can be filtered for the user id, if needed.
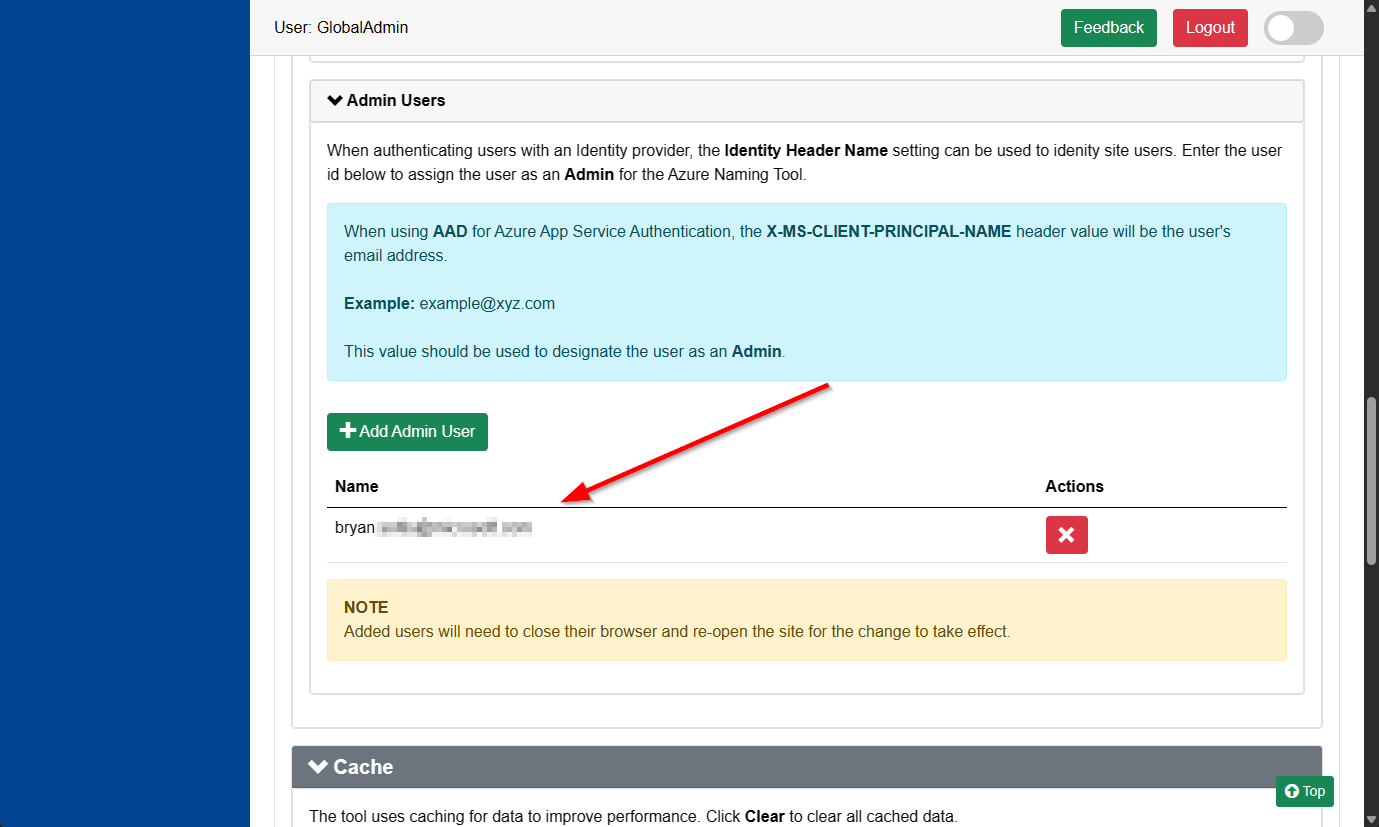
Once the tool can identify users, admin users can be configured to allow management capabilities within the site. By entering the user’s identity, the site will expose admin capabilities whenever the user accesses the site.
Admins can manage all configuration, EXCEPT:
The Admin User ids are stored in the /settings/adminusers.json file. The ids are encrypted using the SALT Key created when the site was installed.
While the recommended installation is an Azure App Service, we recognize many users will deploy the Azure Naming Tool to their local environments. When deploying locally and implementing authentication through an Identity Provider that injects a header into the request, you can still leverage the Identity Header Name setting to determine the user’s id. This allows you to leverage the activity tracking and admin user assignment in any installation.
I hope this blog provides clarifying details on how the Azure Naming Tool leverages Authentication with an Identity Provider. By hosting in Azure, you can take advantage of simplified integration with Azure AD, GitHub, Google, and other identity providers. If hosting in your own environment, you can leverage the Identity Header Name setting to identify your site users and assign Admin permissions. Good luck and keep the tool feedback coming!