


Azure is always changing. The amount of innovation and development that has gone into the platform over the last 9 years is staggering. Morphing with current industry trends and patterns, Microsoft's cloud continues to evolve and add new capabilities to keep developers happy. One of the biggest areas of innovation has been in Artificial Intelligence and Machine Learning space. Go ahead, just try and find someone who is not talking/thinking/coding on this topic today. I'll wait...
Developers are starting to leverage technology to expand their application and capabilities in astonishing ways. Long gone are the days of analyzing data by hand to find patterns and details. Now, services crank through terabytes of data and display trends and patterns, all spun up in a matter of seconds. And with so much media produced, using AI to process the content is a requirement just to keep up. Enter Azure Cognitive Computer Vision Services. This powerful offering allows you to quickly process media and extract all sorts of valuable information, backed by the powerful of some mega-smart computer brains. And as I said in my intro, making sure they're happy is going to be key for the upcoming "disagreement" humans with have with them. Let's keep you on their good side....
Before you get started on wowing the AI powers, you need to create a service. As with most things in Azure, this process is a very straight-forward and simple endeavor. The documentation page actually guides you through the process quickly, integrating seamlessly into the Azure portal.

After completing the process, you’ll land in your Azure portal with your new service.
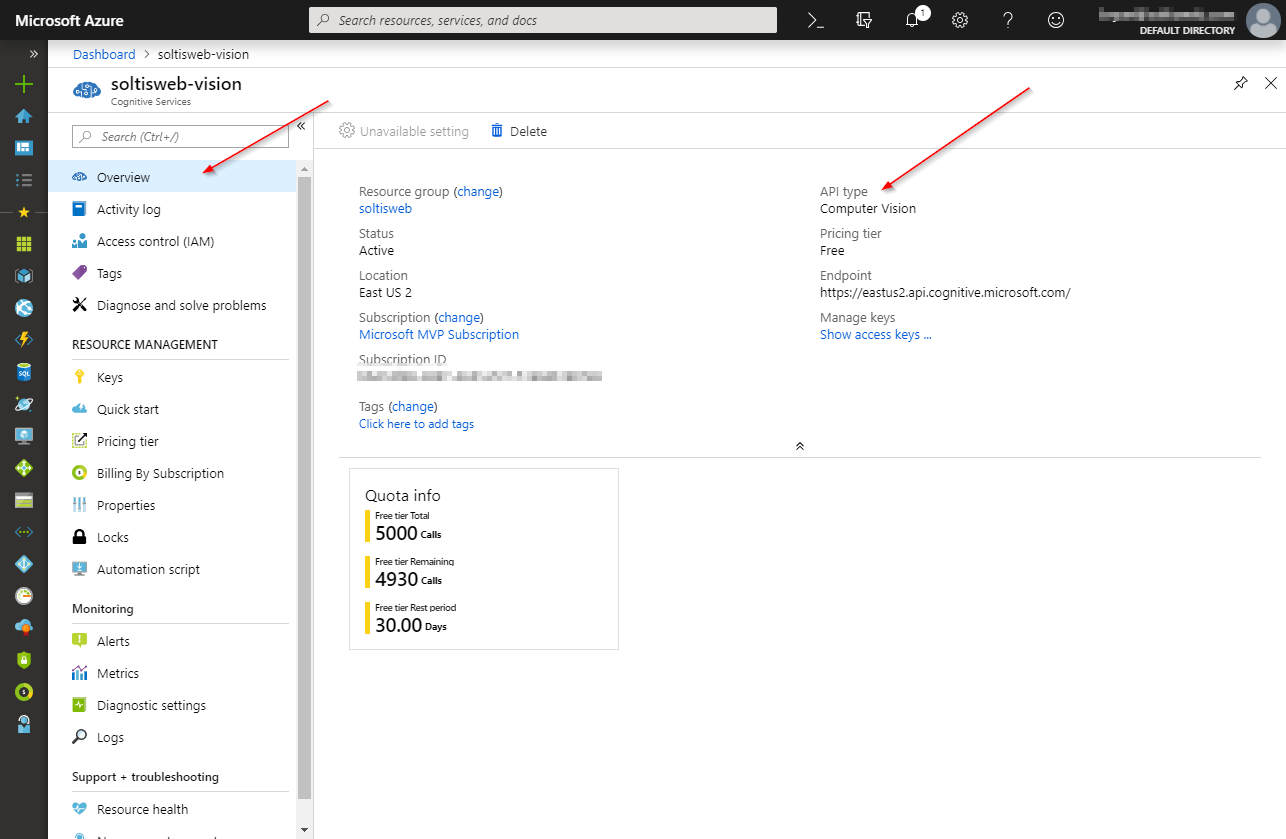
In my case, I chose the Free tier for testing. If you’re build a for-reals application, be sure to pick the Standard tier to get the best performance. You will use this when you connect to the service from within you application. Also, keep it safe and all that jazz. You don't want someone poaching your sweet Azure loot.
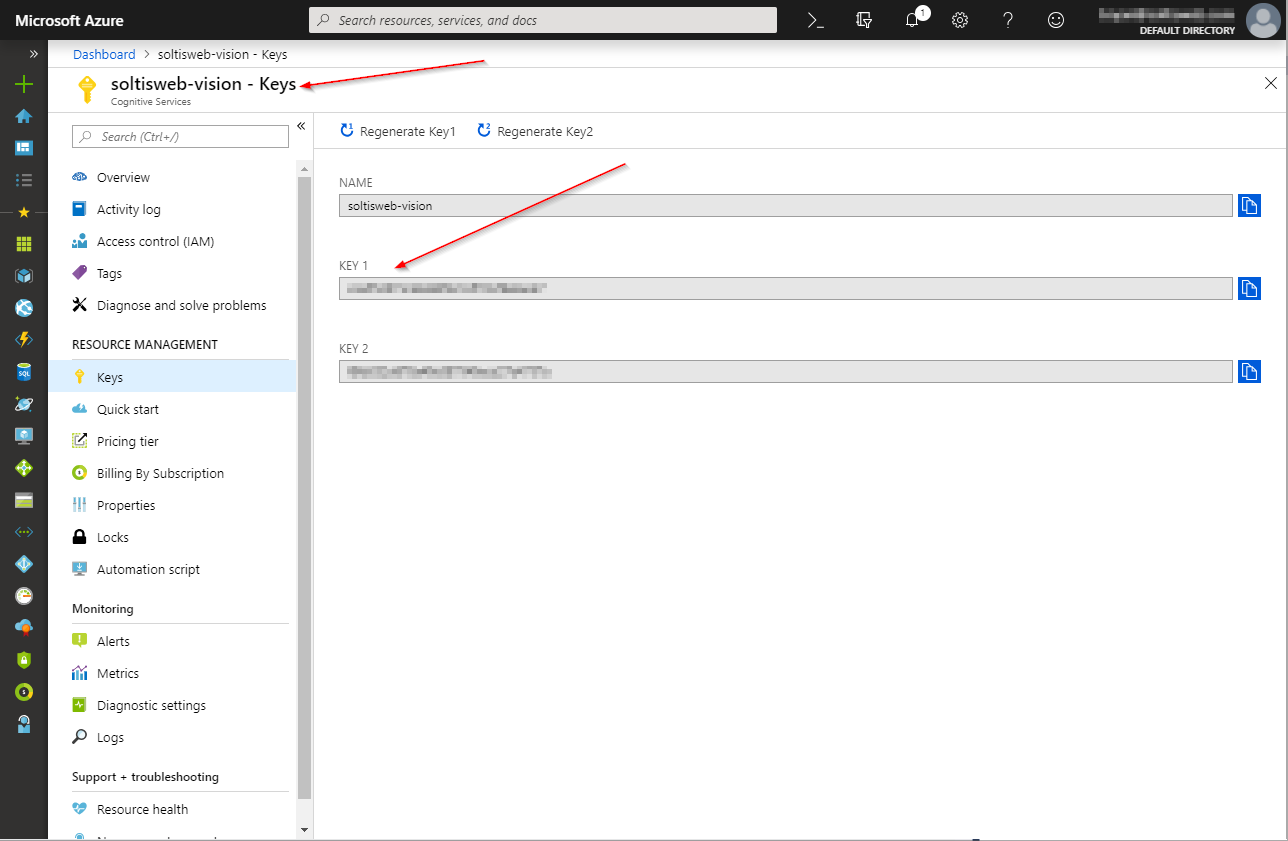
The “key” to using cognitive service is your API key. In the Azure portal, be sure to copy this value for use within your application.
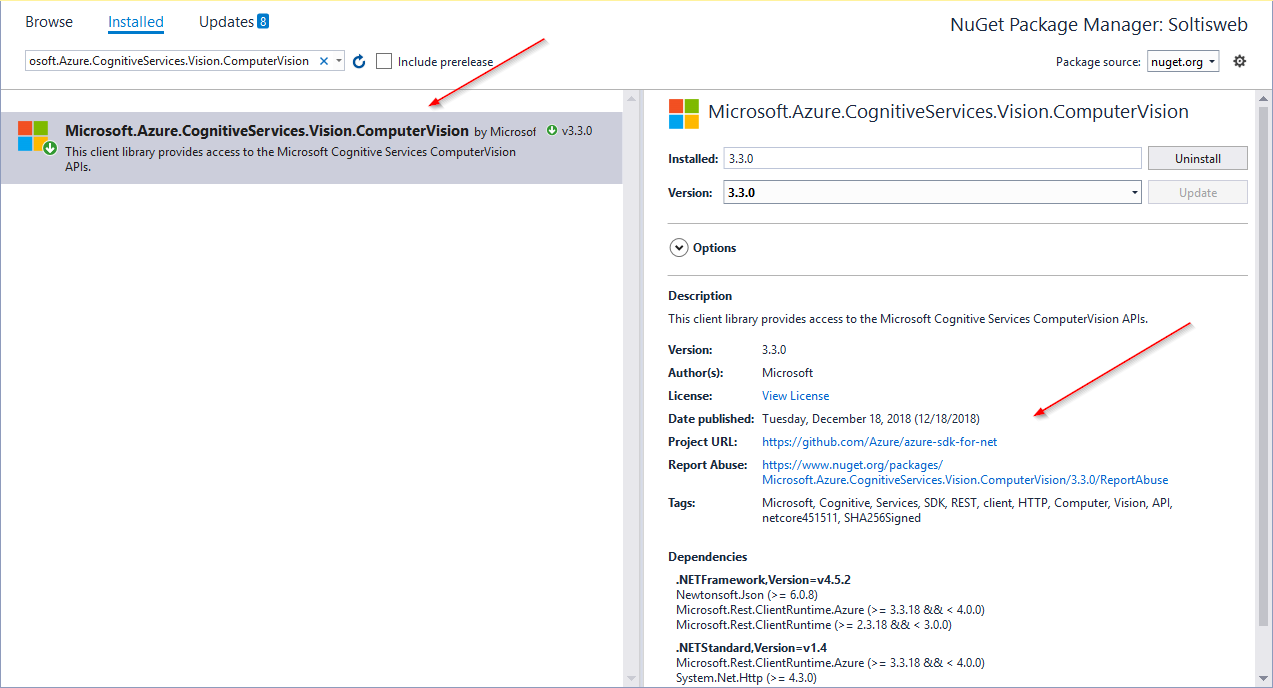
With the service created and key copied, you’re ready to add your code. In my case, I’m working with an ASP.NET Core MVC site, so I added the Microsoft.Azure.CognitiveServices.Vision.ComputerVision NuGet package. This includes all the namespaces and classes I’ll need to work with the service from ASP.NET Core.
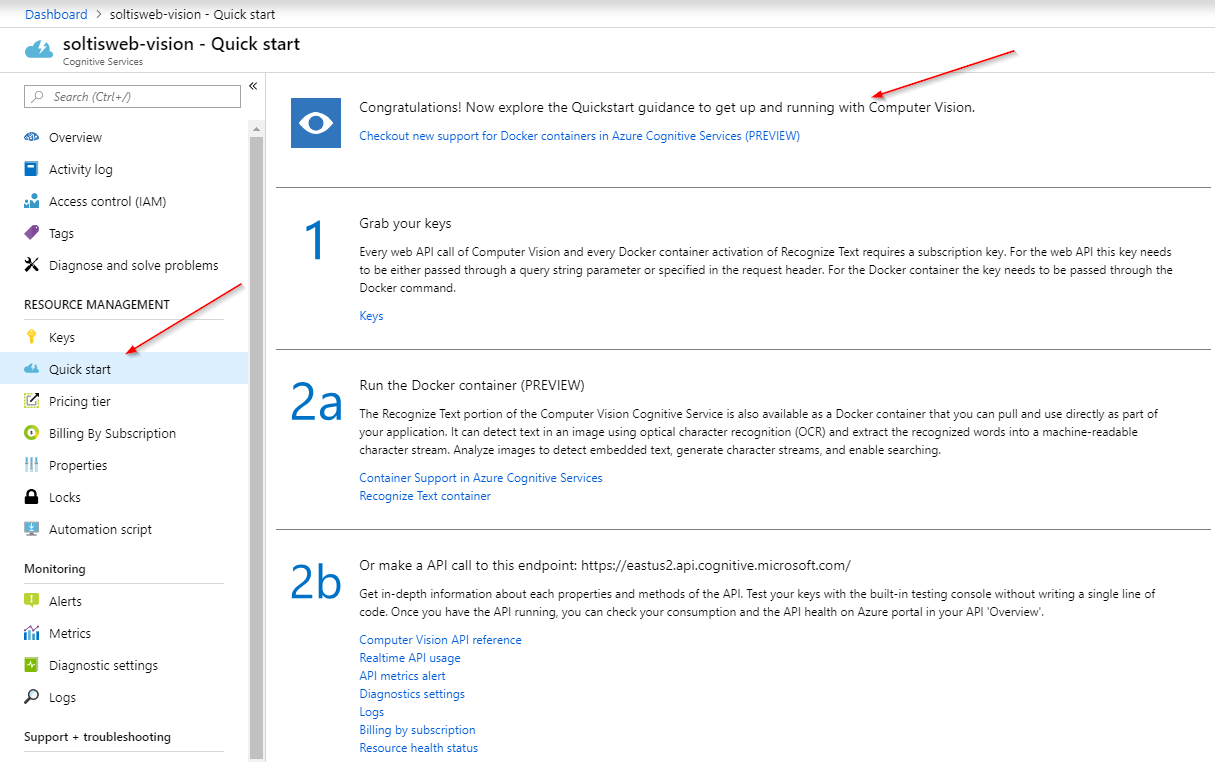
NOTE
In the Azure portal, use the Quick start section to get up and running in your preferred language.
With the NuGet package part of the project, it’s time for some mega-awesome image analysis, Check out the following code to see how to access the service and process an uploaded file. I'll break this down into each logical section, as well.
       [HttpPost]
        public async Task<ActionResult> UploadFile(IFormFile file)
        {
            StringBuilder sb = new StringBuilder();
            try
            {
                // Mazke sure the file is a valid image
                string[] filetypes = { "image/jpeg", "image/jpg", "image/gif", "image/png" };
                if (filetypes.Contains(file.ContentType))
                {
                    if (file.Length > 0)
                    {
                        // Process the uploaded file
                        using (Stream imageStream = file.OpenReadStream())
                        {
                            // Process with Cognitive Vision API
                           ComputerVisionClient computerVision = new ComputerVisionClient(
                                   new ApiKeyServiceClientCredentials(strAPIKey),
                                   new System.Net.Http.DelegatingHandler[] { });

                           // Specify the Azure region
                           computerVision.Endpoint = "https://eastus2.api.cognitive.microsoft.com/";

                            // Anaylze the image using the Computer Vision API
                            ImageAnalysis analysis = await computerVision.AnalyzeImageInStreamAsync(imageStream, features, details);

                            // Extract the description
                            sb.Append("<h3>Description</h3>");
                            sb.Append(analysis.Description.Captions[0].Text);
                        }

                        // Convert the image to display it on the page
                        using (var ms = new MemoryStream())
                        {
                            file.CopyTo(ms);
                            var fileBytes = ms.ToArray();
                            string s = Convert.ToBase64String(fileBytes);
                            ViewData["UploadedImage"] = "data:" + file.ContentType + "; base64," + s;
                        }
                    }
                }
                else
                {
                    sb.Append("You must choose a valid image file.");
                }
            }
            catch (Exception ex)
            {
                sb.Append("<h3>ERROR</h3>");
                sb.Append(ex.Message);
            }

            ViewBag.Message = sb.ToString();
            return View();
        }
    }
This code block does a few things. First, it checks to make sure the file uploaded is an image. I'm not actually saving the file or anything, but I still want to make sure someone isn't trying to upload some uber-virus to my site. Also, the Vision API won't work too well on non-image files, so it's best to filter everything before you process. If it is a file, I convert it to a stream for processing.
// Make sure the file is a valid image
string[] filetypes = { "image/jpeg", "image/jpg", "image/gif", "image/png" };
if (filetypes.Contains(file.ContentType))
{
     // Process the uploaded file
    using (Stream imageStream = file.OpenReadStream())
    {
    …
Next, it connects to the Computer Vision Service, using the API Key and endpoint. These values can be found in your Azure portal, as they will be specific for your service.
// Process with Cognitive Vision API
ComputerVisionClient computerVision = new ComputerVisionClient(
new ApiKeyServiceClientCredentials(strAPIKey),
       new System.Net.Http.DelegatingHandler[] { });

// Specify the Azure region
computerVision.Endpoint = strEndpoint;
Lastly, it analyzes the image and extracts the Description value.
// Analyze the image using the Computer Vision API
ImageAnalysis analysis = await computerVision.AnalyzeImageInStreamAsync(imageStream, features, details);

// Extract the description
sb.Append("<h3>Description</h3>");
sb.Append(analysis.Description.Captions[0].Text);
Here’s what the find result looks like.
Note
I added some code to display the uploaded image file. You can find this is the full code below.
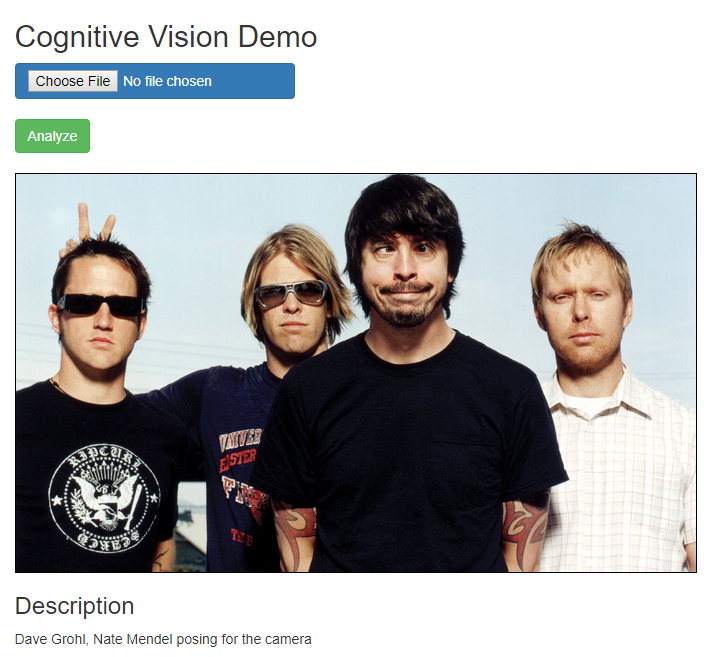
You can see the Vision API is analyzing the image and determining what it might be and providing a description. The service doesn't always get it 100% right, but it comes close in most cases.
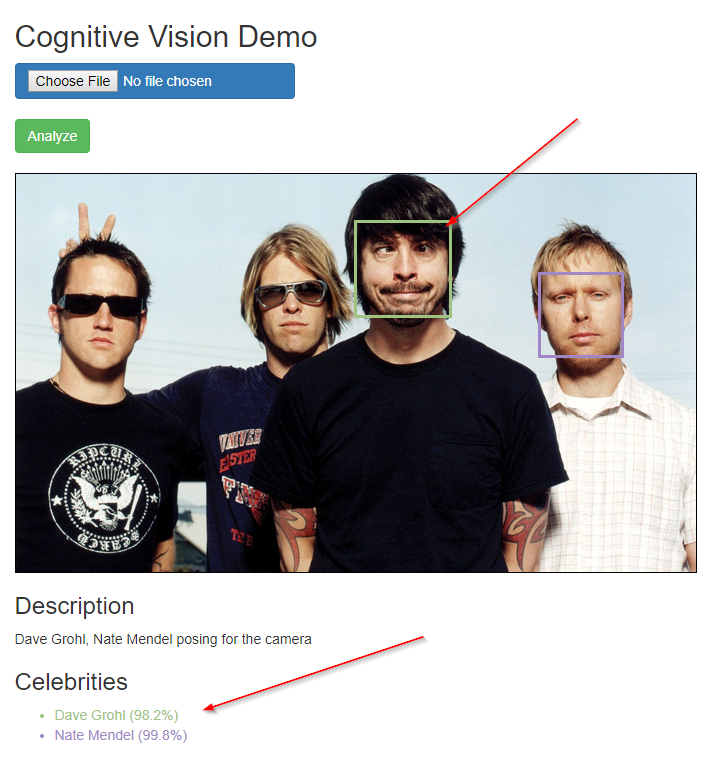
The Computer Vision API returns a lot more than just a description, This AI-powered service can recognize faces, estimate ages, and even identify celebrities and landmarks. Here’s some additional code I added to pull some of these values and display them.
This code loops through the returned values to find any identified celebrities. For each celebrity I find, I create an HTML element with name, confidence, and a random color. I also create a overlay square for the "face" of the celebrity to put on top of the image.
I'm not sure their what the criteria is for a "celebrity", so hopefully one day I make the cut.
// Check for identified celebrities
if (cat.Detail.Celebrities != null)
{
    if (cat.Detail.Celebrities.Count > 0)
    {
        StringBuilder sbFaces = new StringBuilder();
        sb.Append("<h3>Celebrities</h3>");
        sb.Append("<ul>");
        // Loop through all the identified celebrities
        foreach (CelebritiesModel celebrity in cat.Detail.Celebrities)
        {
            Color color = Color.FromArgb(rnd.Next(256), rnd.Next(256), rnd.Next(256));
            string strColor = "#" + color.R.ToString("X2") + color.G.ToString("X2") + color.B.ToString("X2");
            sb.Append("<li style=\"color: " + strColor + ";\"> " + celebrity.Name + " (" + (Math.Round(celebrity.Confidence * 100, 1)) + "%)</li>");
            sbFaces.Append("<div style=\"position:absolute;width:" + celebrity.FaceRectangle.Width + "px; height:" + celebrity.FaceRectangle.Height + "px; top:" + celebrity.FaceRectangle.Top + "px; left:" + celebrity.FaceRectangle.Left + "px;border:3px solid " + strColor + "; z-index:3;\"></div>");
          }
         sb.Append("</ul>");
          ViewData["FaceRectangles"] = sbFaces.ToString();
    }
} This code is almost identical to identify any landmarks. The service doesn't return any position for a landmark, so I just display the name.
// Check for identified landmarks
if (cat.Detail.Landmarks != null)
{
    if (cat.Detail.Landmarks.Count > 0)
    {
        sb.Append("<h3>Landmarks</h3>");
        sb.Append("<ul>");
        // Loop through all the identified landmarks
        foreach (LandmarksModel landmark in cat.Detail.Landmarks)
        {
            sb.Append("<li>" + landmark.Name + " (" + (Math.Round(landmark.Confidence * 100, 1)) + "%)</li>");
         }
         sb.Append("</ul>");
     }
}
Here is the full code in action. You can see it's finding 2 of the Foo Fighters with pretty high confidence, and drawing a colored square over their faces. Because Taylor and Pat are wearing glasses, the service cannot identify their faces.
Here is the full source code for the article, if you want to try it out yourself.
        [HttpPost]
        public async Task<ActionResult> UploadFile(IFormFile file)
        {
            StringBuilder sb = new StringBuilder();
            try
            {
                // Make sure the file is a valid image
                string[] filetypes = { "image/jpeg", "image/jpg", "image/gif", "image/png" };
                if (filetypes.Contains(file.ContentType))
                {
                    if (file.Length > 0)
                    {
                        // Process the uploaded file
                        using (Stream imageStream = file.OpenReadStream())
                        {
                            // Process with Cognitive Vision API
                           ComputerVisionClient computerVision = new ComputerVisionClient(
                                   new ApiKeyServiceClientCredentials(strAPIKey),
                                   new System.Net.Http.DelegatingHandler[] { });

                           // Specify the Azure region
                           computerVision.Endpoint = strEndpoint;

                            // Anaylze the image using the Computer Vision API
                            ImageAnalysis analysis = await computerVision.AnalyzeImageInStreamAsync(imageStream, features, details);

                            // Extract the description
                            sb.Append("<h3>Description</h3>");
                            sb.Append(analysis.Description.Captions[0].Text);

                            if (analysis.Categories.Count > 0)
                            {
                                Category cat = analysis.Categories[0];
                                if (cat.Detail != null)
                                {
                                    // Check for identified celebrities
                                    if (cat.Detail.Celebrities != null)
                                    {
                                        if (cat.Detail.Celebrities.Count > 0)
                                        {
                                            StringBuilder sbFaces = new StringBuilder();
                                            sb.Append("<h3>Celebrities</h3>");
                                            sb.Append("<ul>");
                                            // Loop through all the identified celebrities
                                            foreach (CelebritiesModel celebrity in cat.Detail.Celebrities)
                                            {
                                                Color color = Color.FromArgb(rnd.Next(256), rnd.Next(256), rnd.Next(256));
                                                string strColor = "#" + color.R.ToString("X2") + color.G.ToString("X2") + color.B.ToString("X2");
                                                sb.Append("<li style=\"color: " + strColor + ";\"> " + celebrity.Name + " (" + (Math.Round(celebrity.Confidence * 100, 1)) + "%)</li>");
                                                sbFaces.Append("<div style=\"position:absolute;width:" + celebrity.FaceRectangle.Width + "px; height:" + celebrity.FaceRectangle.Height + "px; top:" + celebrity.FaceRectangle.Top + "px; left:" + celebrity.FaceRectangle.Left + "px;border:3px solid " + strColor + "; z-index:3;\"></div>");
                                            }
                                            sb.Append("</ul>");
                                            ViewData["FaceRectangles"] = sbFaces.ToString();
                                        }
                                    }

                                    // Check for identified landmarks
                                    if (cat.Detail.Landmarks != null)
                                    {
                                        if (cat.Detail.Landmarks.Count > 0)
                                        {
                                            sb.Append("<h3>Landmarks</h3>");
                                            sb.Append("<ul>");
                                            // Loop through all the identified landmarks
                                            foreach (LandmarksModel landmark in cat.Detail.Landmarks)
                                            {
                                                sb.Append("<li>" + landmark.Name + " (" + (Math.Round(landmark.Confidence * 100, 1)) + "%)</li>");
                                            }
                                            sb.Append("</ul>");
                                        }
                                    }
                                }
                            }
                        }

                        // Convert the image to display it on the page
                        using (var ms = new MemoryStream())
                        {
                            file.CopyTo(ms);
                            var fileBytes = ms.ToArray();
                            string s = Convert.ToBase64String(fileBytes);
                            ViewData["UploadedImage"] = "data:" + file.ContentType + "; base64," + s;

                            // Get the entire response, for debugging purposes
                            var client = new HttpClient();
                            var queryString = HttpUtility.ParseQueryString(string.Empty);

                            // Request headers
                            client.DefaultRequestHeaders.Add("Ocp-Apim-Subscription-Key", strAPIKey);

                            // Request parameters
                            queryString["visualFeatures"] = "Categories,Description,Faces,Tags";
                            queryString["details"] = "Celebrities,Landmarks";
                            queryString["language"] = "en";
                            var uri = strEndpoint + "vision/v1.0/analyze?" + queryString;

                            HttpResponseMessage response;

                            // Request body
                            using (var content = new ByteArrayContent(fileBytes))
                            {
                                content.Headers.ContentType = new MediaTypeHeaderValue("application/octet-stream");
                                response = await client.PostAsync(uri, content);
                            }

                            JObject json = JObject.Parse(response.Content.ReadAsStringAsync().Result);
                            string formatted = json.ToString();

                            ViewData["RawJSON"] = "<h3>JSON</h3><pre>" + formatted + "</pre>";
                        }
                    }
                }
                else
                {
                    sb.Append("You must choose a valid image file.");
                }
            }
            catch (Exception ex)
            {
                sb.Append("<h3>ERROR</h3>");
                sb.Append(ex.Message);
            }

            ViewBag.Message = sb.ToString();
            return View();
} So, the Vision API is pretty awesome, right? And it’s super easy to set up and use. With the Free tier, you should be able to build some amazing applications and leverage this powerful service. And you may want to look at it soon! It’s only a matter of time before SkyNet comes online and we’re all working for the machine. Good luck!