

The easiest way to understand what automations are possible in Azure is to just think of anything. Basically, you can string together almost everything in the cloud, and usually with a few clicks. For Azure Logic Apps, that’s especially true, because of how the service was created. Built on Microsoft Flow and tightly woven into the Azure ecosystem, Logic Apps are an extremely powerful tool for your dev arsenal.
Azure Logic Apps allow you architect and design workflows and process, all from within a slick UI within the Azure portal. You add conditions and steps to your workflow, building out the functionality you want. To add to the fun, there are a ton of built-in integrations to all your Microsoft favorites, like 0365, Azure Functions, Cognitive Services, and maybe even Clippy! (probably not that last one, but you get the idea). Because everything is connected by Azure on the back-end, you can quickly access and automate all sorts of actions within your systems, without even writing a single line of code.
Let’s try it out…
Before you go creating the Sistine Chapel of Azure Logic Apps workflow, you need to decide what you’re trying to do. Because Logic Apps are built on this-then-that, you need to think through each action and decide how you would like the process to go in all cases. Is there a task you’re looking to automate? What systems are you trying to connect? Logic Apps have a lot of connectors (with a ton of functionality ready to go) built-in, but not every system is covered. You need to think through your process and identify the pieces you can leverage, and which ones will require some custom code. (See Logic App Custom Connectors)
https://docs.microsoft.com/en-us/connectors/custom-connectors/create-logic-apps-connector
Hopefully, in the process of deciding WHAT you want to do, you also figure out WHEN you want to do it. Logic Apps are a lot like Azure Functions, in that you can fire them with an HTTP post, timers, queues, or even watchers (we’ll get that too cool stuff in a minute). By knowing how you want your workflow to execute, you can better predict your functionality and how often your automation will be called.
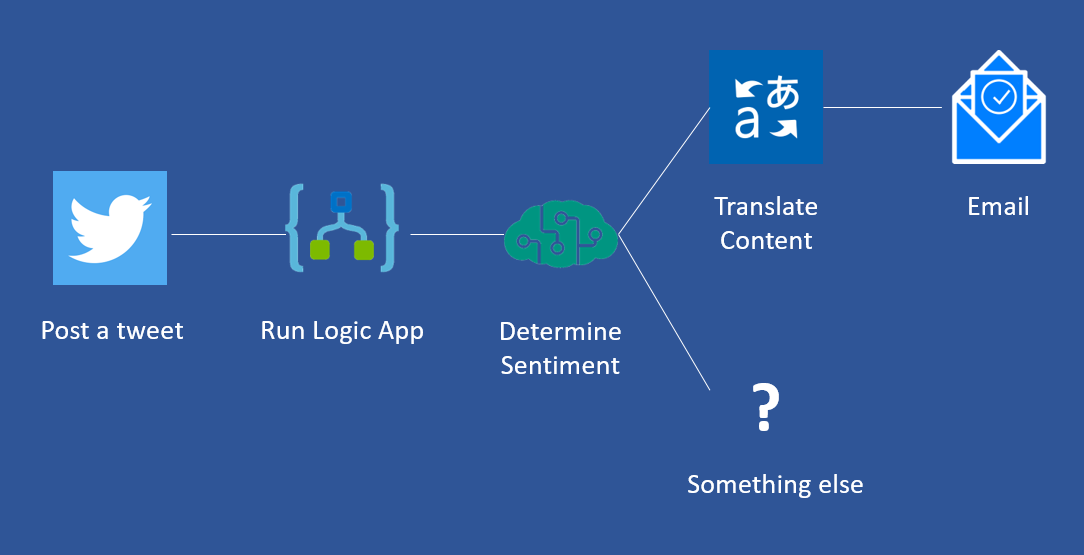
As I said in my intro, there’s really no shortage to the automation you can put in place with Logic Apps. For now, I’m going to show you how to use Logic Apps to do some on-the-fly translation of a tweet, as soon as it’s published.
Here’s a diagram of our process, for you to print out and hang in your living room.
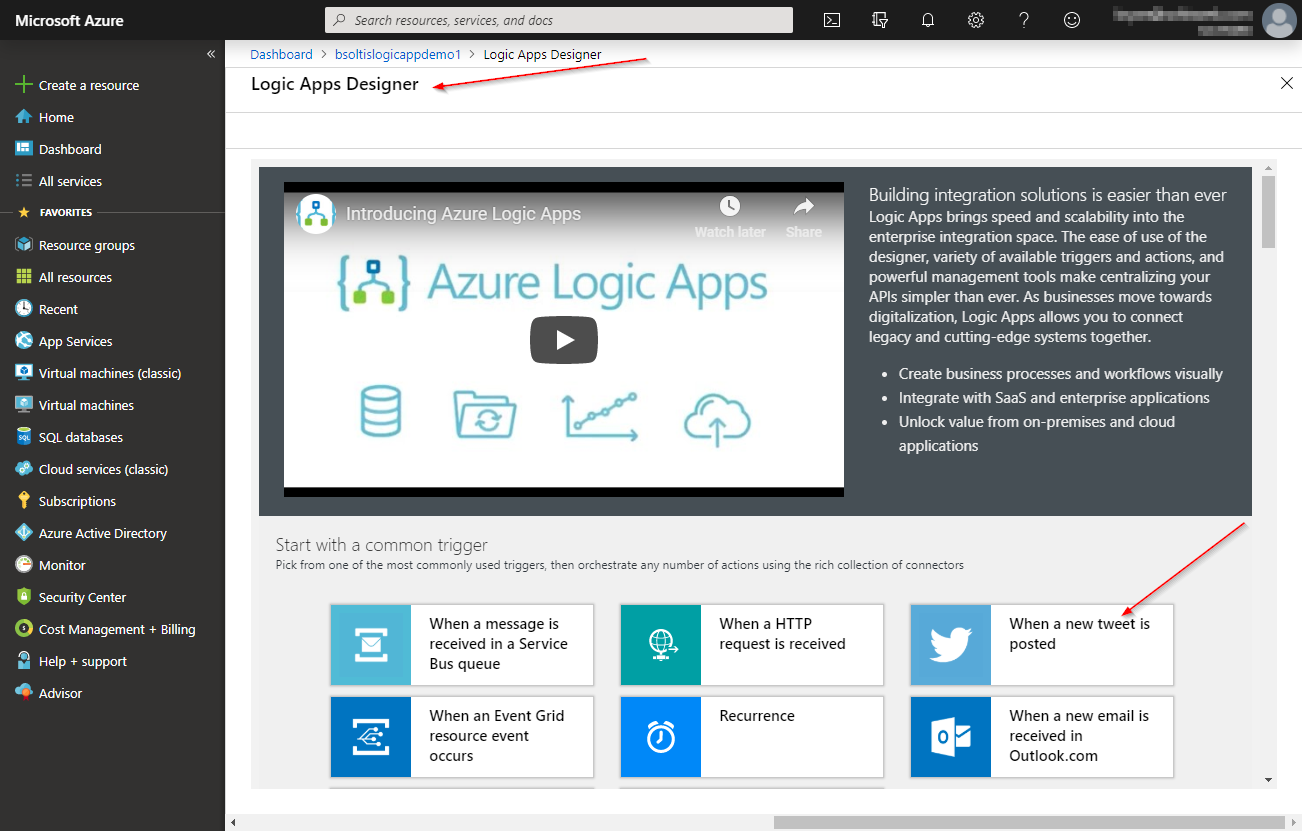
Because I want my workflow to fire when a tweet is posted, I select “When a new tweet is posted” under the Start with a common trigger section. This means the Logic App will watch for a specific tag/user/phrase on Twitter and execute when it identifies one.
After adding my Twitter authentication information (the Logic App needs a user to authenticate with Twitter), I’m ready to start laying out my process. I also define how often the Logic App will check Twitter for the value.
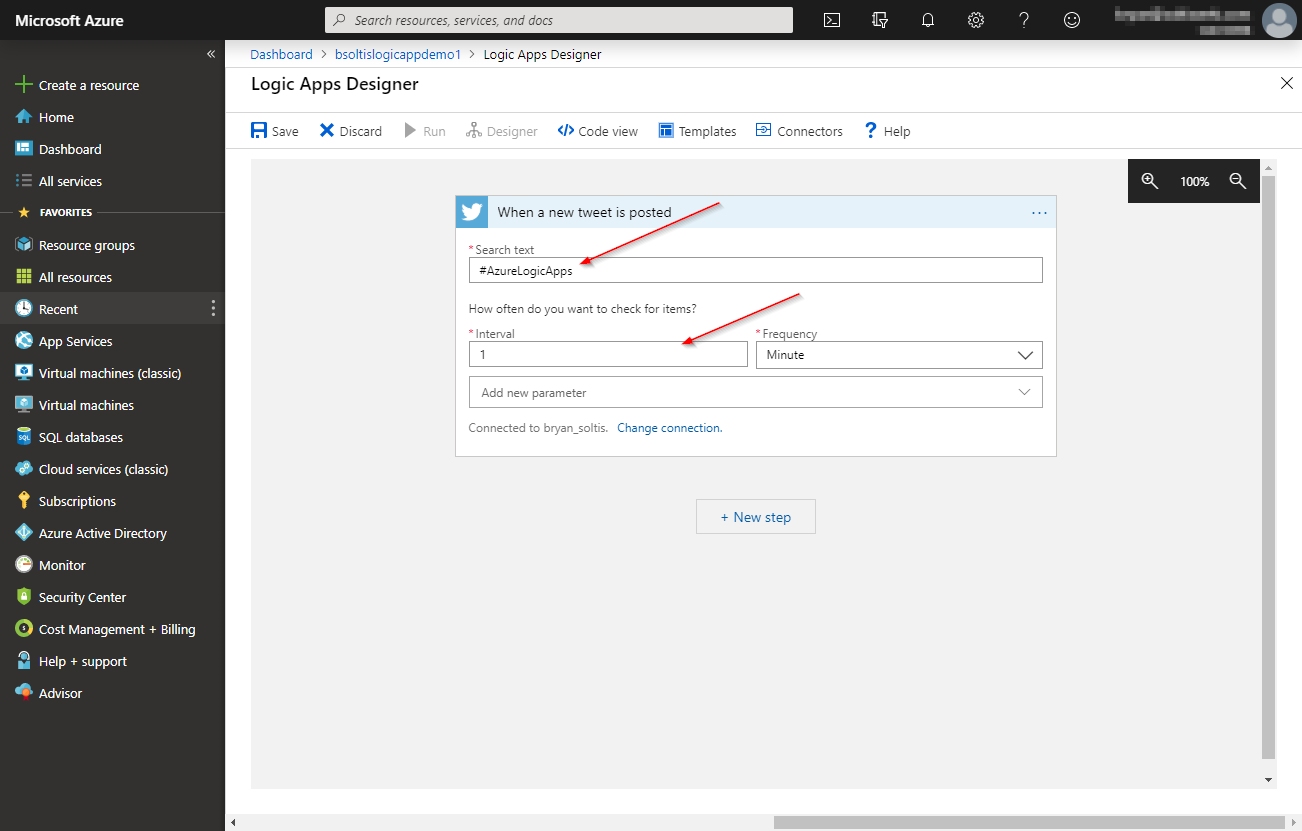
Logic Apps are charged by the number of executions. Be sure you set anything that will run on a schedule to the right interval to avoid unexpected charges!
After the Logic App fires, I want to check the tweet text and see if it was something “nice”. To do this, I’ll use Azure Cognitive Services to determine the sentiment. In the Choose an action UI, I selected Cognitive Services / Text Analytics / Detect Sentiment. In the module, I enter my Cognitive Services account information.
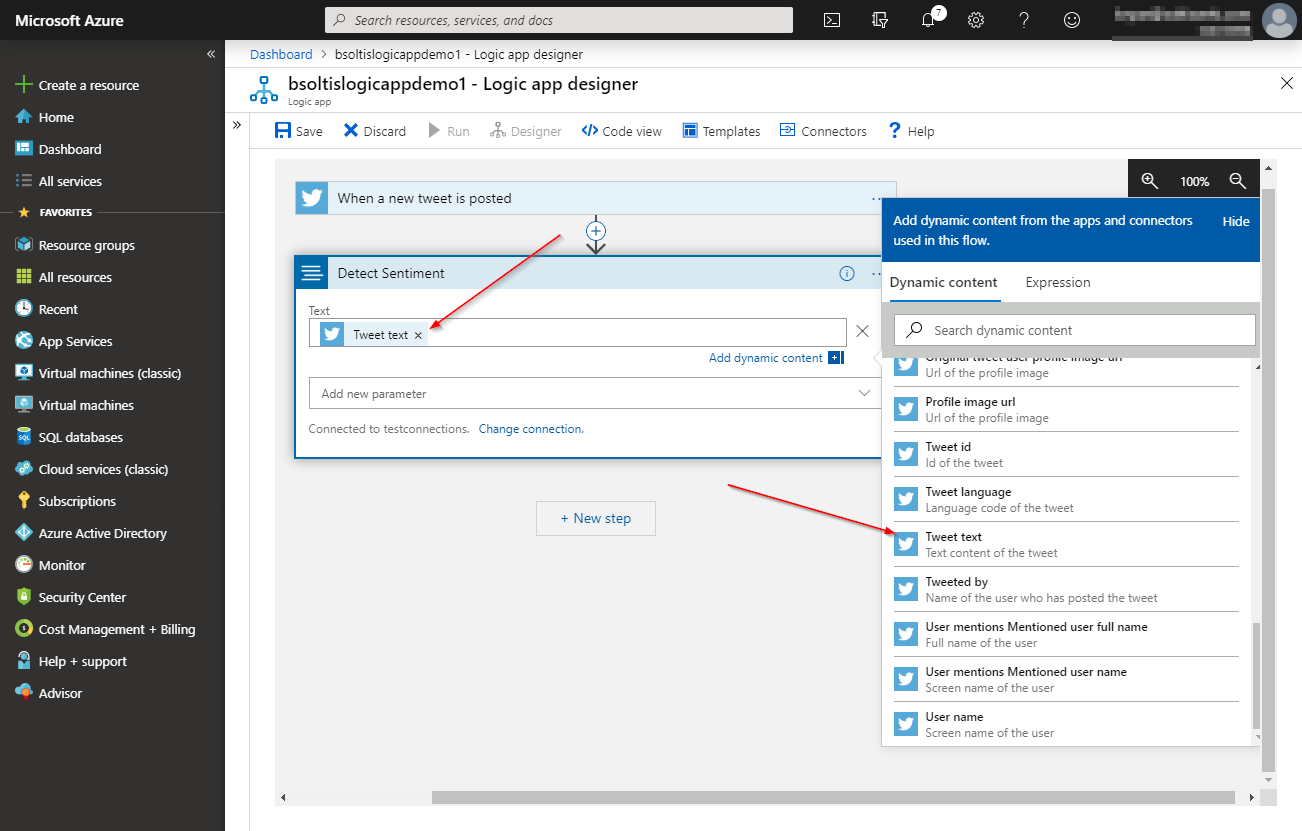
This tells the Logic App to take the tweet text and pass it to Cognitive Services for Analysis. The Detect Sentiment function will return a score from 0 to 1, indicating how nice the text was.
Find out more about Cognitive Services
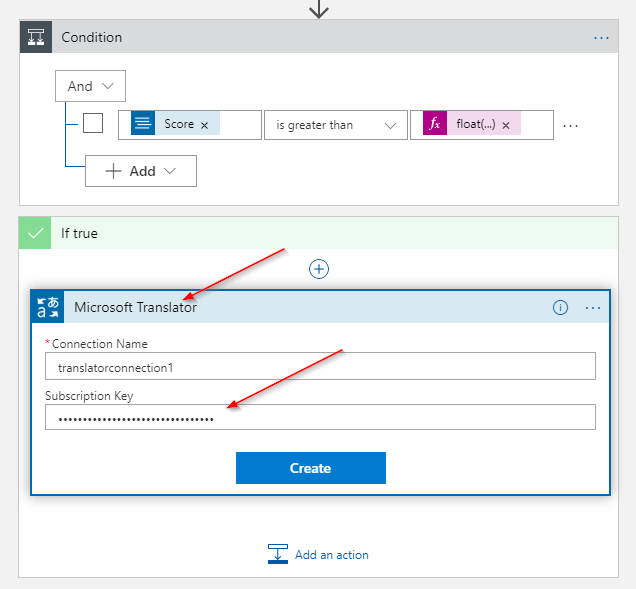
Next, we need to look at the sentiment and have a conditional step. If it’s a “nice” tweet”, we’re going to send it over Microsoft Translator, because why not? To do that, we add a Condition and set the values to evaluate. In my case, I’m going to make sure the value is greater than .5. I use a built-in expression to help with the formatting.

If our Score value (returned from the Detect Sentiment function) is > .5, I want to pass the text to Microsoft Translator. In the UI, I add my Translator Subscription Key and create the connection.
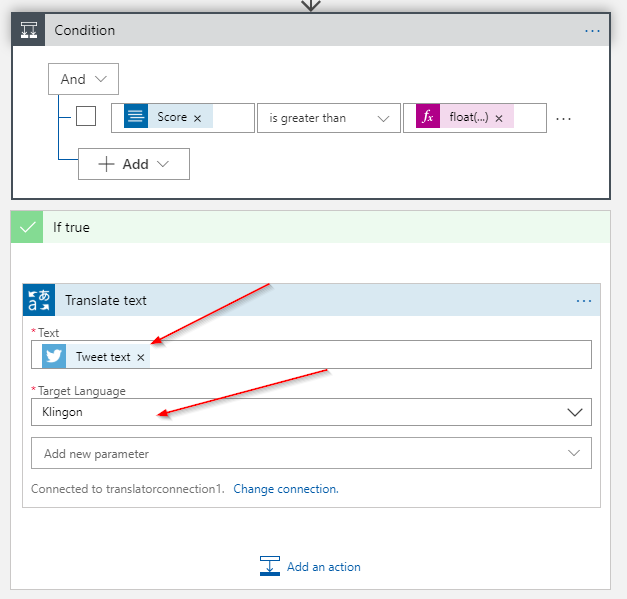
I then select the Tweet text to translate, and choose Klingon, because that should be interesting. The Translate text function will attempt to translate the text to the selected language. AS you can see, there’s lots of supported languages, and it even handles slang!
The last step of the process will be to send an email with the translated text. To do this, I select the Outlook.com / Send an email option as the next step. After authenticating, I populate the email with my dynamic values.
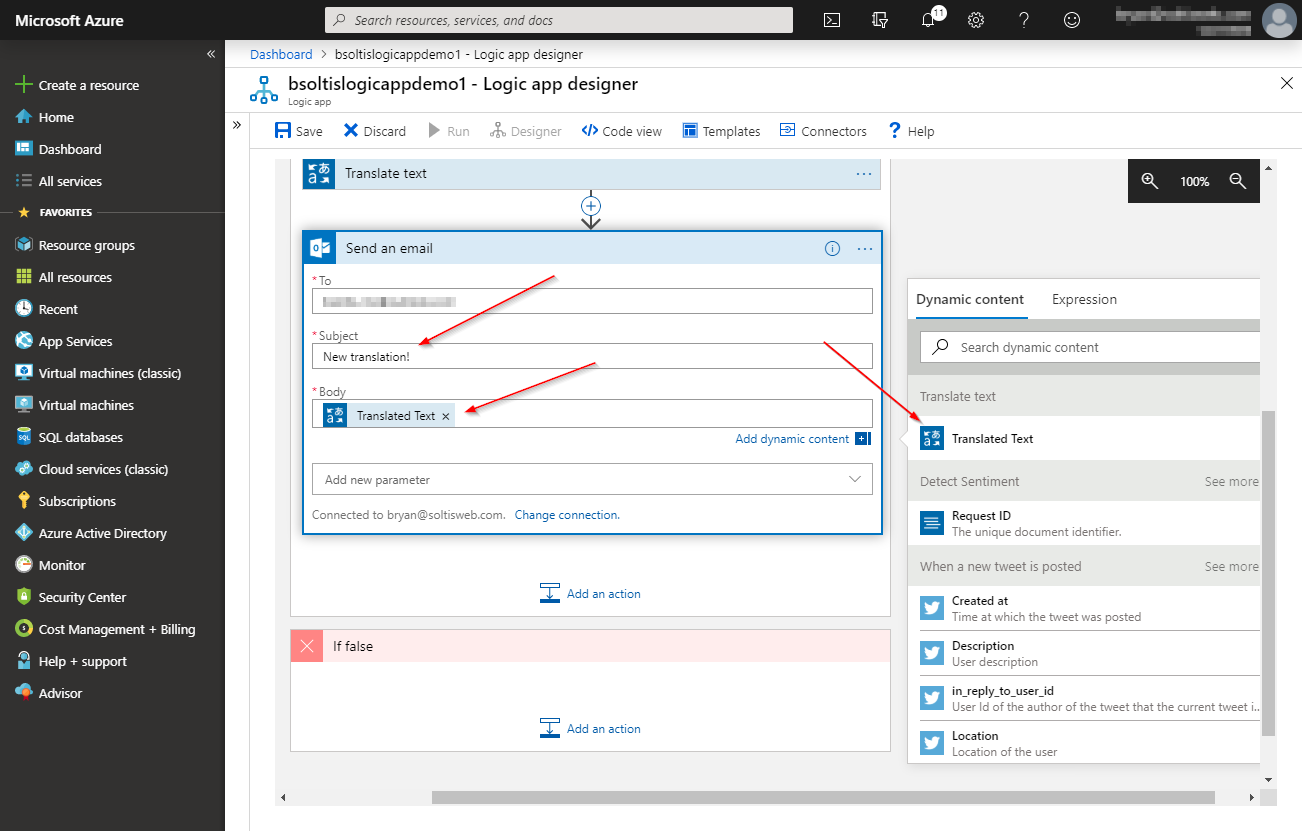
Note that I select the Translated Text value, which is returned form the Translate Text function call.
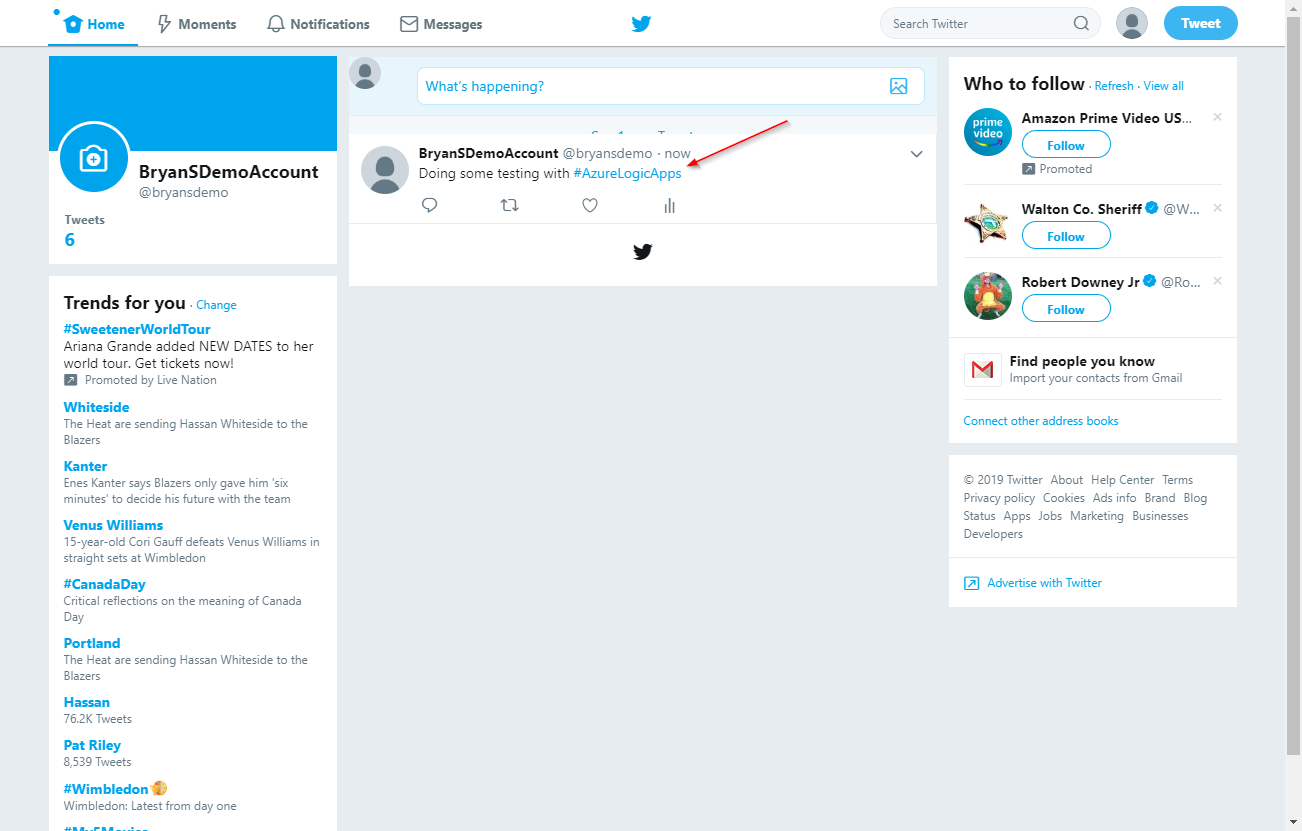
With the above in place, I’m ready to test. First, I post a tweet with my #AzureLogicApps tag. This is the value I configured the Azure Logic App trigger to watch for.
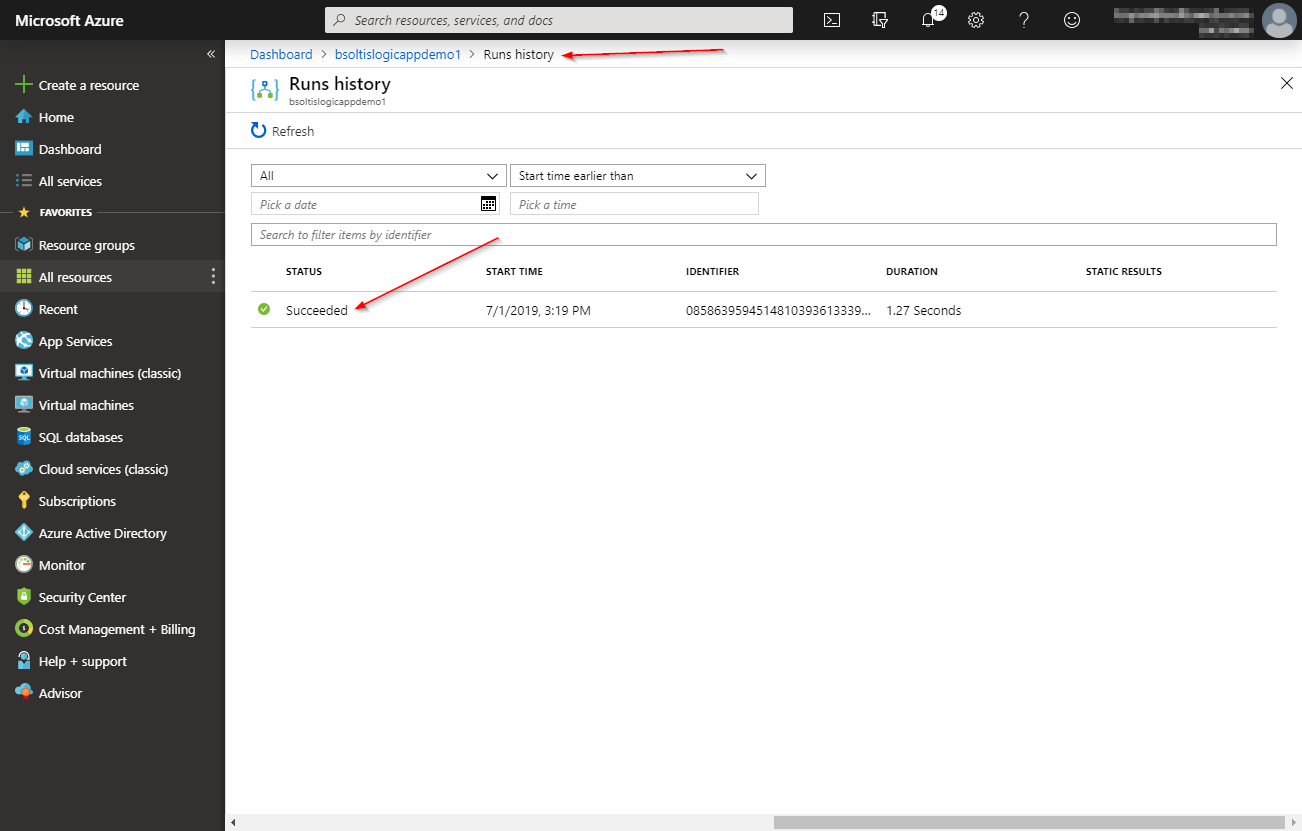
In my Logic App, I can see the Logic App was triggered.
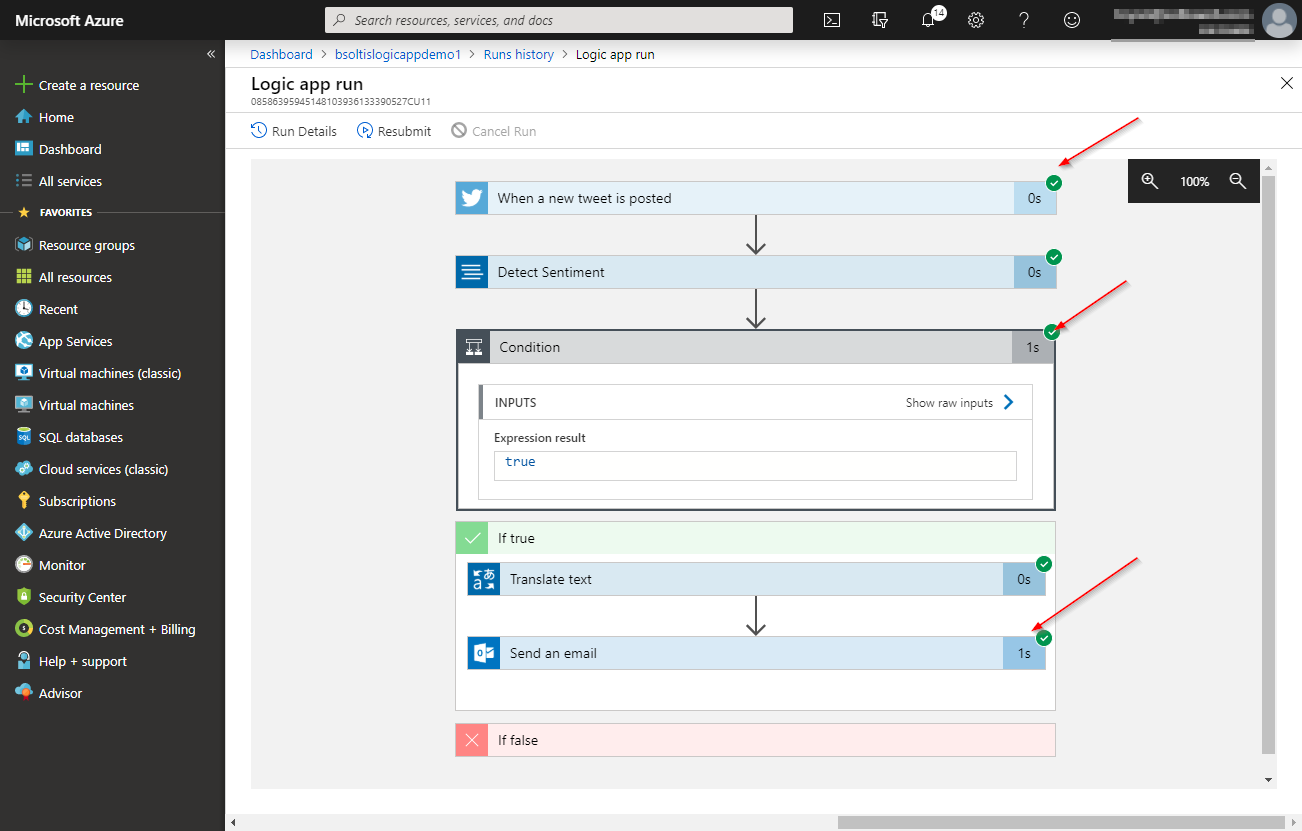
By drilling into the execution, I can view that the test was “nice”, it was translated to Klingon, and an email was sent.
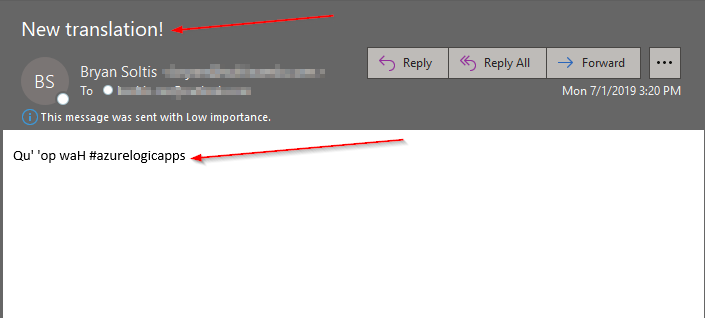
And, viola! There’s an email with the new Klingon version of the tweet.
Azure Logic Apps are pretty amazing. You can quickly create elaborate workflows, integrating with many of your favorite Microsoft applications. And you can develop your own custom connectors for 3rd party systems and platforms. By blending multiple applications together in a single automation process, you can simplify your life and amaze your friends. There’s a ton more we could talk about Logic Apps, but that will have to wait for another time.
In the meantime, go check out Logic Apps and see what you can create. Or, if you’re in the Jacksonville area on July 28th, come check out my session at Code on the Beach, where I’ll show all this code in action. Good luck!