


I recently worked with a client using Azure Policy to enforce tagging for resources. The company was super savvy and scripted nearly every aspect of their deployments. This included using Azure PowerShell to create environments and architectures. I got proposed a question on how to specify tags as part of the creation and found the solution pretty interesting. Hopefully, you will, too!
Azure PowerShell has been around for a few years, and many companies have adopted it as their go-to way of creating environments. Savvy developers can create a resource group, add some services, connect to the VNET, and still have time to make some animated gifs. The Azure PowerShell cmdlets let enable the scripting of resource creation, permission assignment, and nearly every other aspect of Azure.
Because the simplicity of Azure can quickly lead to resource sprawl, the platform contains a number of governance tools you can use to control things. One of the simplest and most useful features is Tagging. Tags allow you to categorize and identify systems and components quickly. This helps you understand what services belong together, consolidate billing and tracking, and just makes sense for a large number of Azure solutions. Many large corporations base their entire Azure architecture on a very specific set of tags and practices, making things easier on their admins.
To help apply tags, Azure Policy is often used to enforce the proper configurations for the organization. By assigning a policy to a specific subscription, Azure admins can ensure every deployed solution matches the pre-defined set of criteria. And in the recent situation I mentioned, I found out how to use Azure Policy to make sure any deployed resource groups and resources have a specific tag assigned. Let’s check it out!
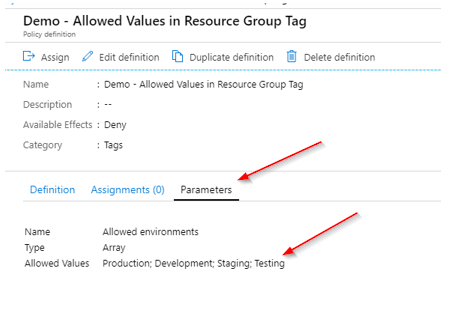
Here’s a basic Azure Policy definition that requires all resources/groups have the environment tag set. There are lots of pre-built policies you can use/copy for your projects. I made a minor modification to one of the provided definitions by adding some available options the user can specify for the tag.
{
  "mode": "All",
  "policyRule": {
    "if": {
      "anyOf": [
        {
          "field": "tags['environment']",
          "notIn": "[parameters('allowedEnvironments')]"
        },
        {
          "field": "tags['environment']",
          "exists": false
        }
      ]
    },
    "then": {
      "effect": "deny"
    }
  },
  "parameters": {
    "allowedEnvironments": {
      "type": "Array",
      "metadata": {
        "displayName": "Allowed environments",
        "description": "The list of allowed environments."
      },
      "allowedValues": [
        "Production",
        "Development",
        "Staging",
        "Testing"
      ]
    }
  }
}
In the Parameters, the following options are accepted: Production, Development, Staging, Testing.
I then create an assignment for the policy for my Subscription.
Now that I have a policy in place, let’s test it out. First, I attempt to make a new resource group using the New-AzResourceGroup cmdlet, without specifying the tag.
In the following code samples, you’ll see I’m using the -Force attribute. This allows me to execute the commands without additional verification, Be sure you know when/where you are using this, as the PowerShell ISE will not prompt you for approval!
New-AzResourceGroup -Location "East US 2" -Name bsoltispshelldemo -Force

As you can see from the error, the policy prevents the resource group creation. This is a good thing.
Next, I’ll attempt the same command, but include the environment tag, but with random value (ex: sample).
New-AzResourceGroup -Location "East US 2" -Name bsoltispshelldemo -Tag @{environment="sample"} -Force
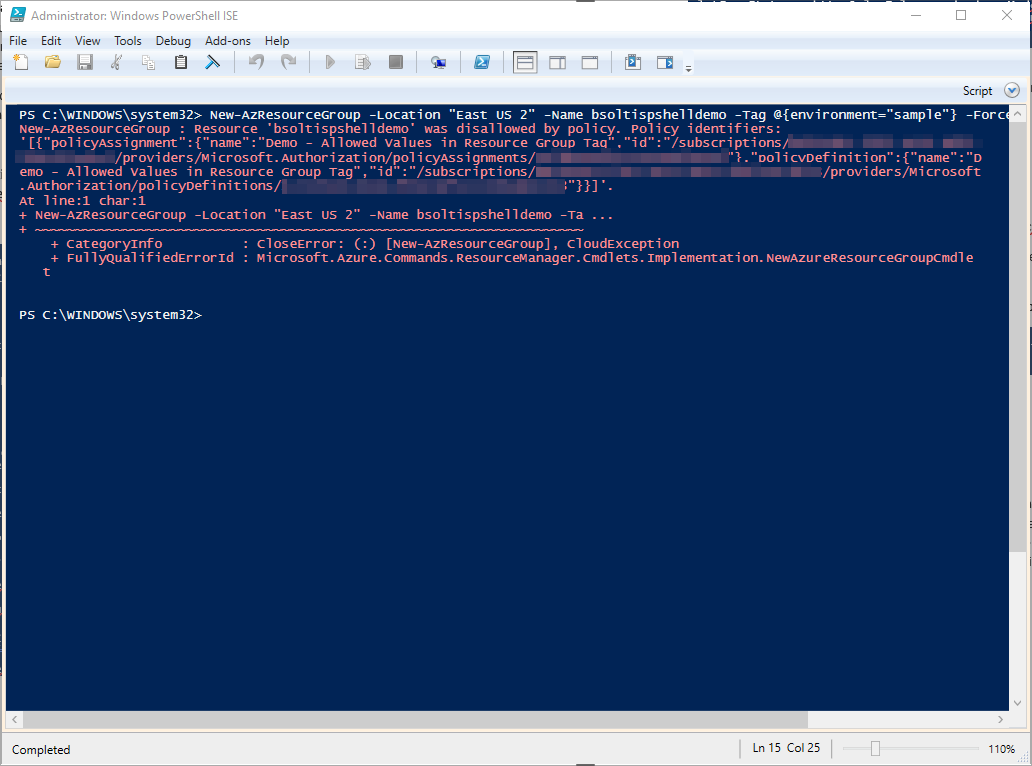
Again, our command fails because while I did have the environment tag included, it was not one of the 4 approved values.
This time, I’ll add the environment tag with an approved value, just to show you it really does work.
New-AzResourceGroup -Location "East US 2" -Name bsoltispshelldemo -Tag @{environment="Testing"} -Force
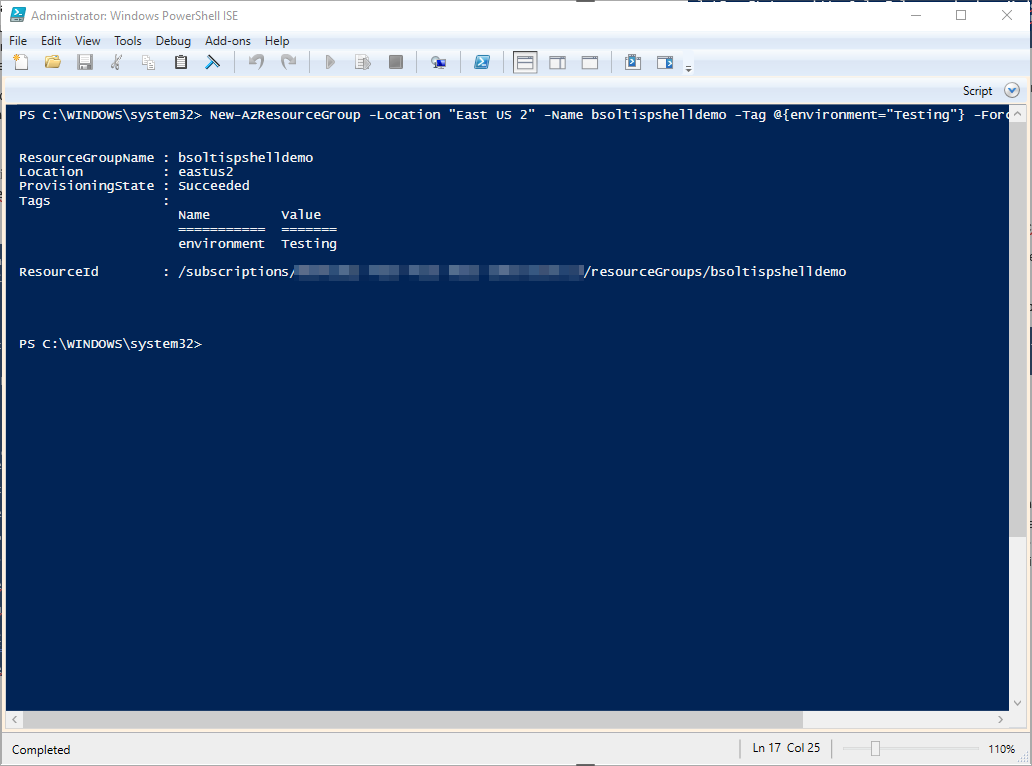
Because a valid value was passed in the environment tag, the resource was successfully created.
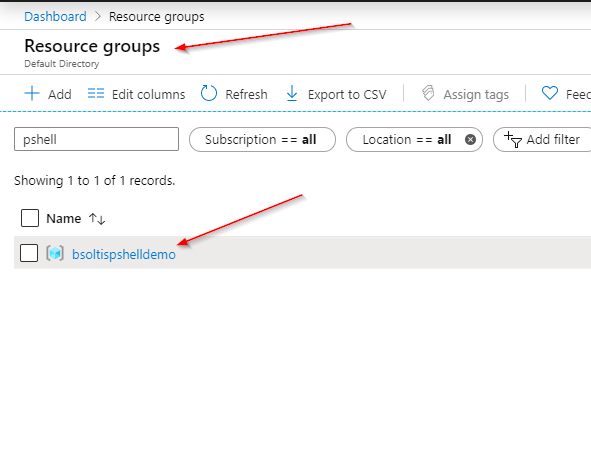
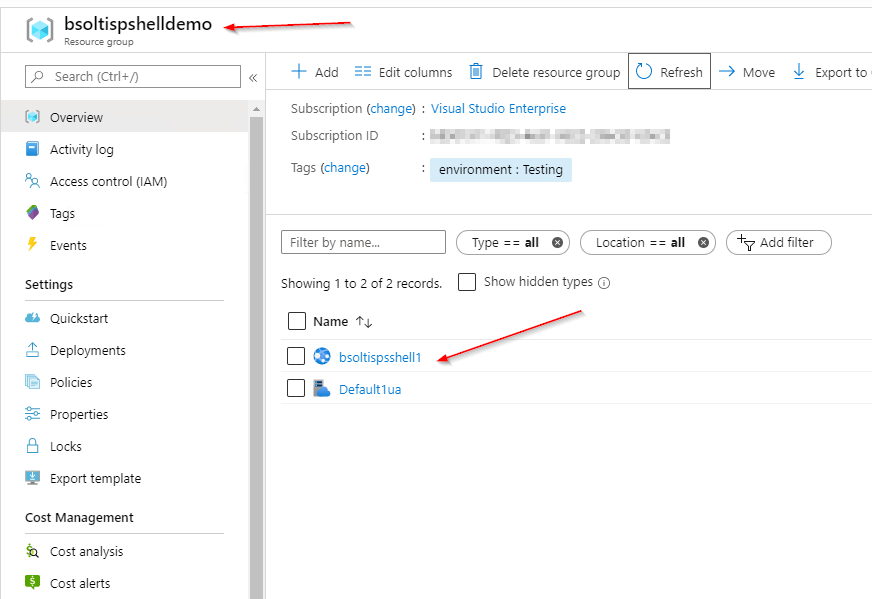
Here is the new resource group in the Azure portal.
But, what about creating an individual resource?
The Azure PowerShell cmdlets let you create every type of resource, but some cmdlets allow you to specify more details than other. To create a new App Service, you could use the New-AzWebApp (leftover from when they were called Web Sites) to quickly make a new site. That command, however, doesn’t allow you specify a tag. Because my policy requires this, I had to find another way.
The answer? New-AzResource.
This is a more generic way to create resources but gives much more control over the process. When using this command, you need to specify the location, name, type, and resource group for the new resource. More importantly, it allows tags to be defined as part of the creation process, ensuring the Azure Policy will be adhered to.
Here is the full command to create the App Service in my new Resource Group. Note that I have also specific the environment tag.
New-AzResource -Location "East US 2" -Properties @{} -ResourceName bsoltispsshell1 -ResourceType microsoft.web/sites -ResourceGroupName bsoltispshelldemo -Tag @{environment="Testing"} -Force

From the message, you can see a new App Service was created within my resource group. Here’s the new service listed in the portal.
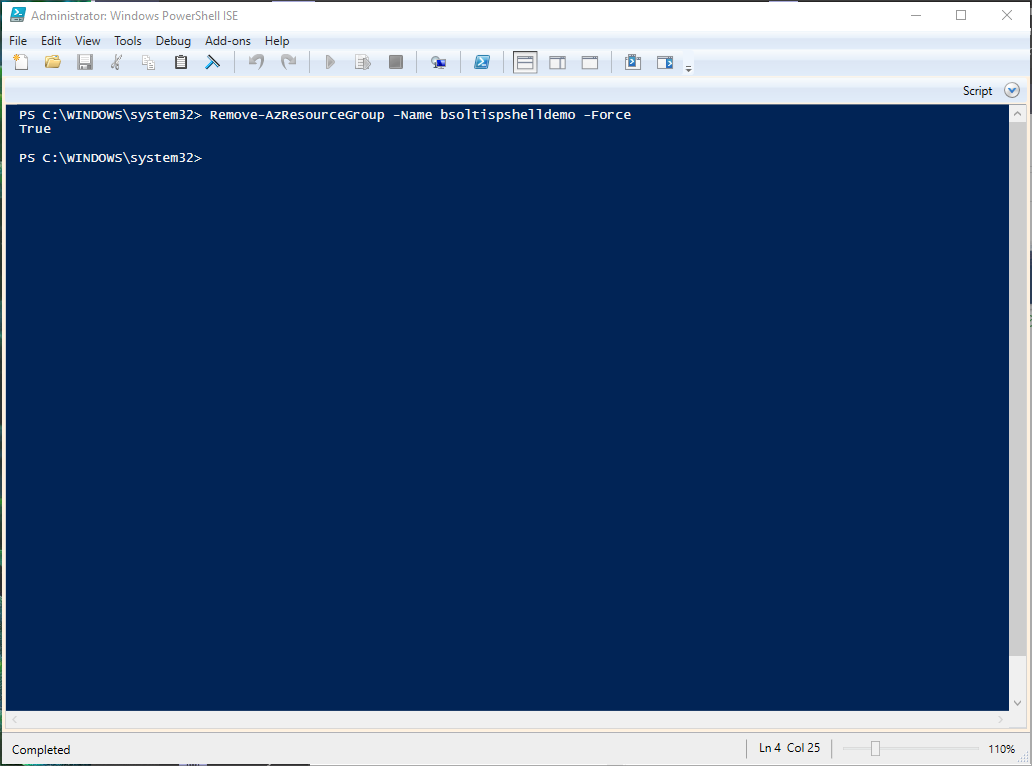
Now that the demo is done, I run the Remove-AzResourceGroup cmdlet to clean everything up.
Deleting a resource group with the -Force attribute will DELETE EVERYTHING. Make sure you want to do this!
Remove-AzResourceGroup -Name bsoltispshelldemo -Force
By leveraging Azure PowerShell, Policy, and Tags, you can keep your Azure deployments organized and clean. This will help you with resource allocation, billing, administration, and just keeping your sanity when working with your environments. By leveraging the New-AzResource cmdlet, you can specify specific tags for your resources and keep everything looking great. Good luck!