


The Power Apps Platform continues to be one of the fastest growing parts of the Microsoft ecosystem. From creating data-integrated applications to completely secure and authenticated environments, Canvas Apps, Model-Driven Apps, and Portals are a way to blend functionality and form with ease. One of the benefits of Power Apps is the ability to extend the platform, if needed. Recently, I needed to integrate an API into a Power App Portal. After some exhaustive searches, I was able to piece together a few different recommendations to meet my needs. This article combines that knowledge for a simple, one-stop solution to anyone facing the same challenge.
For my scenario, I had an existing API that needed to be called to retrieve a value, all from within my Power App Portal. The idea would be to call the API, get the id back, and then use it within my Portal logic to filter some data.
The first step was to create a new Power App Portal. There’s lots of articles on how to do that, so I’ll leave it to those experts. For a start, I headed to the Power Apps site to create my new application.
Power Apps
Here’s my very exciting Starter Portal.

After creating the portal, I was ready to add my JavaScript.
Now, there are several ways I could have added custom code to my Power Apps Portal. I could…
How the code was added was largely dependent on the requirements. I opted to add it to a specific page. If I needed the code to execute on multiple pages, adding it to a page template may have been a better choice.
In the Portal Edit View, I selected my page in the navigation.

On the page, I selected an editable region, the clicked the </> link to view the code. In this view, I inserted a <script> tag for my custom JavaScript.
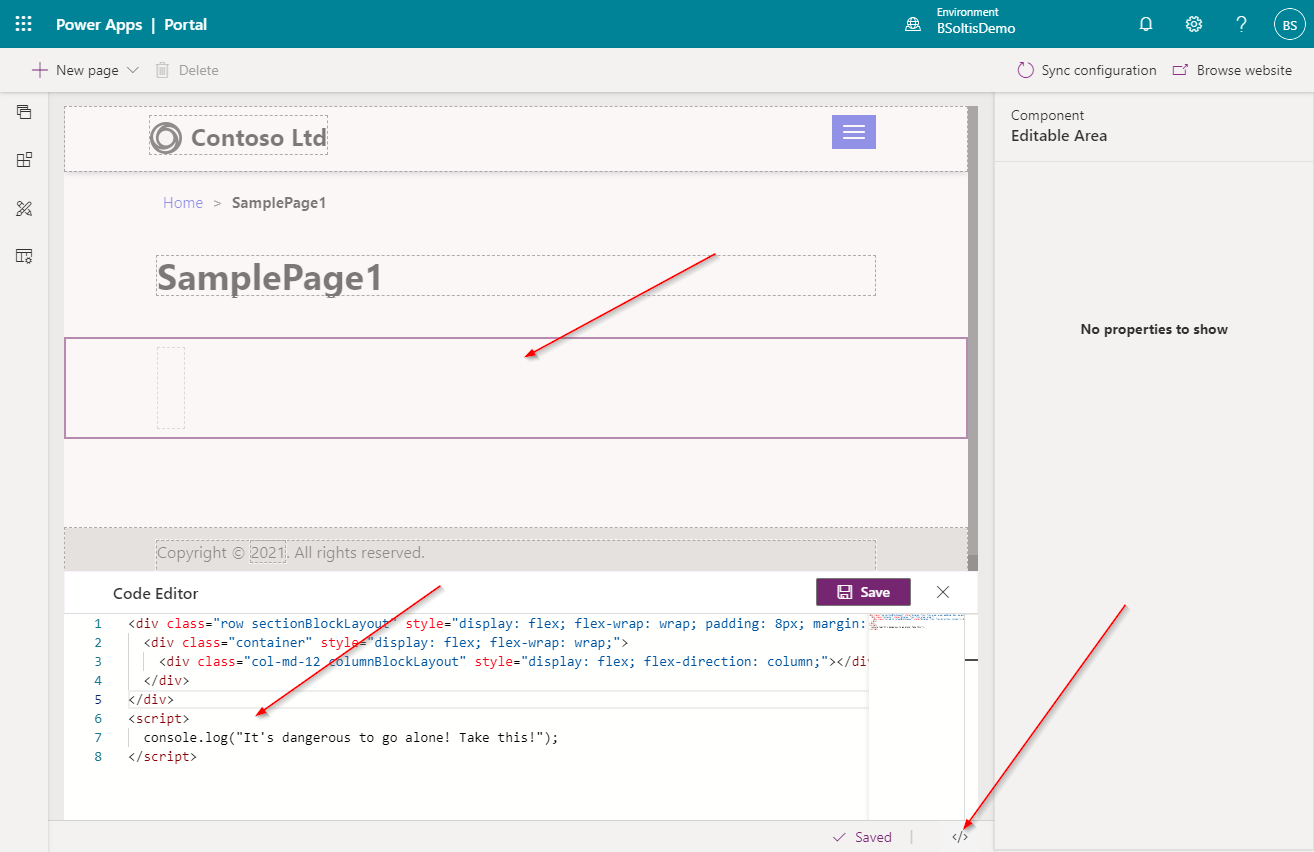
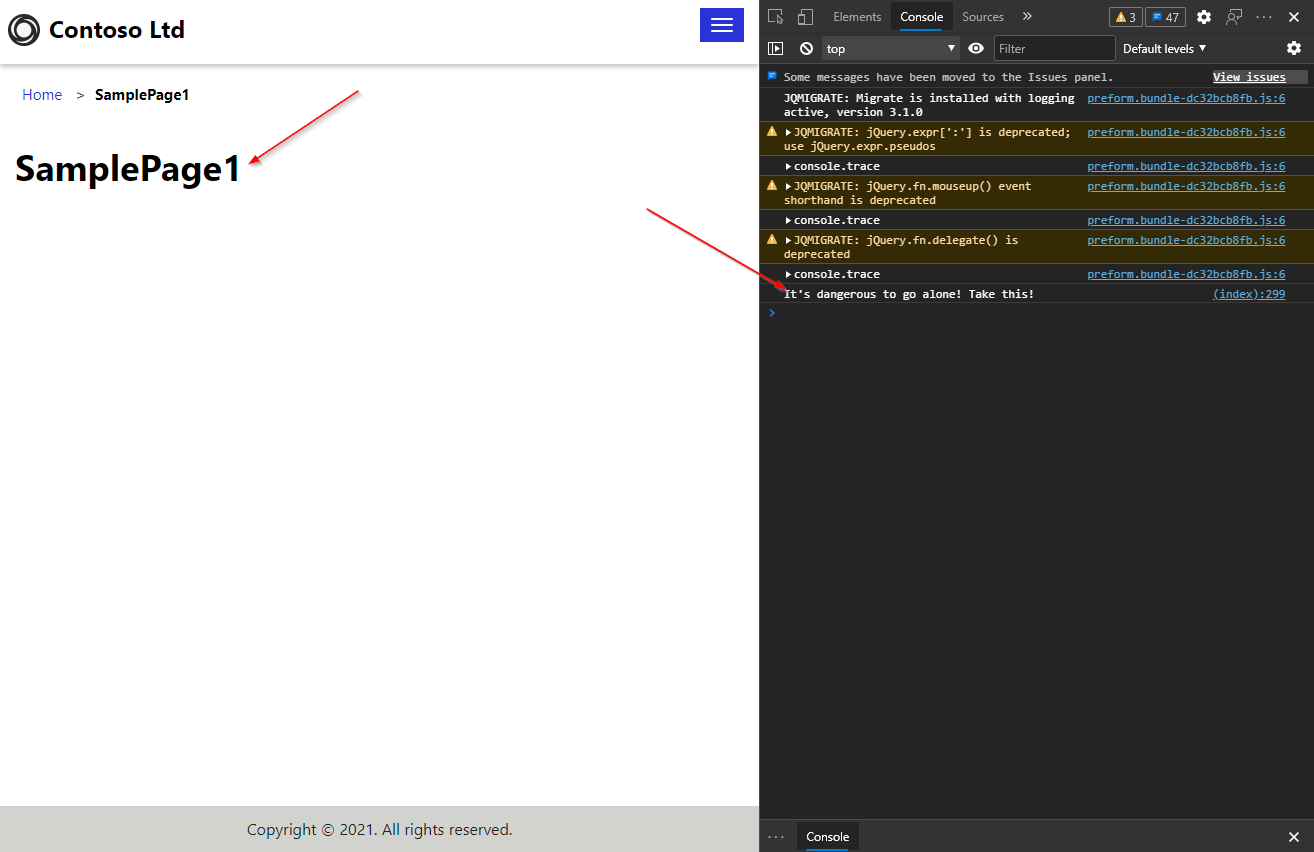
I then browsed the site and confirmed my console.log message is displayed when viewing my page.
Next, I needed to add code to call my API. Like most things, there are LOTS of ways to do this. And anyone that knows me knows my very tumultuous relationship with JavaScript. Trying to the determine the “best” way to do something with JavaScript is a lot like trying to wrestle a pig. Sure, you’ll both have fun, but in the end you’re left with a big mess.
Putting that aside, I went with the following code that used the fetch function to access my API.
<script>
  const getUserid = async () => {
    let response = await fetch([API Endpoint URL]);
    if (response.status === 200) {
      window.sessionStorage.setItem('tanids', await response.text());
      console.log('read from API:' + window.sessionStorage.getItem('userid'));
    }
  }
  if (window.sessionStorage.getItem('userid') == null) {
    getUserid();
  } else {
    console.log('read from session:' + window.sessionStorage.getItem(‘userid’));
  }
</script>
I then updated my editable region code with the custom JavaScript.
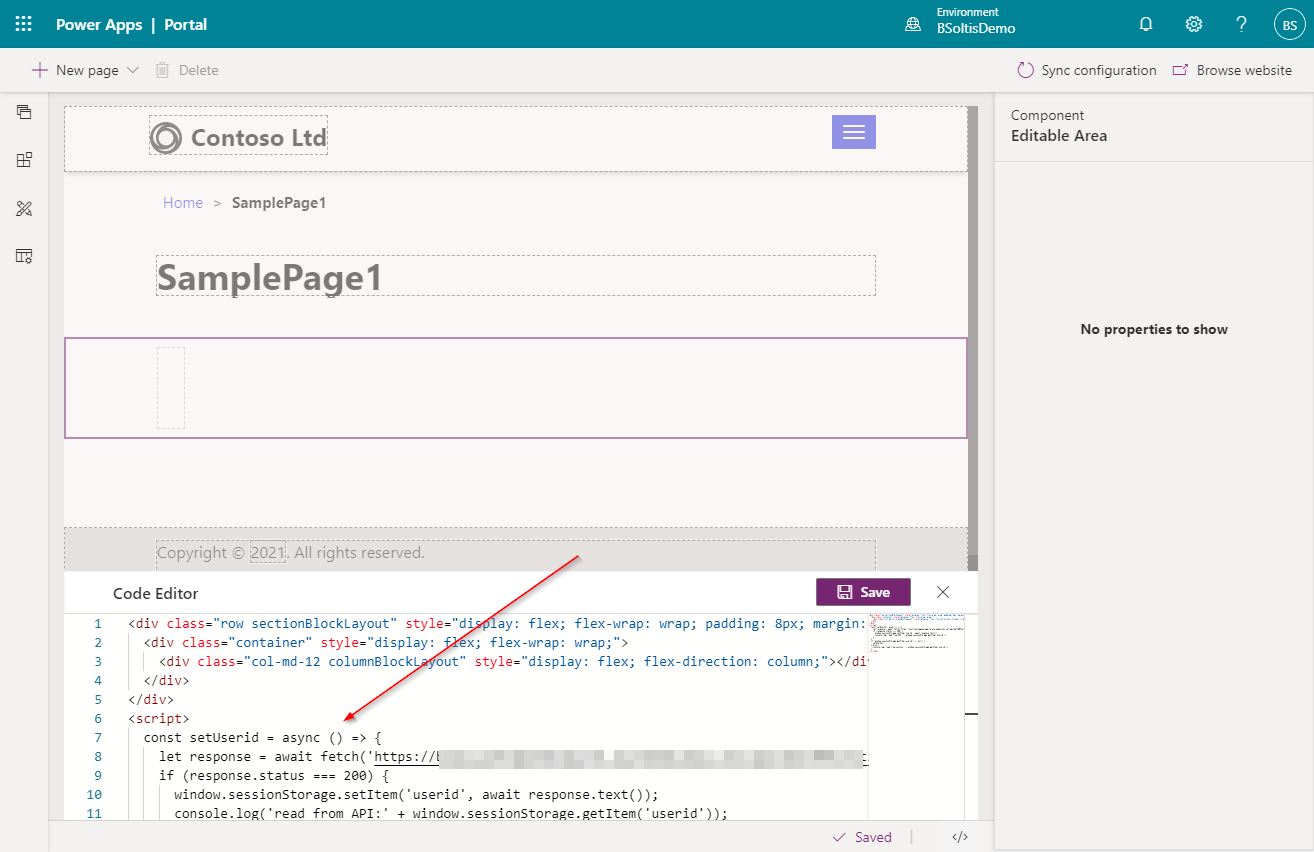
In my JS code, I chose to use the sessionStorage collection to store my API values. This allowed my page to load the value from API when a user first accessed the site, but then from local memory for the rest of the visit. It was a simple way to reduce my API calls and improve overall performance. There are several other patterns to store these values (localStorage, cookies, etc.), so you have lots of options.
With those simple changes in place, I was ready to test my code. First, I selected Browse website to view my page.
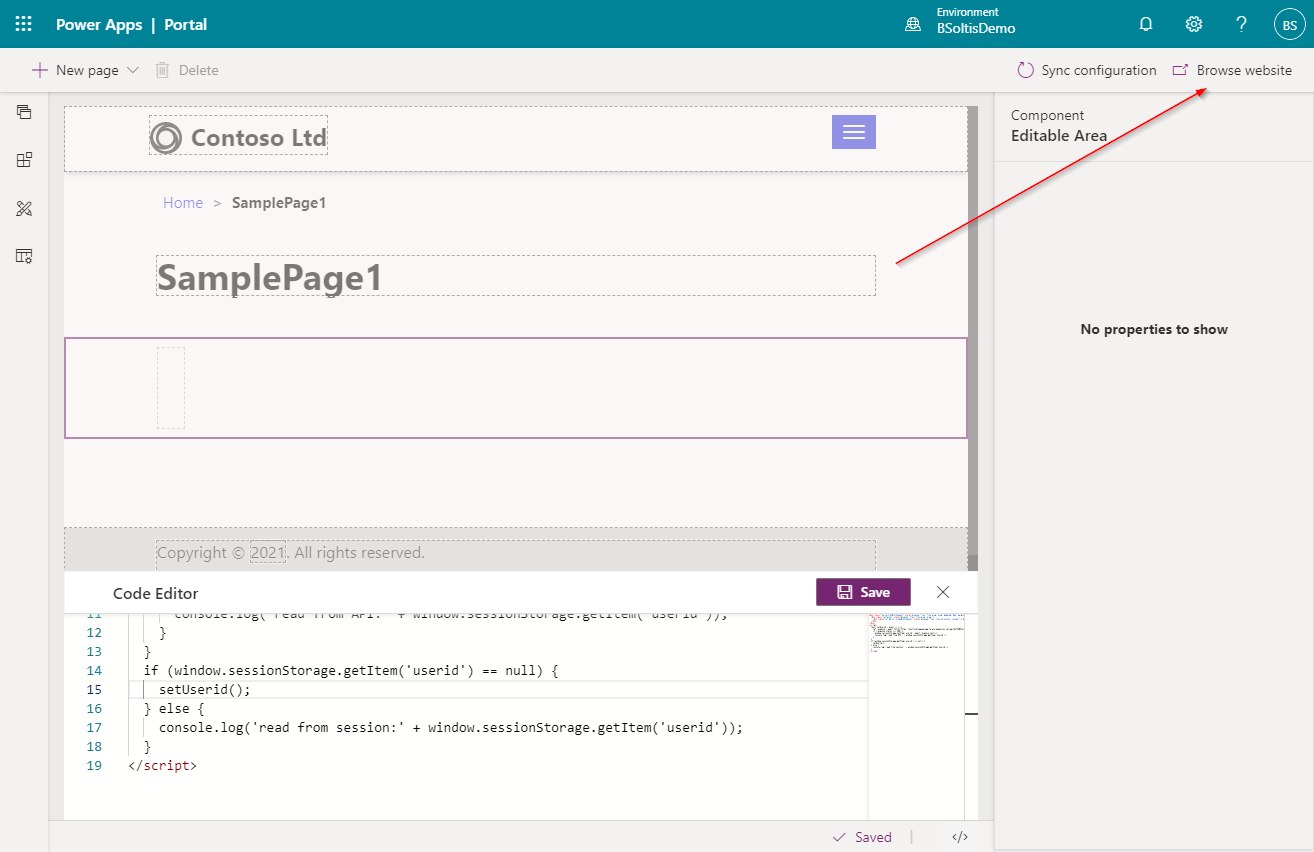
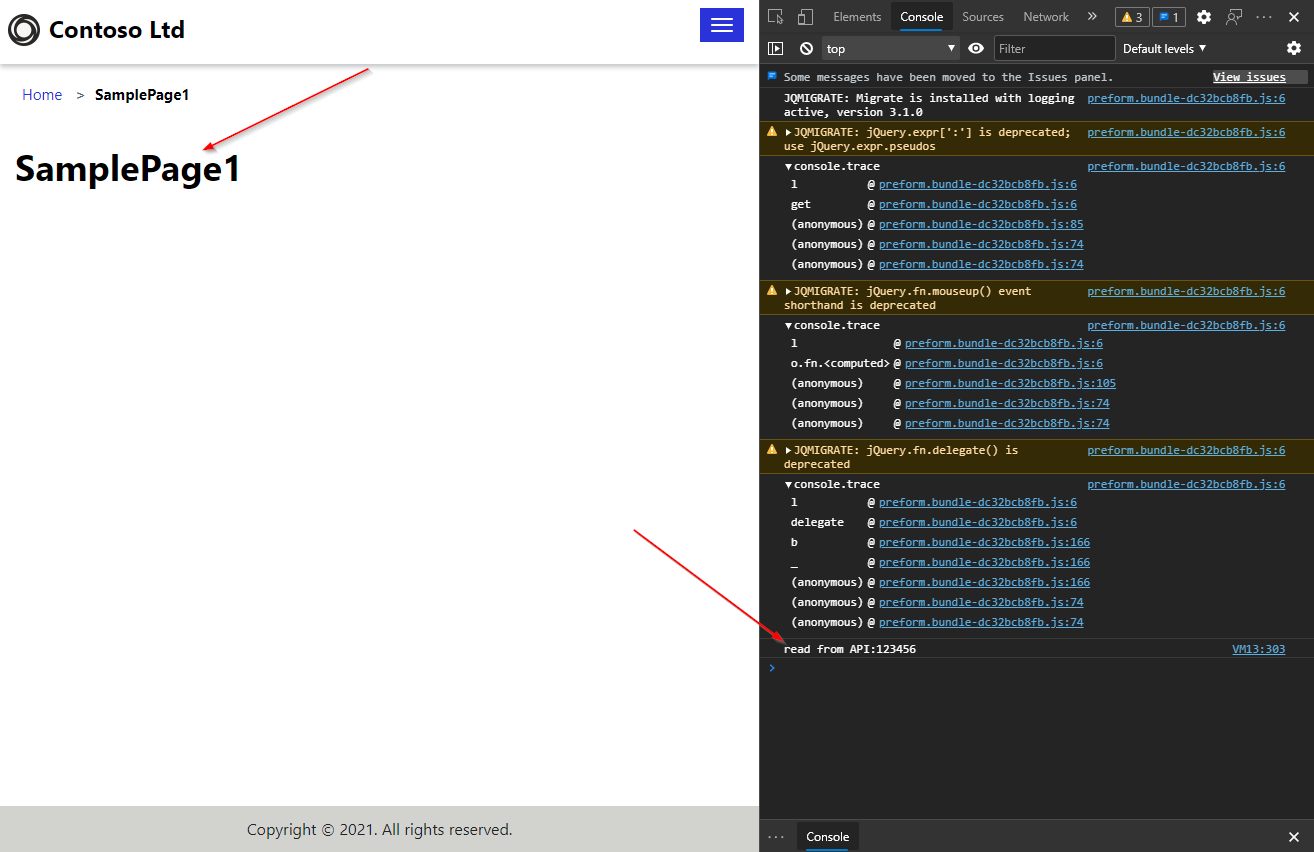
Once the page loaded, I confirmed the API was called and values were returned.
Lastly, I refreshed the page to confirm the values were loaded from my sessionStorage collection.

Viola! My testing confirmed I was able to access my API from within my Portal. [Bow…wait for applause…backflip off stage for dramatic effect]
The Microsoft Power Apps Platform allow you to build powerful and stylish applications quickly, all from within the browser. By integrating your business systems and APIs, you can expose functionality to users quickly, secure it with your favorite Identity Provider, and have something to show off at the next family reunion. Hopefully, this article showed you one way to call your APIs and get your site running quickly. Good luck!
Microsoft Power Apps documentation - Power Apps | Microsoft Docs
Apply business logic using client scripting in model-driven apps using JavaScript