


Normally, I’d give you a little story about Azure Logic Apps and containers and workflows. But, this blog has a ton of images, so I’m going to forego the novel writing and jump right in! Let’s see how to use Azure Container Registry images within your Azure Logic App workflows.
This blog closely follows this GitHub repo on deploying an ACI with Azure Logic Apps. I found part of the process a little tough to understand, so I wanted provide more detail to help others.
Azure-Samples/aci-logicapps-integration
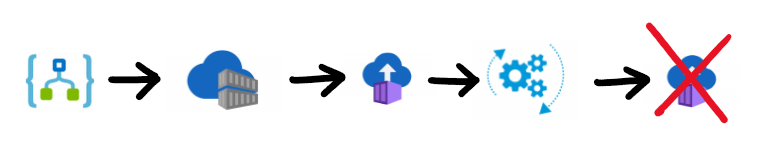
Here’s a basic illustration of what this article is going to demonstrate.
The first step it to have a resource group with our service. Here is my very exciting group with my Azure Logic App and Azure Container Registry.

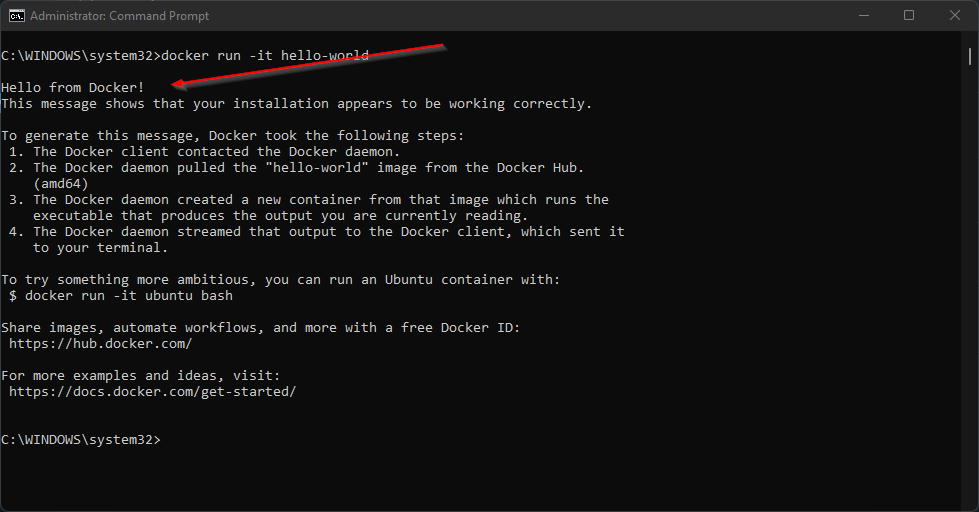
For my container image, I select the always impressive Hello World Docker example.
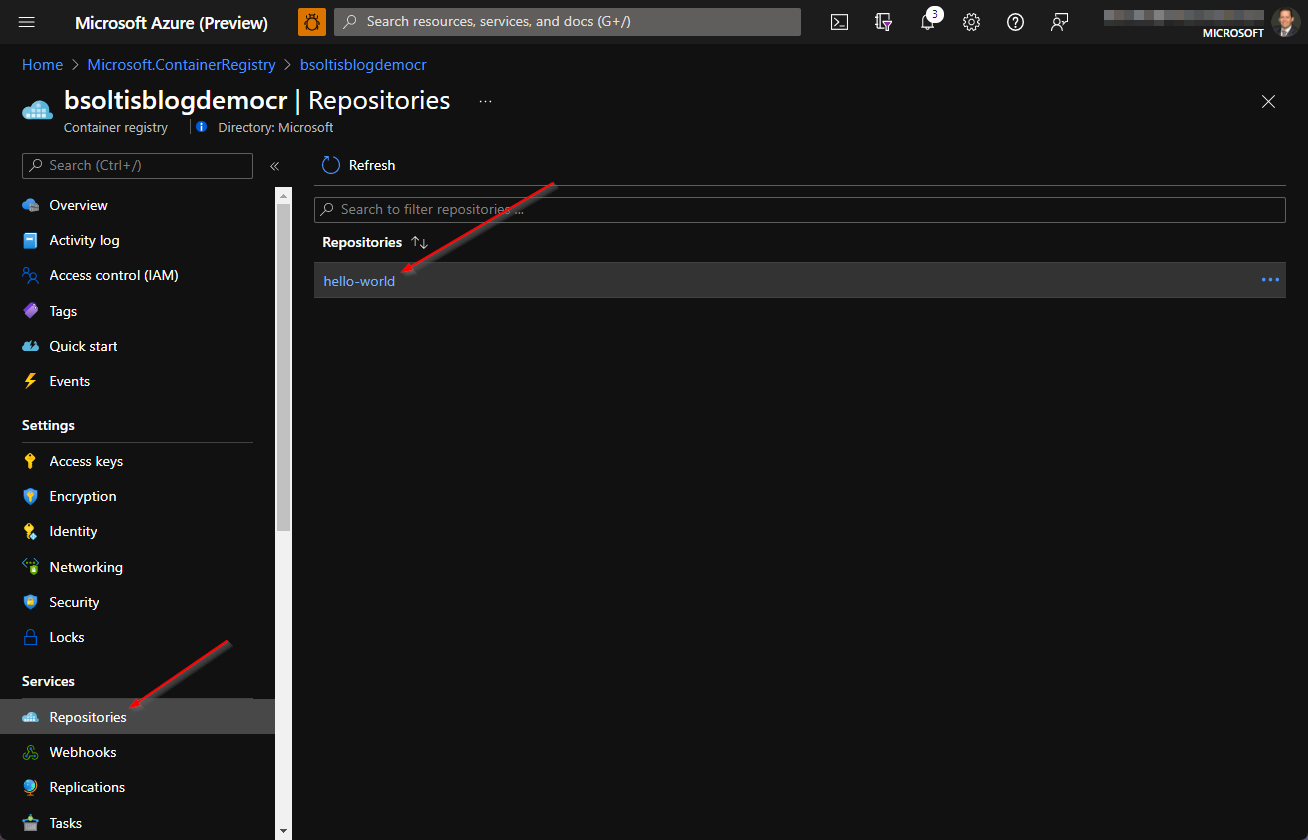
Here is the image in my Azure Container Registry repositories.
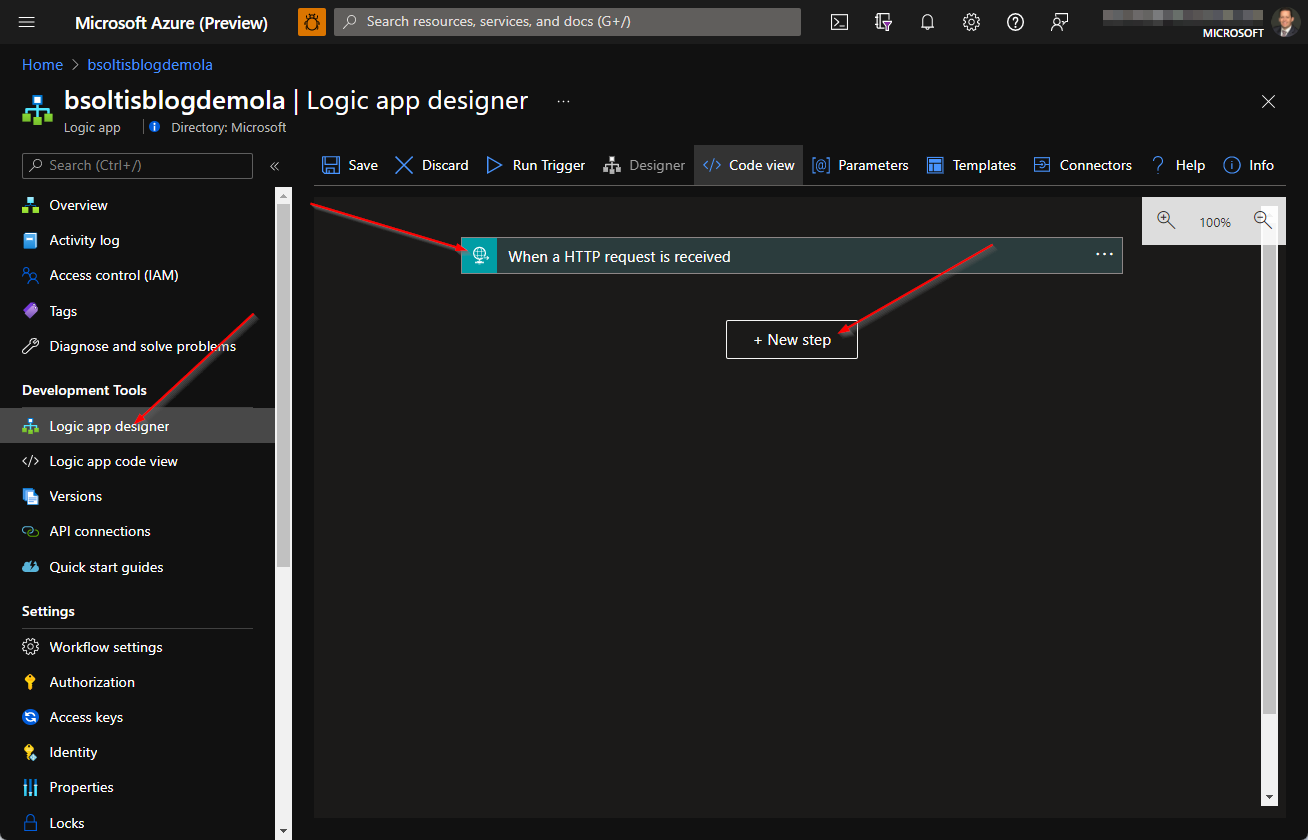
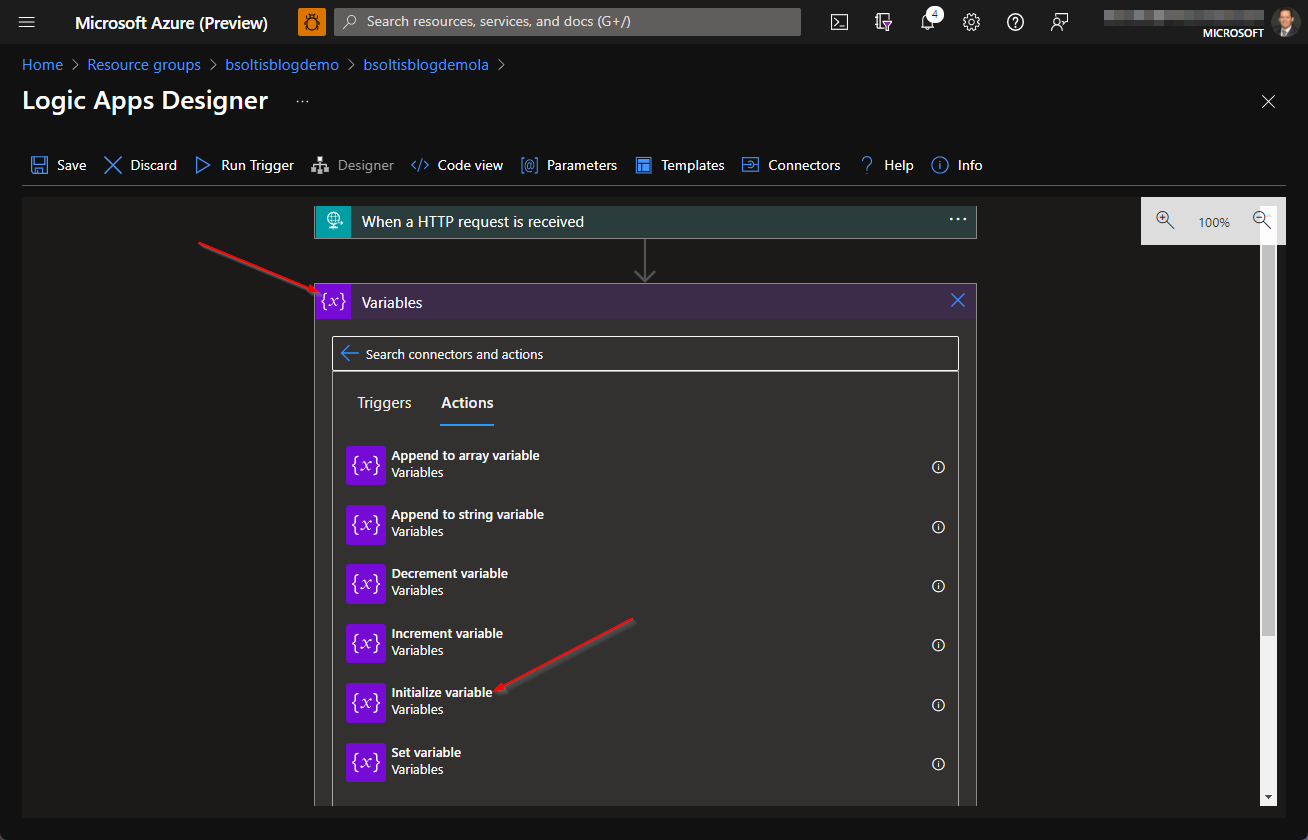
With the components in place, I’m ready to set up my Azure Logic App. I select the HTTP trigger and add my steps.
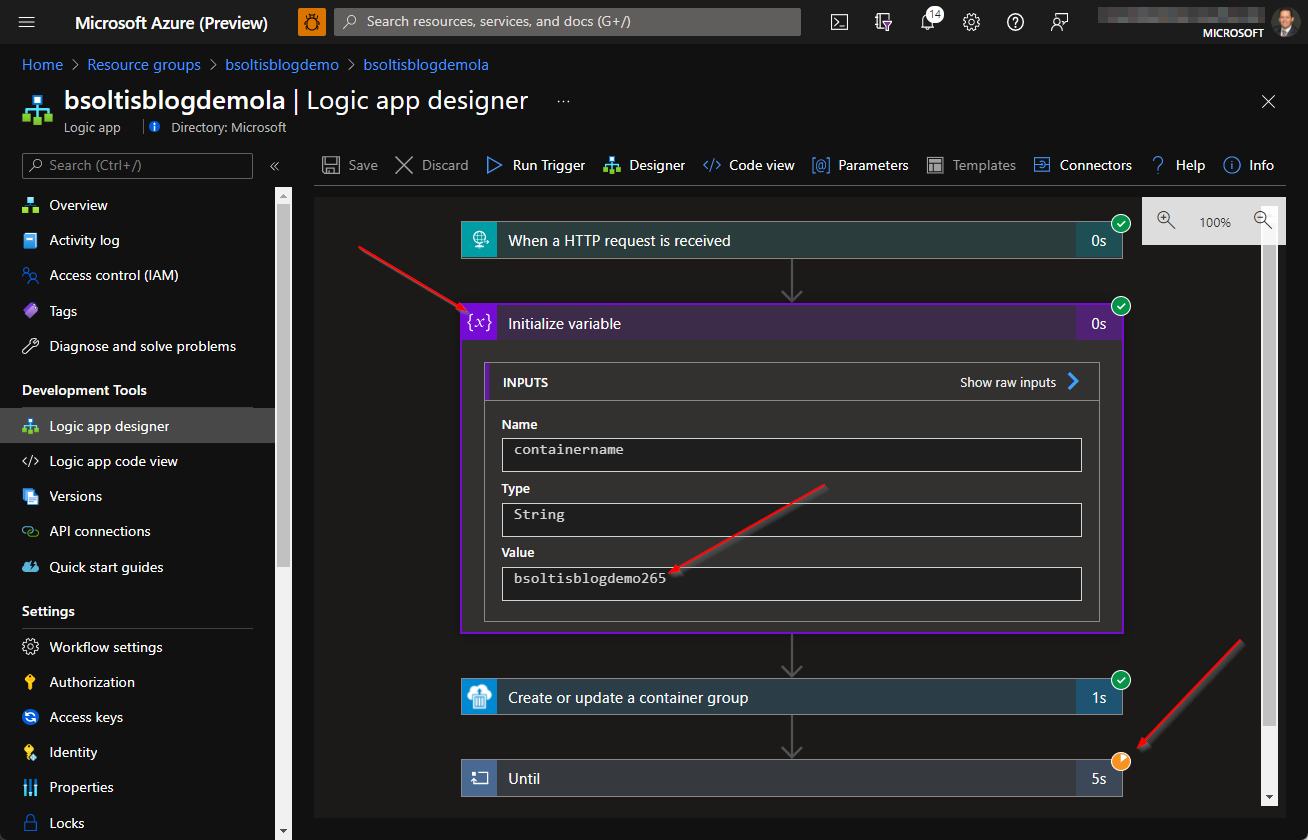
The first step is to initialize and set variable. Because I’ll use the same name in a number of settings, I create a new variable for my container name/group, using a random name. There's chance that this Logic App might run multiple times, resulting in several containers being created at once. The random name for each container will ensure there's no space/time continuum disturbances and everything is unique.
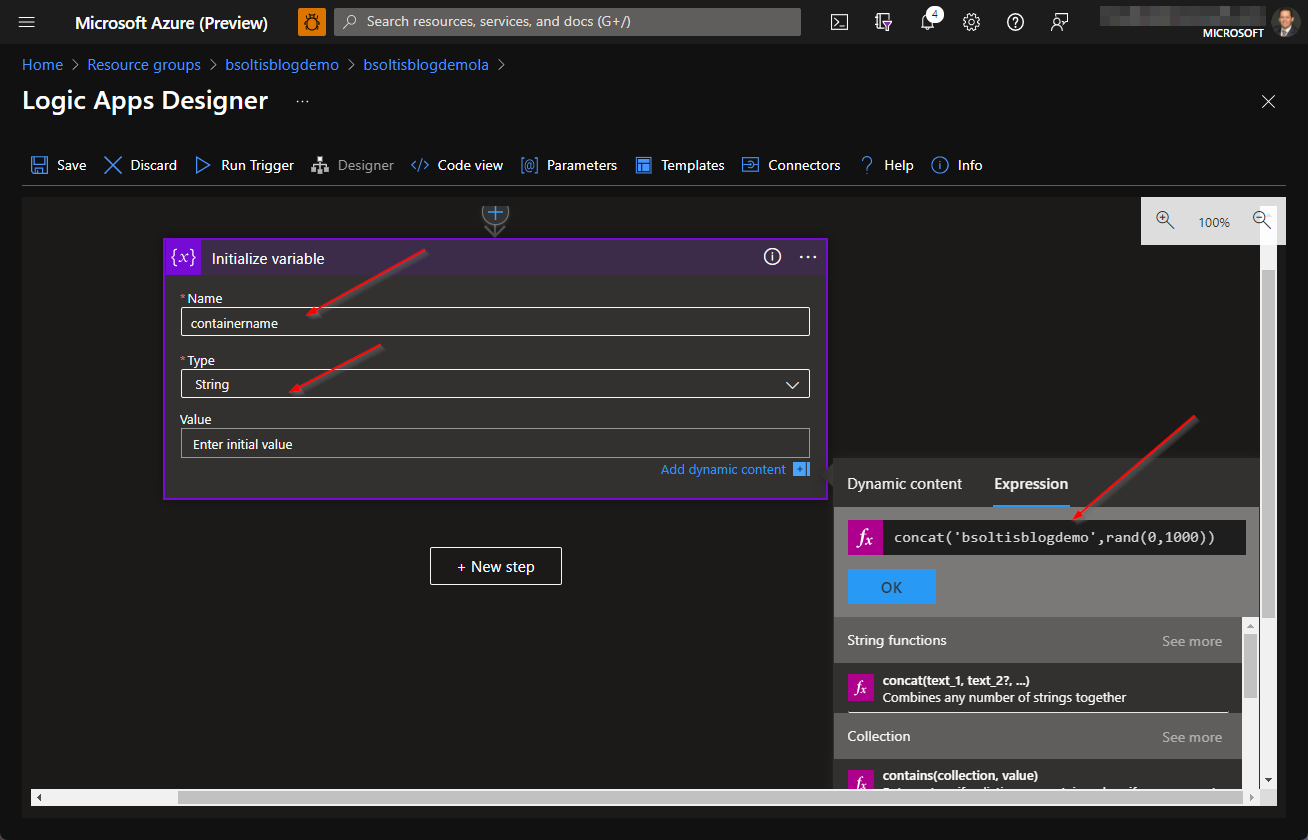
Here are the values I use. Note the expression code I'm using to ensure the name is unique.
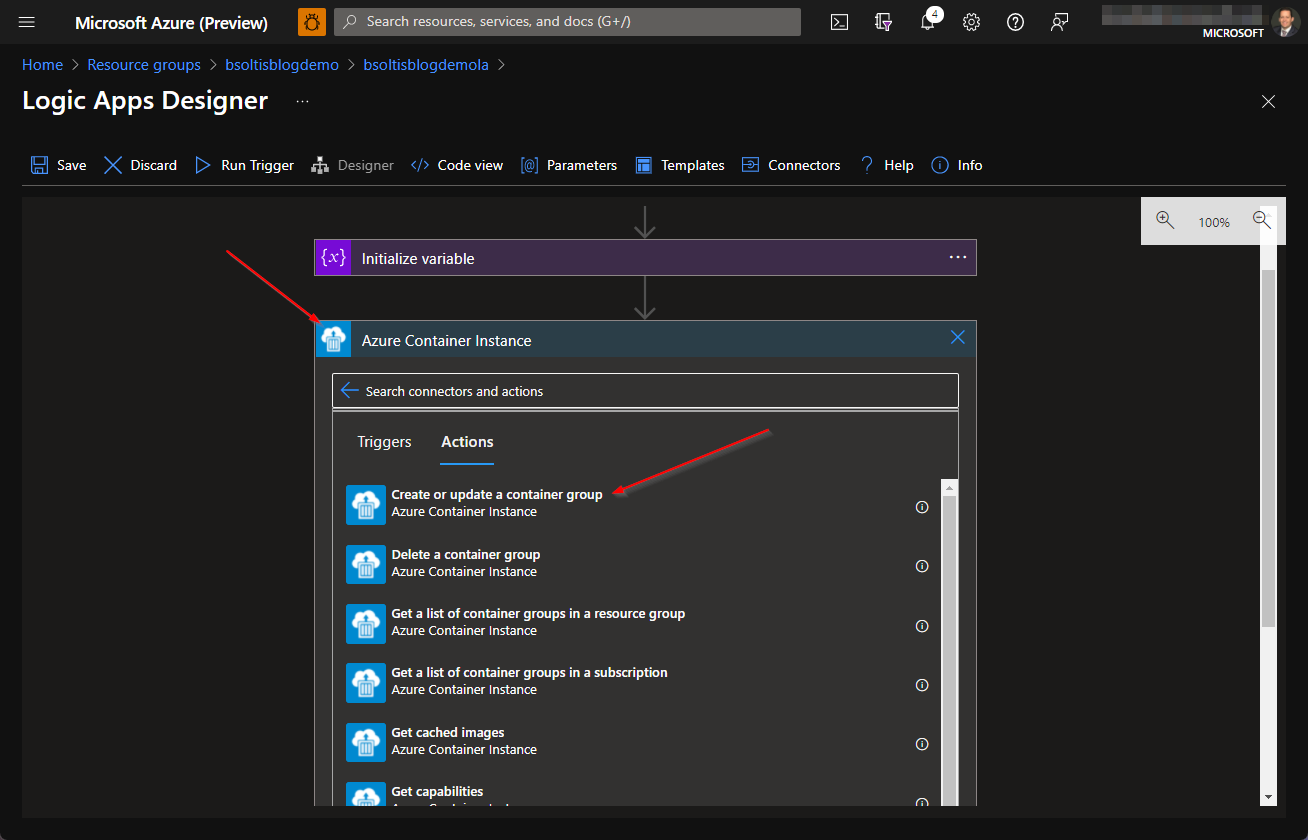
Next, I add a step to create my Azure Container Instance. This step requires creating a new group and defining the properties of the container. I select the Azure Container Instance connector and choose the Create or update a container group action.
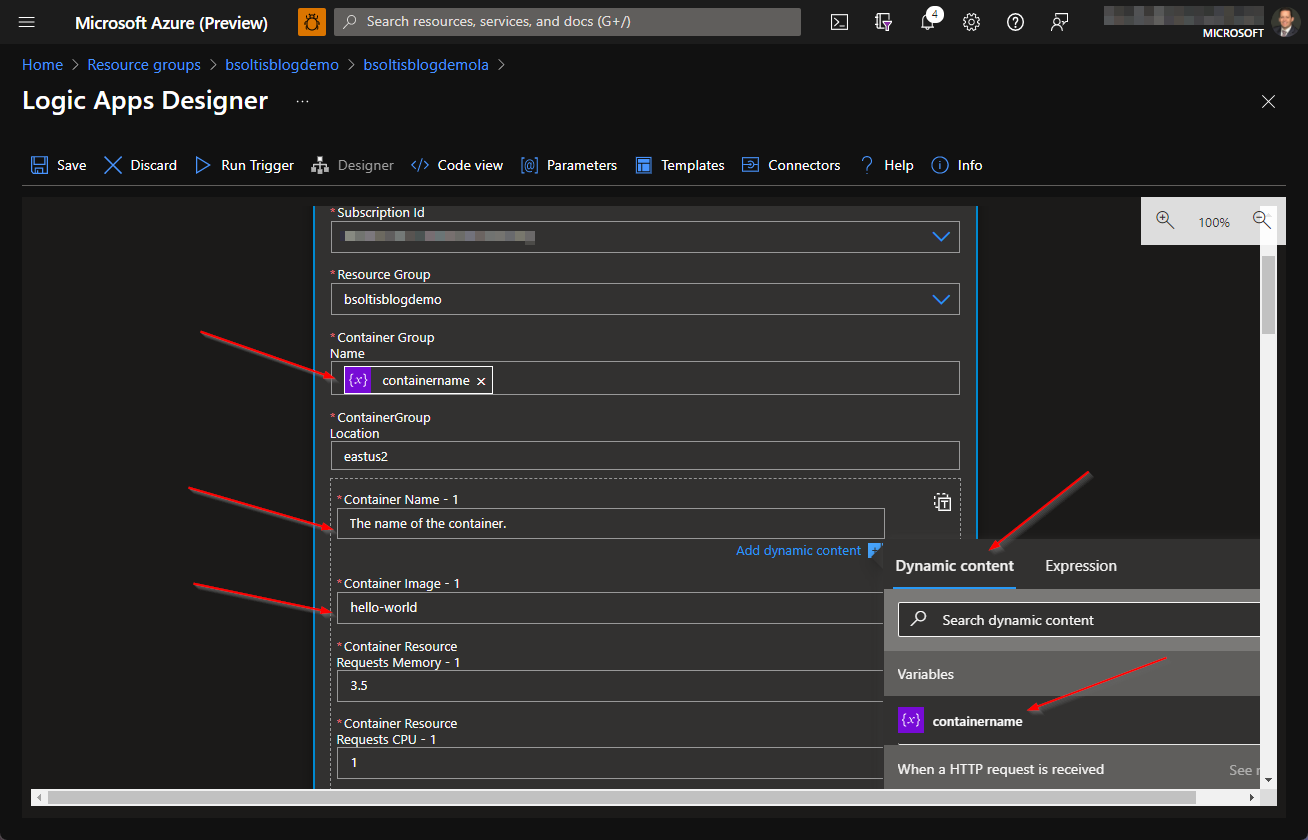
I use my new containername variable for the group/container name and set the image and resource properties.
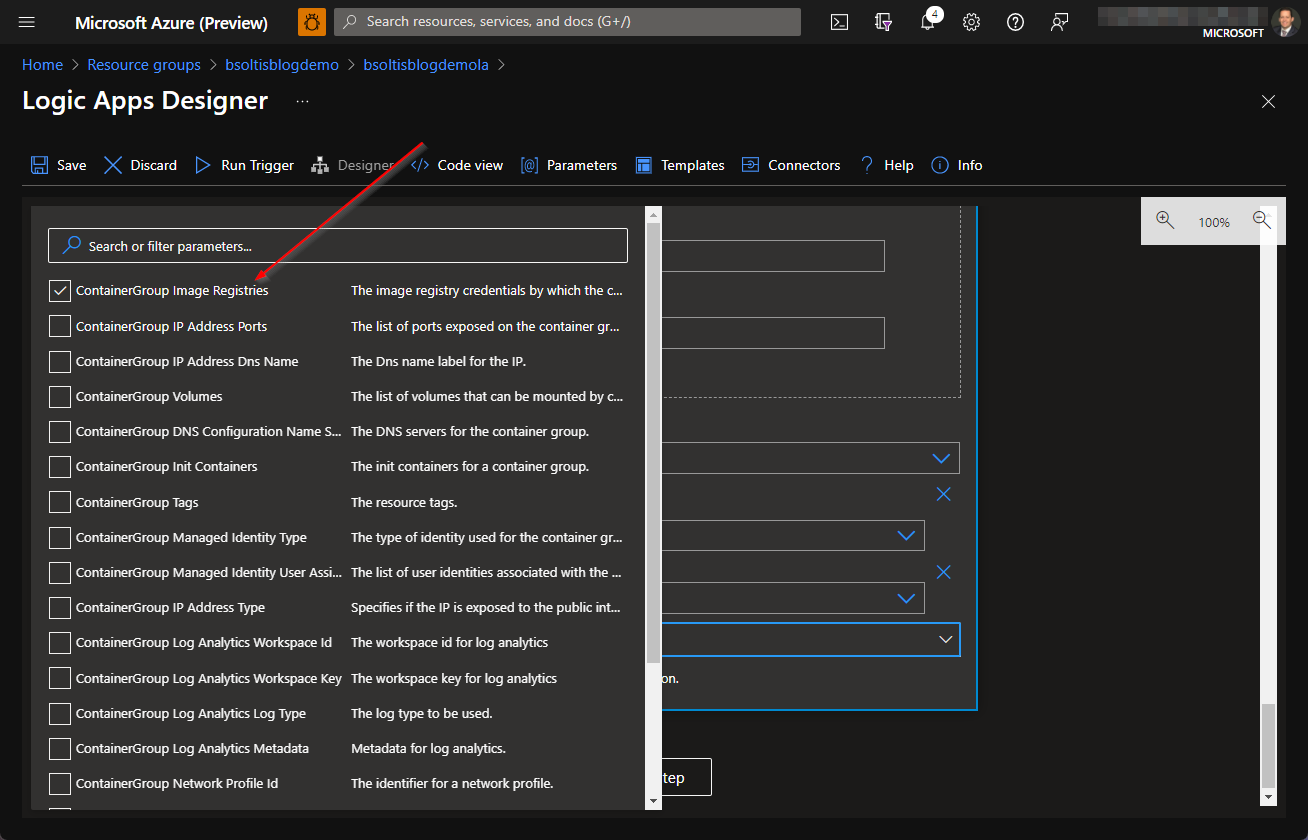
Because my image is coming from an Azure Container Registry, I need to add a parameter section to my connector. I select the Add new parameter drop down.
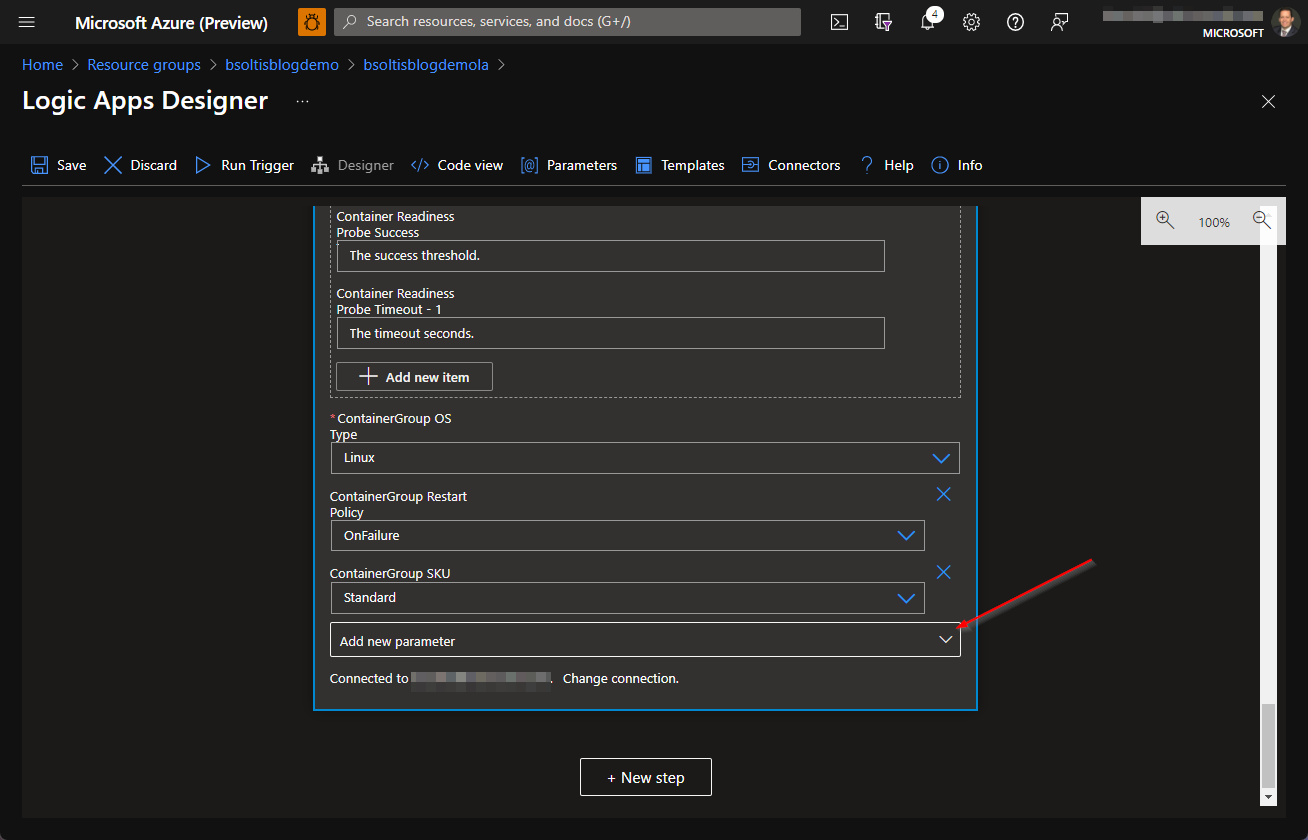
I select the ContainerGroup Image Registries option.
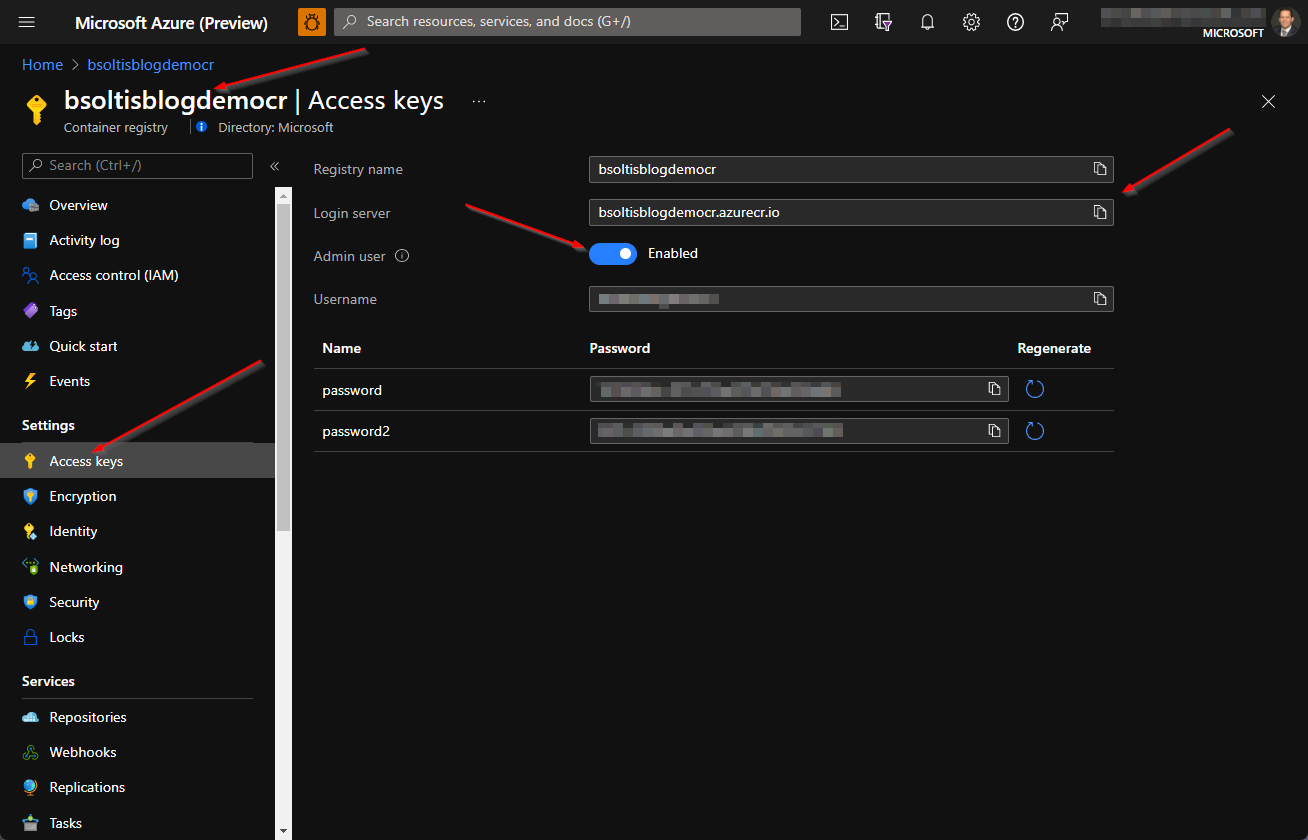
This section will need to know how to connect to my Azure Container Instance. In a new tab, I open my Azure Container Registry and select the Access Keys option to get the server URL, username, and password.
In my Azure Logic App, I set the registry values.
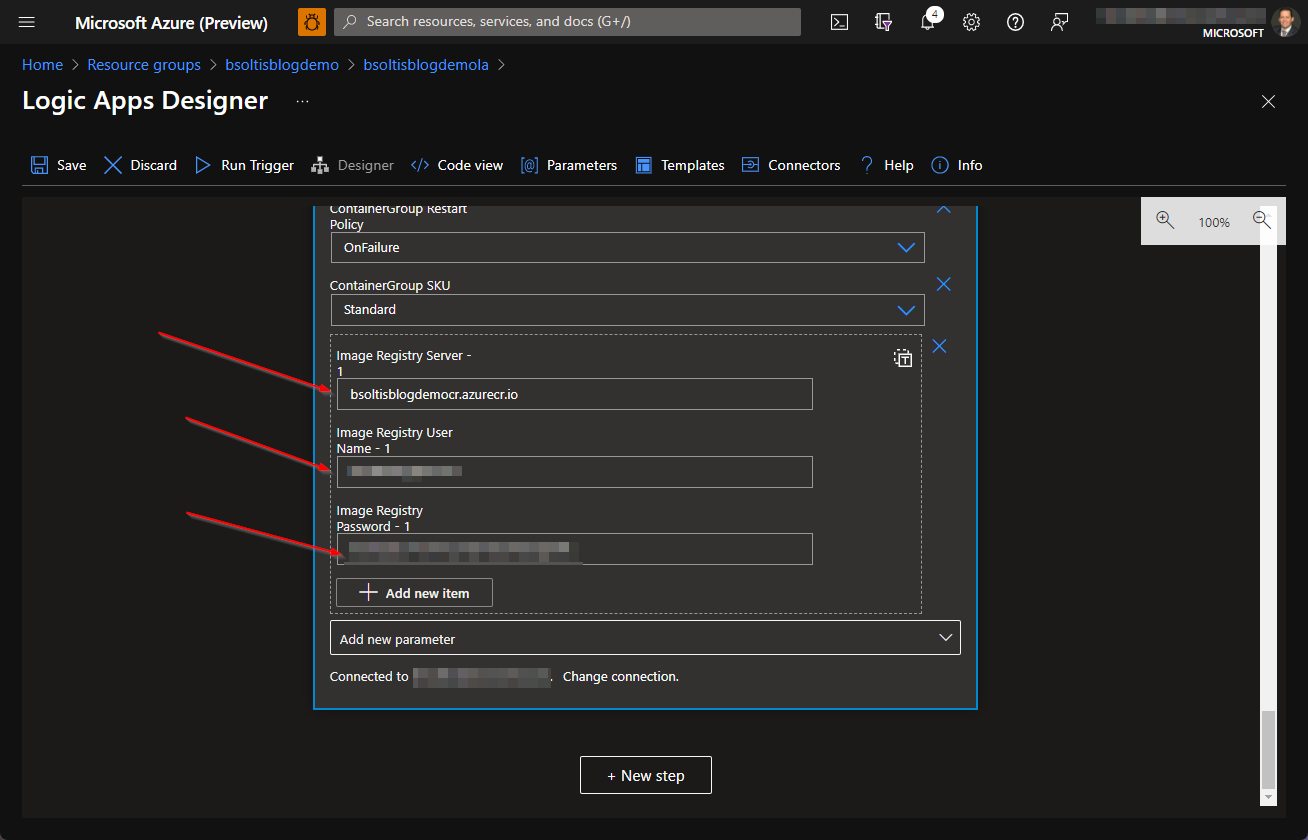
Some of the properties you will see in the Azure Container Instance connector documentation are only visible after adding the appropriate parameter section.
At this point, I have an Azure Logic App that will create my Azure Container Instance using my Azure Container Registry image. This is where my microservice is going to go do something awesome, so I need to wait for that to happen. When an Azure Container Instance is spun up, the state can be monitored to determine its progress. In my case, once I see the state as “Succeeded”, I know my microservice has done its job.
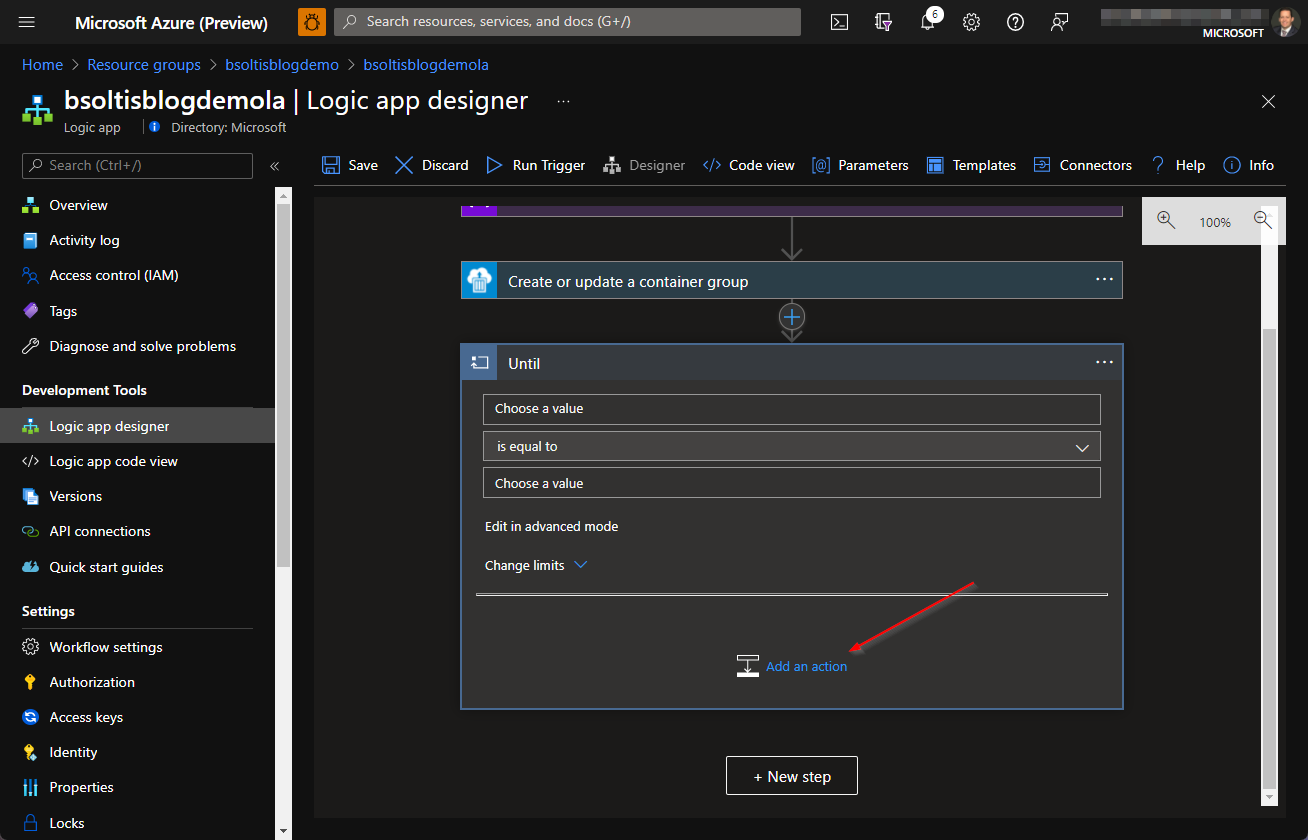
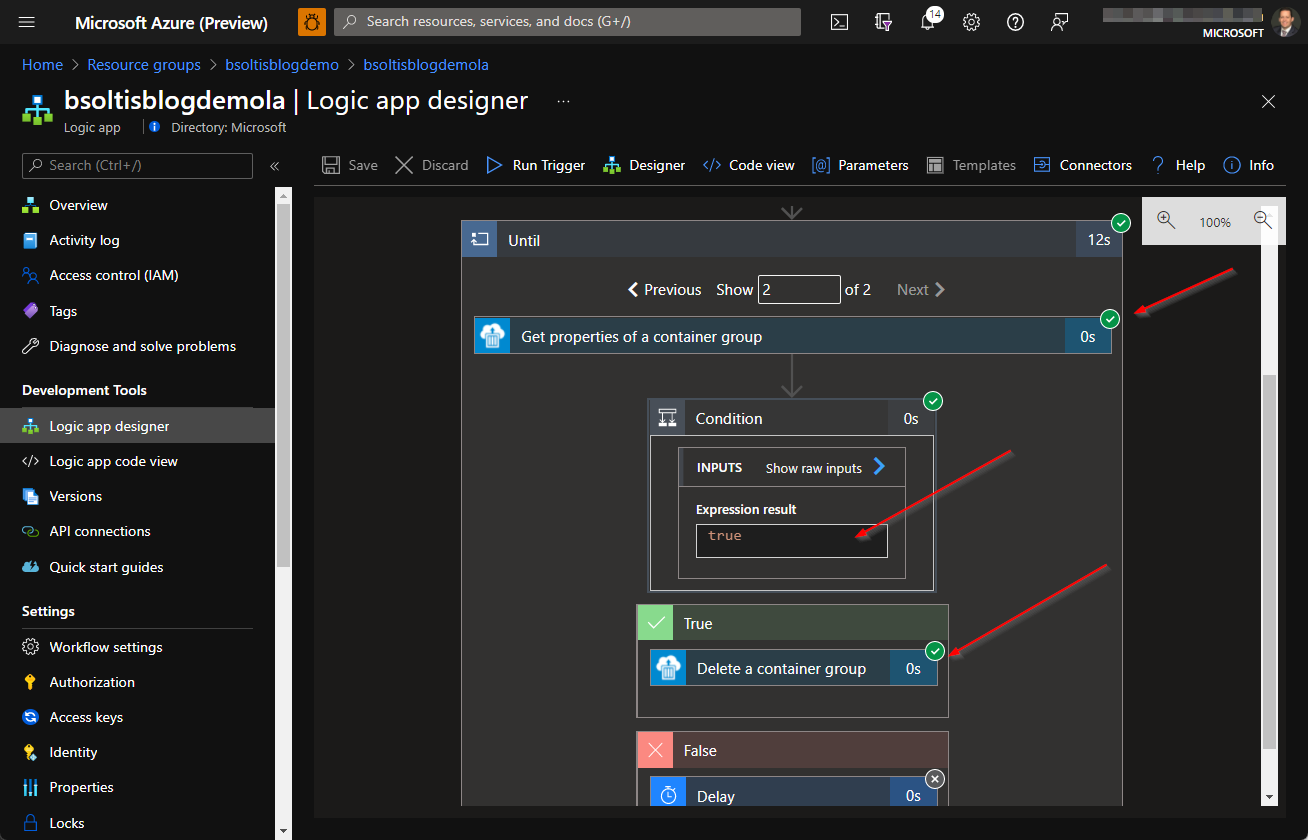
Because I need to wait until the microservice is complete, I add an Until step to force the Azure Logic App to wait until a condition is met. I select the built-in Control connector and select the Until action.

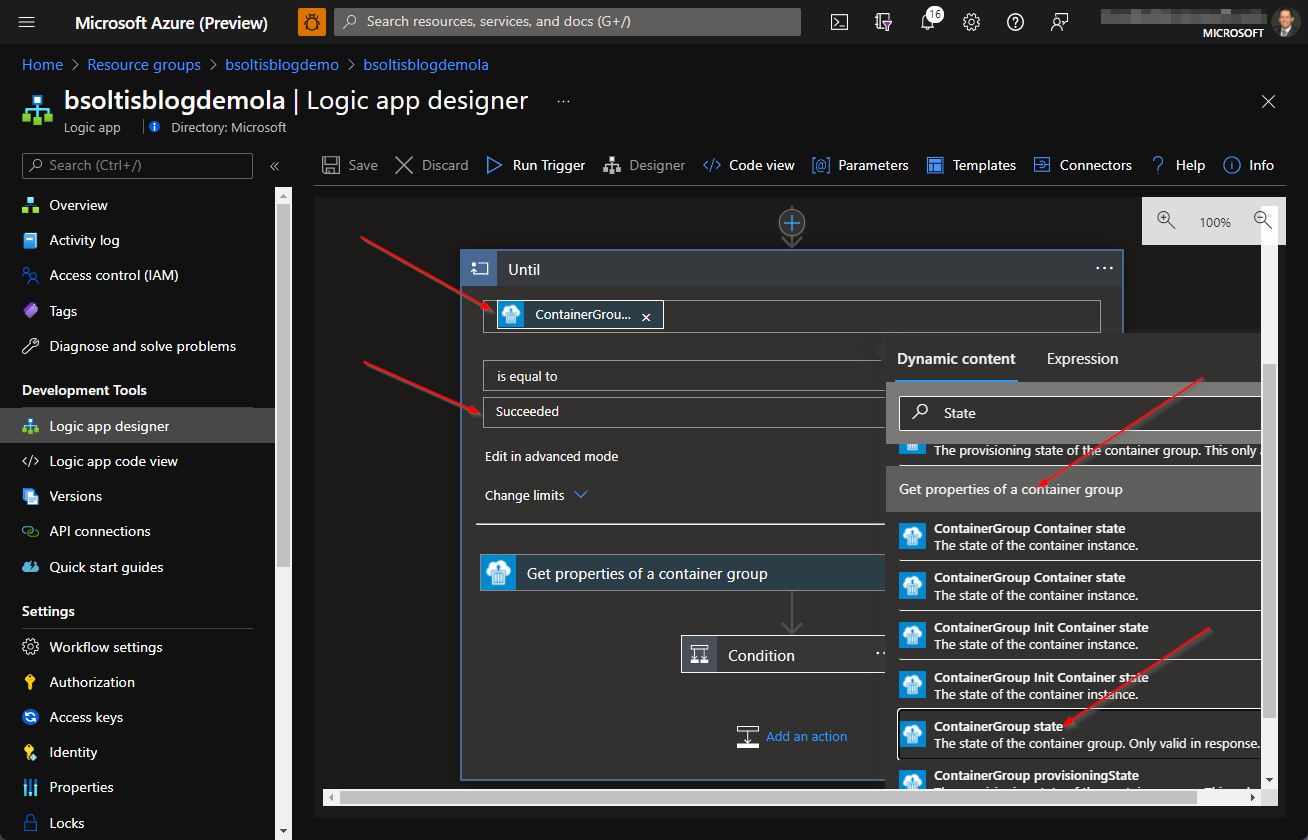
Because this step will check the state, I need to add an action to get the container group state. Inside of the Until step, I select the Add an action link. Don't worry, we'll come back and update the Until condition at the end.
Under the Azure Container Instance connector, I select the Get properties of a container group action.
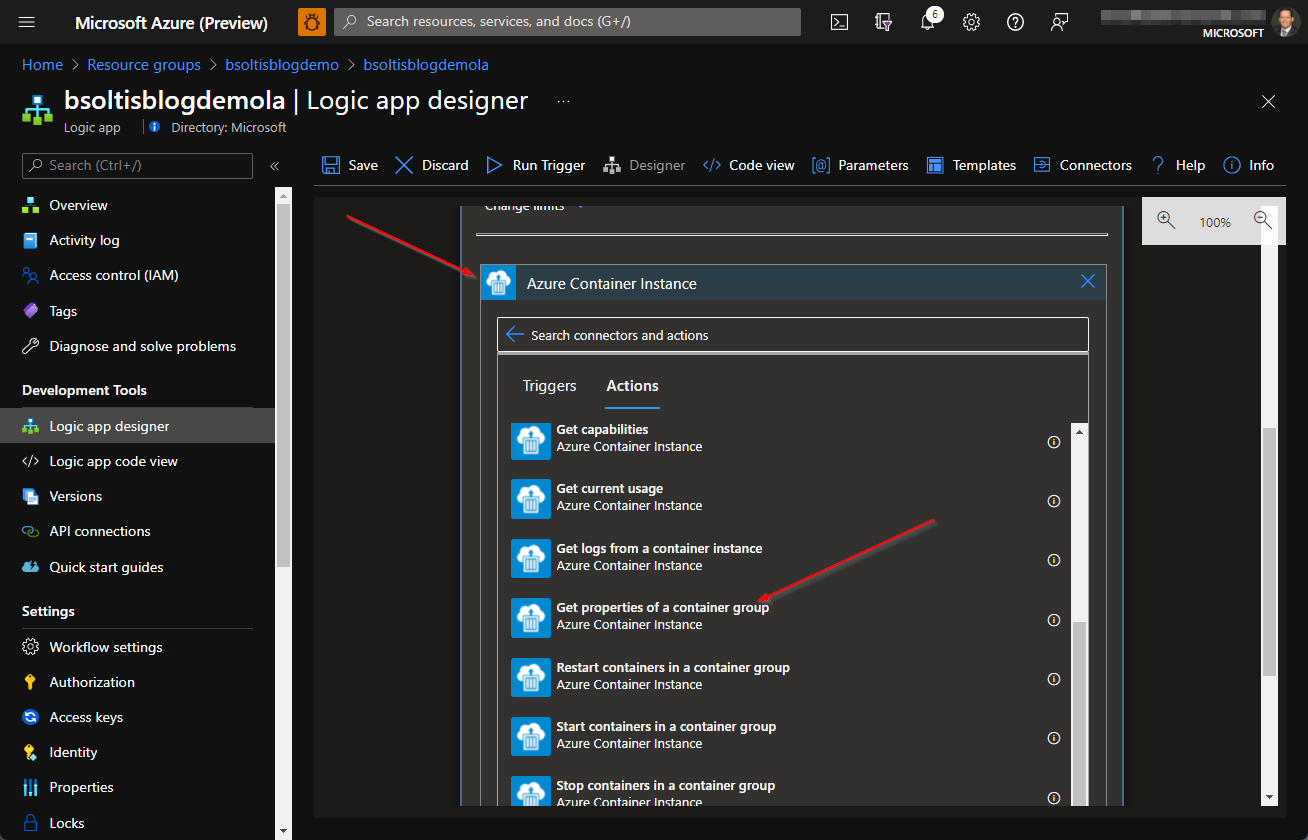
For the name, I select the dynamic ContainerGroup name property, which will be the actual deployed container group name. (I could also use my containername variable here.)

After getting the properties, I need to determine what the state of my container group is. I select the Control connector and add a Condition action.
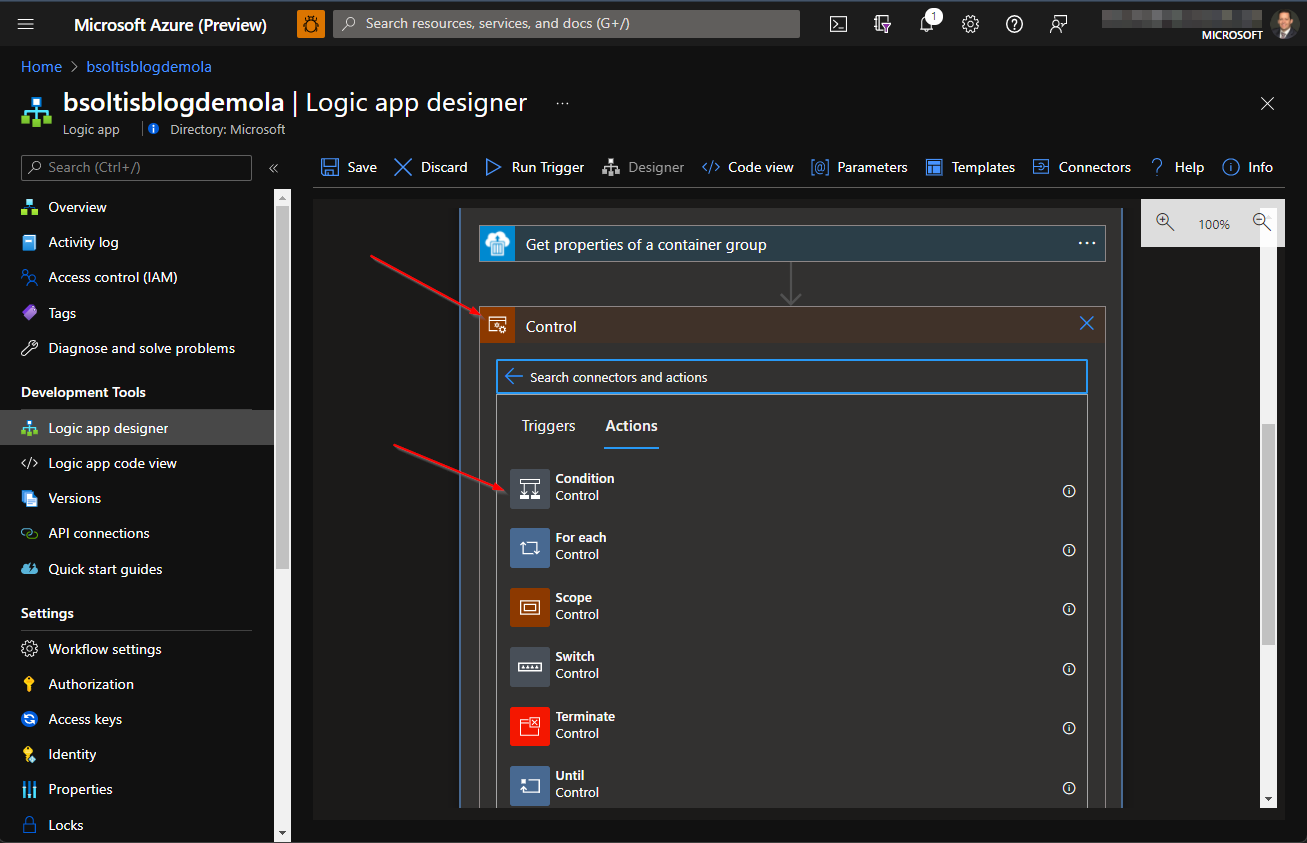
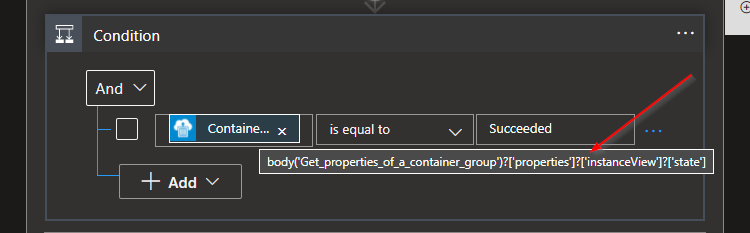
For the Condition, I select the ContainerGroup state value from the Get properties of a container group step and check if it’s equal to “Succeeded.”
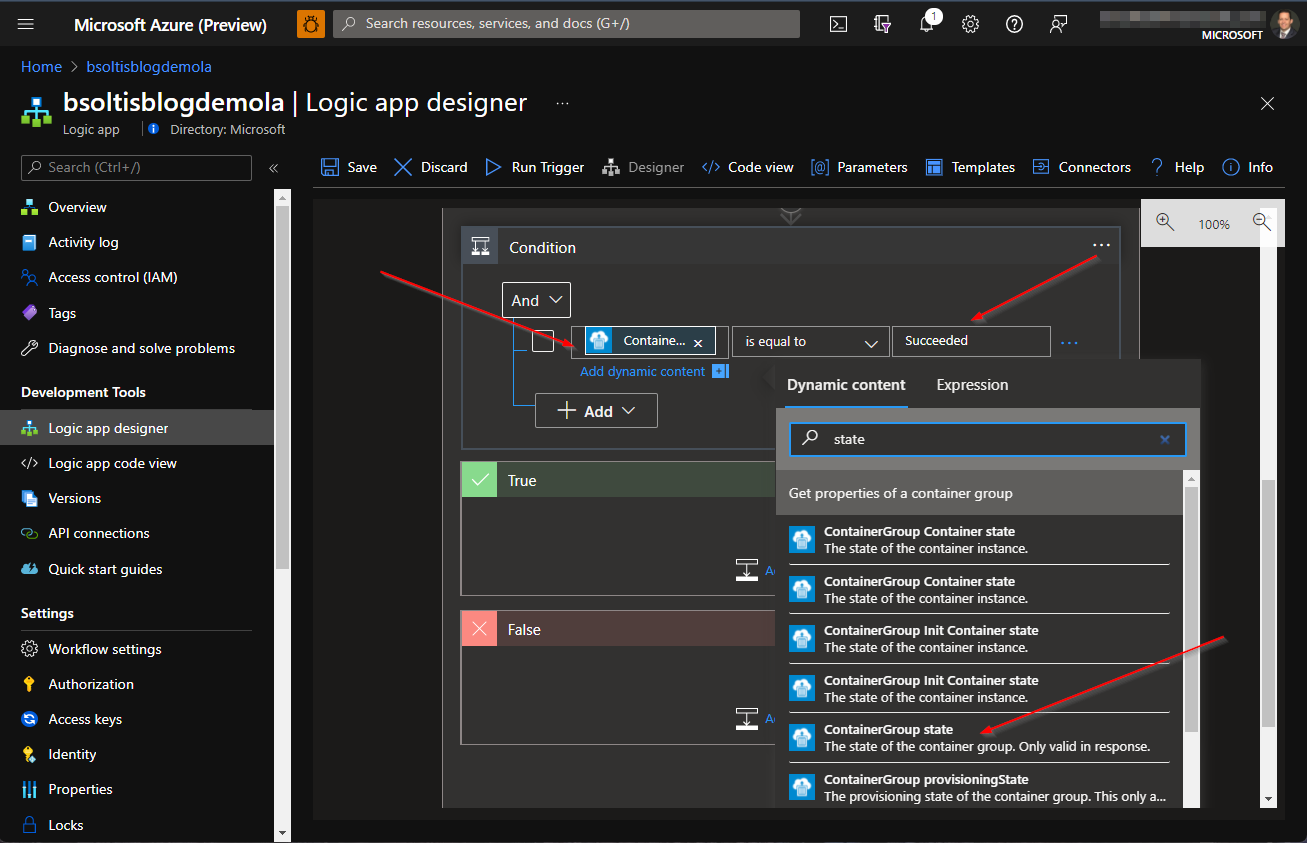
When selecting a dynamic value, it’s easy to choose the wrong option, if there are several similar properties. You can hover over a selection and see the ”code view” to confirm it’s the value you are looking for.
Next, I need to decide what to do, based on the state. If the container is done with its magic, I’ll move on. Otherwise, I want to wait a little while to give it time to complete.
In the False path, I select the Schedule connector.
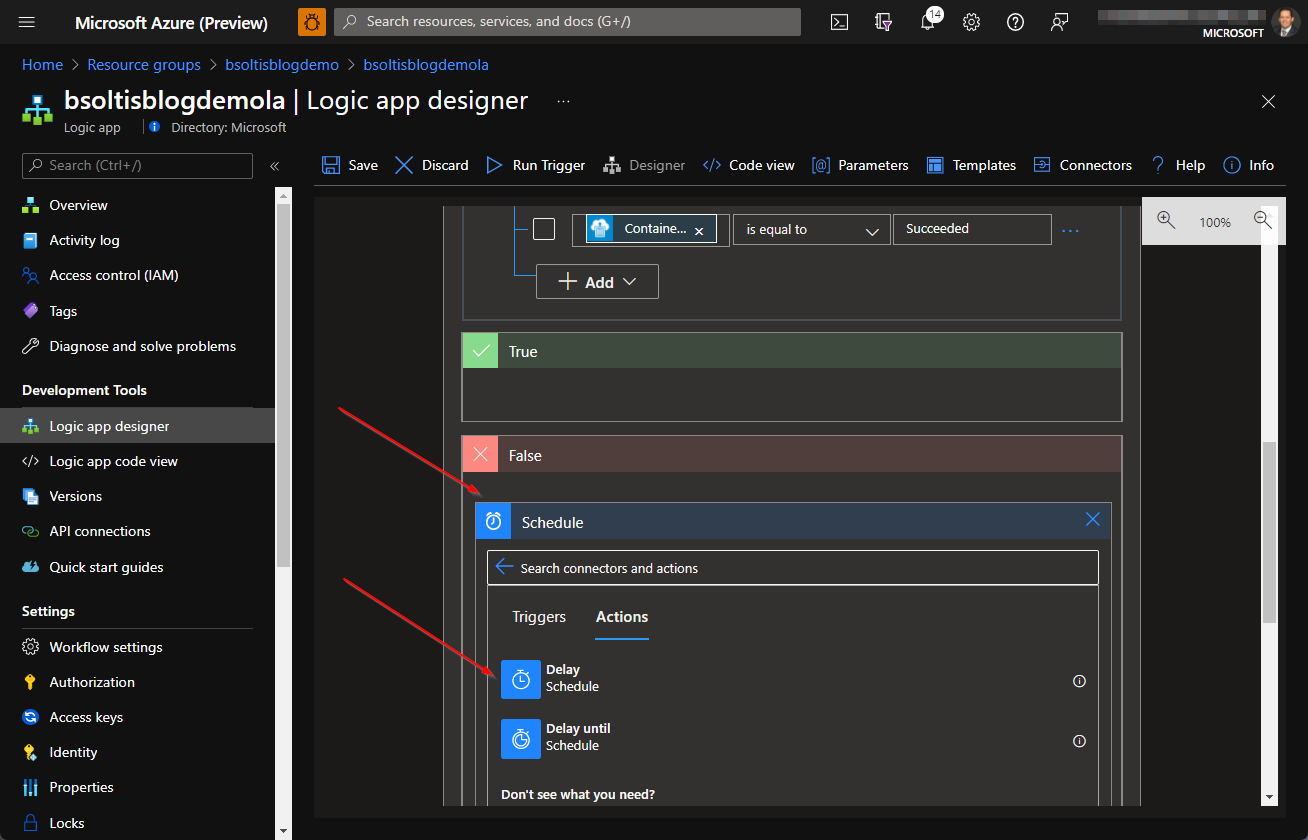
I select the Delay action and set it to 10 seconds.

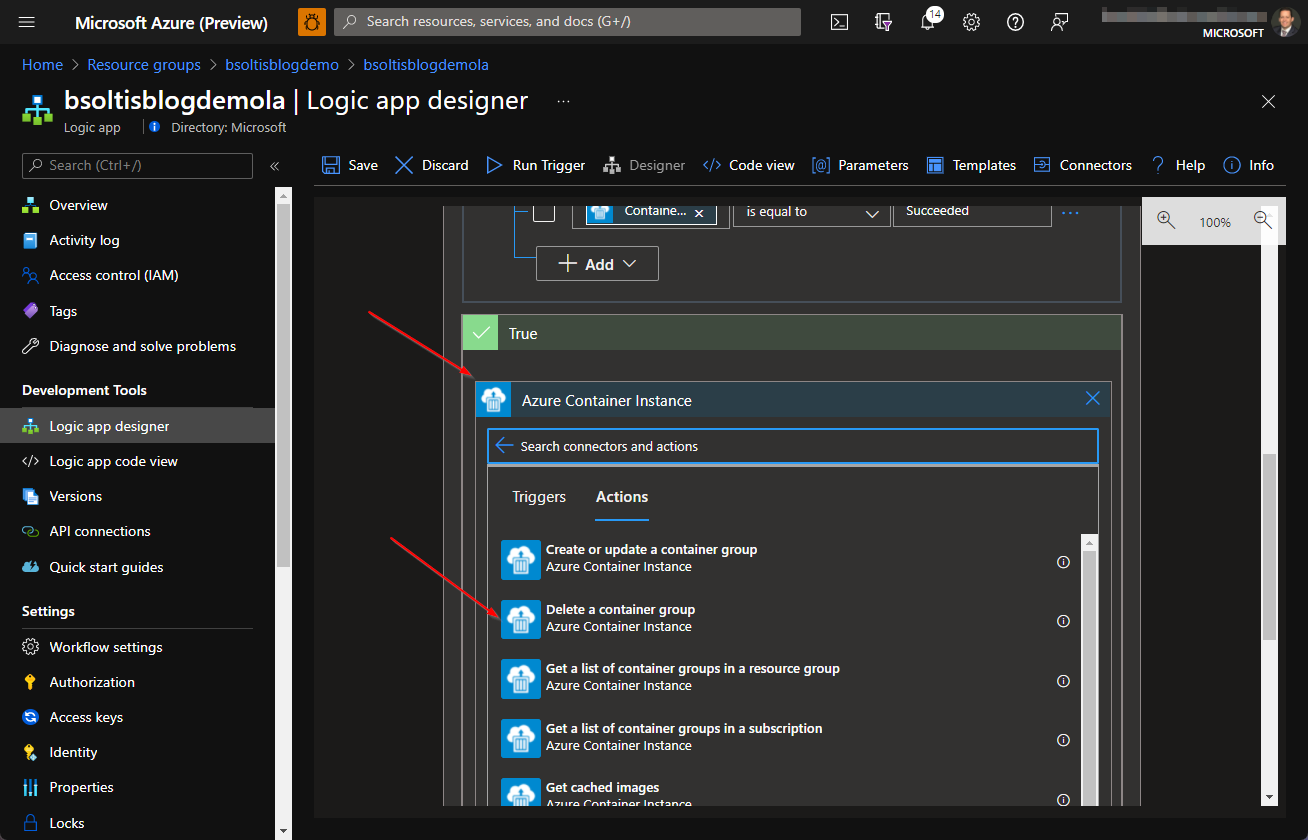
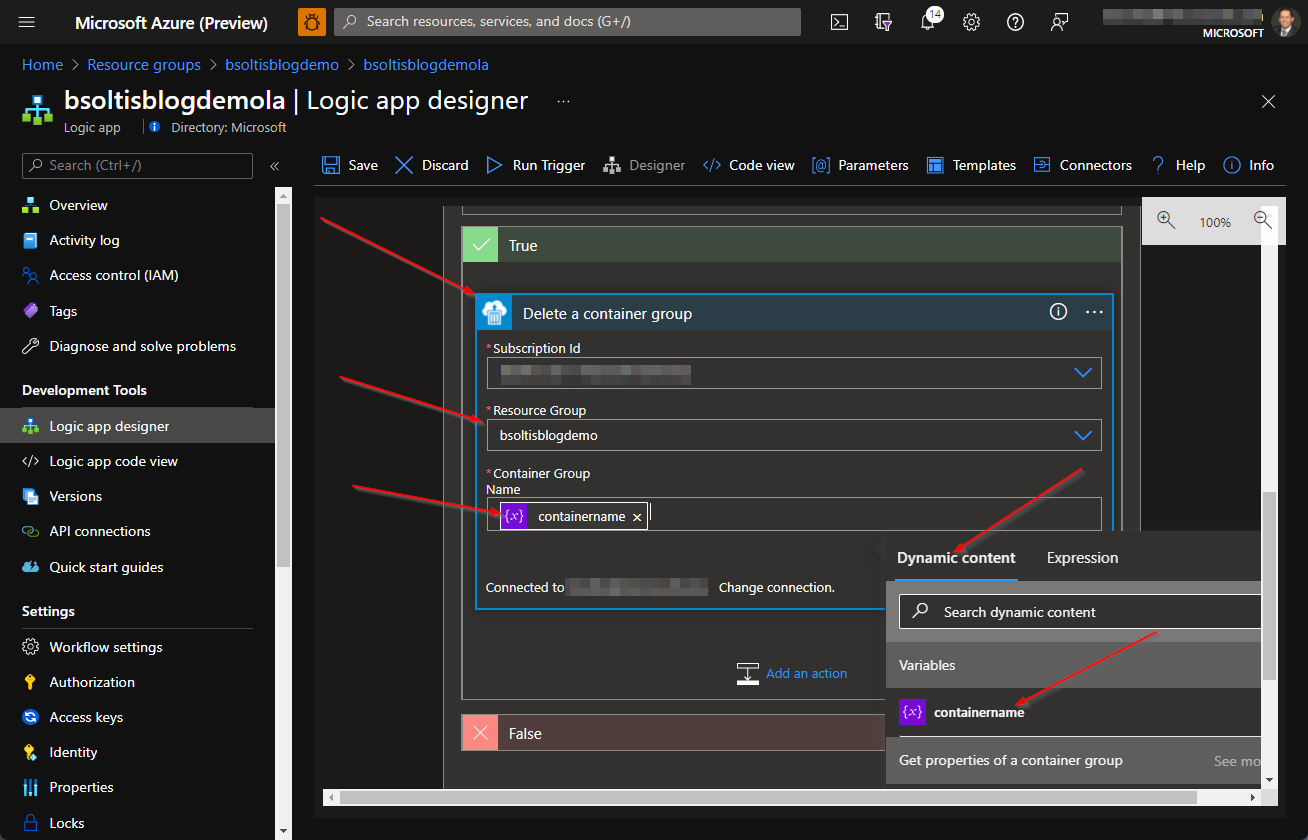
Once the condition is true, I know the microservice is done and I can delete my container instance. Under the True path, I open the Azure Container Instance connector and select the Delete a container group action.
I populate the settings with my values and use the containername variable for the container group.
The last step is to update my Until step to check the container group state. I once again choose the ContainerGroup state from the nested Get properties of a container group step and check if it equals “Succeeded.”
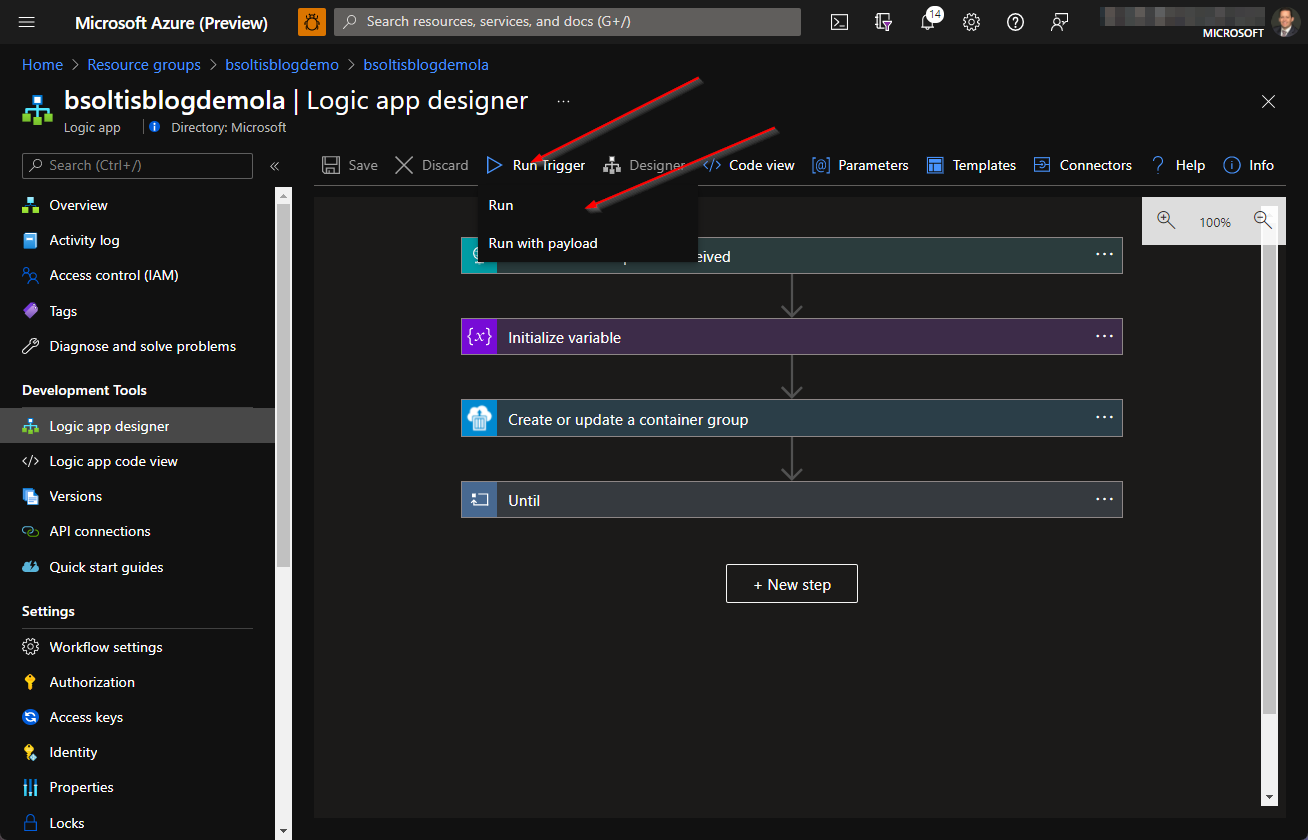
OK, that was a lot of screen shots, but hopefully, it helped you understand the process. To test, I just need to force my Azure Logic App to execute. To do this, I select the Run command within the designer.
Once the Azure Logic App starts executing, I can track the progress within the portal. I can see the random container name that was created with my expression (bsoltisblogdemo265) and that the workflow is currently in the Until step. This means the instance is still running and the Azure Logic App is waiting for the "Succeeded" state.
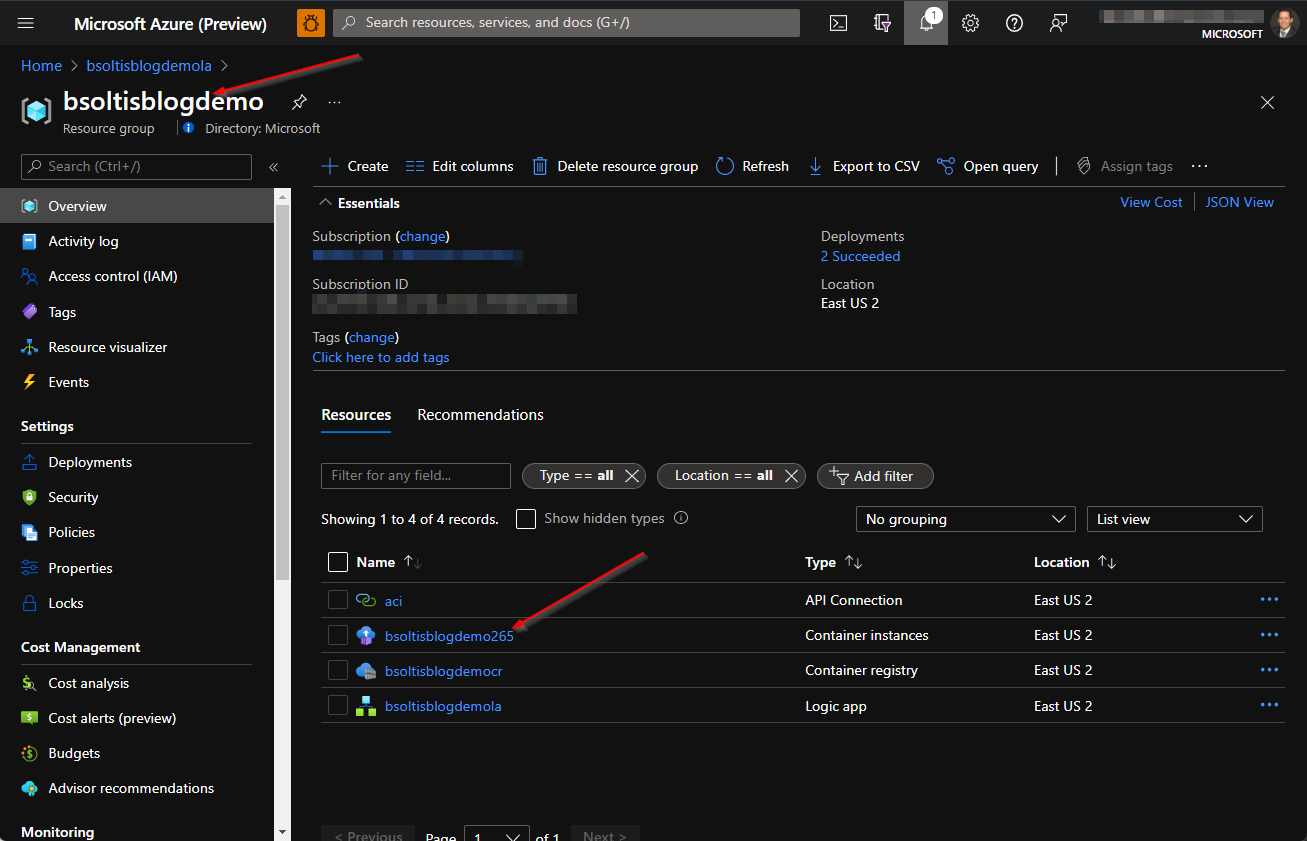
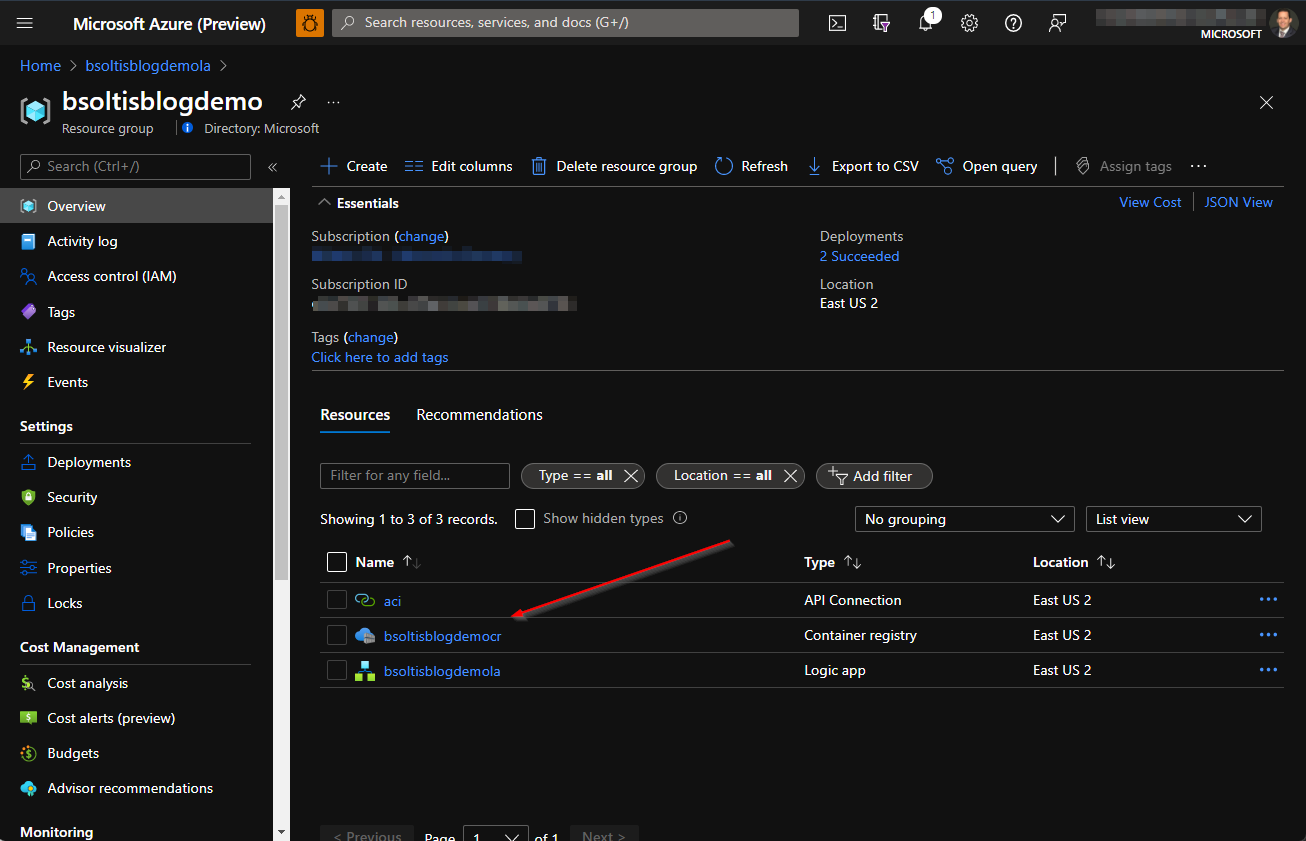
After refreshing my resource group, I can see the bsoltisblogdemo265 container instance was created. This means the workflow created the instance properly and is waiting for it to complete.
The Azure Logic App will stay in the Until loop, pausing for 10 seconds each time, until the “Succeeded” state happens (or it times out). Once it completes, I can see in the portal that the True condition was met on the 2nd attempt.
Finally, I refresh my resource group and see the bsoltisblogdemo265 instance has been deleted.
Whew! That was a lot of screen shots, but I wanted you to see the process from start to finish. By leveraging the built-in Azure Container Instance connector, your Azure Logic Apps can spin up/down your instances when you need them. Adding an Azure Container Registry to mix gives you a centralized, controlled repository for your images to keep things secure. This can help you create very powerful workflows, with minimal effort and blend together your microservices into a complete solution. Good luck!
Azure Container Instance Connector
The Azure Container Instance Connector allows you to not only spin up an instance within your Azure Logic App, but you can also send it commands, specify the resources, and slew of other options. Be sure to check out the details in the documentation.
Azure Container Instance - Connectors | Microsoft Docs
Links