


A totally fictitious, not-typical conversation:
Client: “We want to have a great CICD process for our container applications!”
Me: “Great idea!”
Client: “We want to use GitHub and Azure and everything has to work great.”
Me: “Woo-hoo! Sounds like a fantastic plan!” [Insert appropriate breakdancing move]
Client:” So, what’s the best way to do it???”
Me: “Well, there’s no one way to do it. Every company has their own requirements and will always come up with a different solution. You really need to implement a POC and work through the process to see what works (and what doesn’t).”
Client: [Blank stare]
I’ve had that exact conversation with countless clients. And the hardest part is the ambiguous, “it depends” answer, but it’s the truth. There are so many ways to accomplish CICD, it’s impossible to know which one is best for clients. Containers add another level of variables, as their whole schtick is “run the app anywhere”. That makes it tough to know which was is right for a project.
Recently, I was working on a container app myself and wanted to use Azure and GitHub Actions for a smooth CICD process. In the end, I thought the solution was fairly elegant, automated to level I wanted, and allowed me to learn some new skills. Hopefully, this article shows you one way to implement CICD for a container-based .NET app.
One of the biggest drivers for any solution is the process that needs to be followed. This may apply to how a developer works, how code is reviewed/deployed, and any automation that is needed. Here’s an overview of the process I wanted to implement.
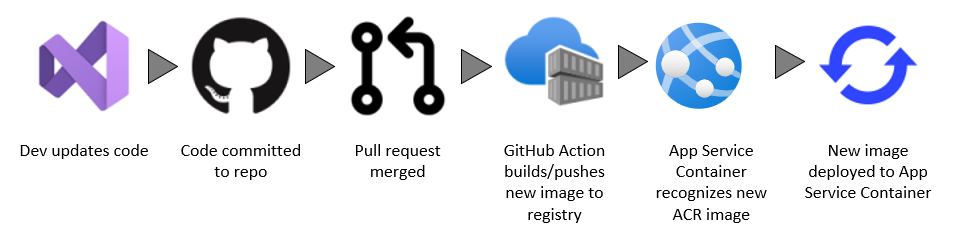
This process requires some built-in automation that Azure App Service provides, as well as some integrations between systems. Let’s dig into the services to see how they were configured.
My environment consisted of:
.NET Core App
My .NET Core app was a very exciting “default template” site and had Docker support.
GitHub Repo
I leveraged GitHub for my code repository. I also planned to use GitHub Actions for my deployment.
Azure Container Registry
Because my application had Docker support, I created an Azure Container Registry for my image.
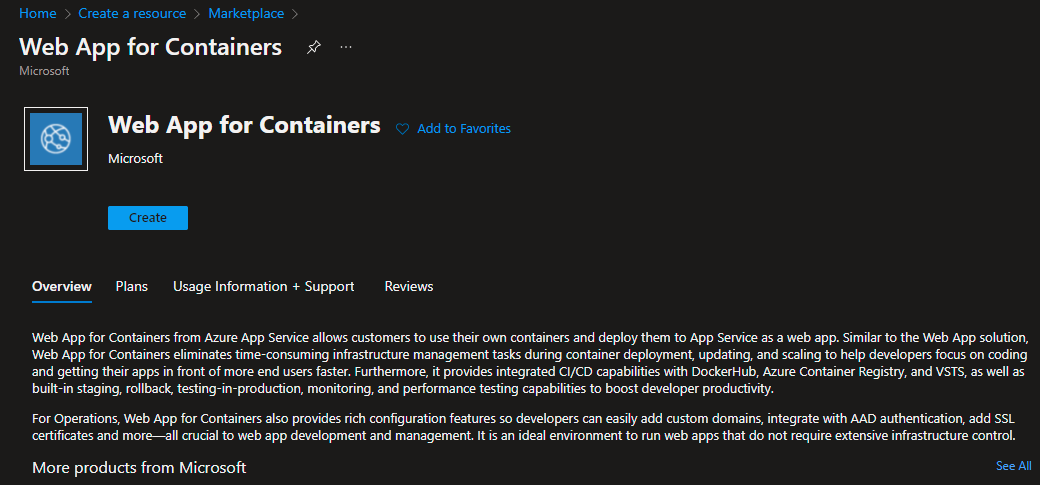
Azure App Service Web App for Container
While I could run my .NET Core as a “standard” web app, I selected for the App Service Web App for Container option. This was because of… reasons. And a regular .NET Core site deployed to an App Service doesn’t make for an exciting article.
For the purpose of the demo, I deployed my image to my Azure Container Registry and manually deployed it to my App Service.
Migrate custom software to Azure App Service using a custom container
I completed the following steps to set up my CICD process.
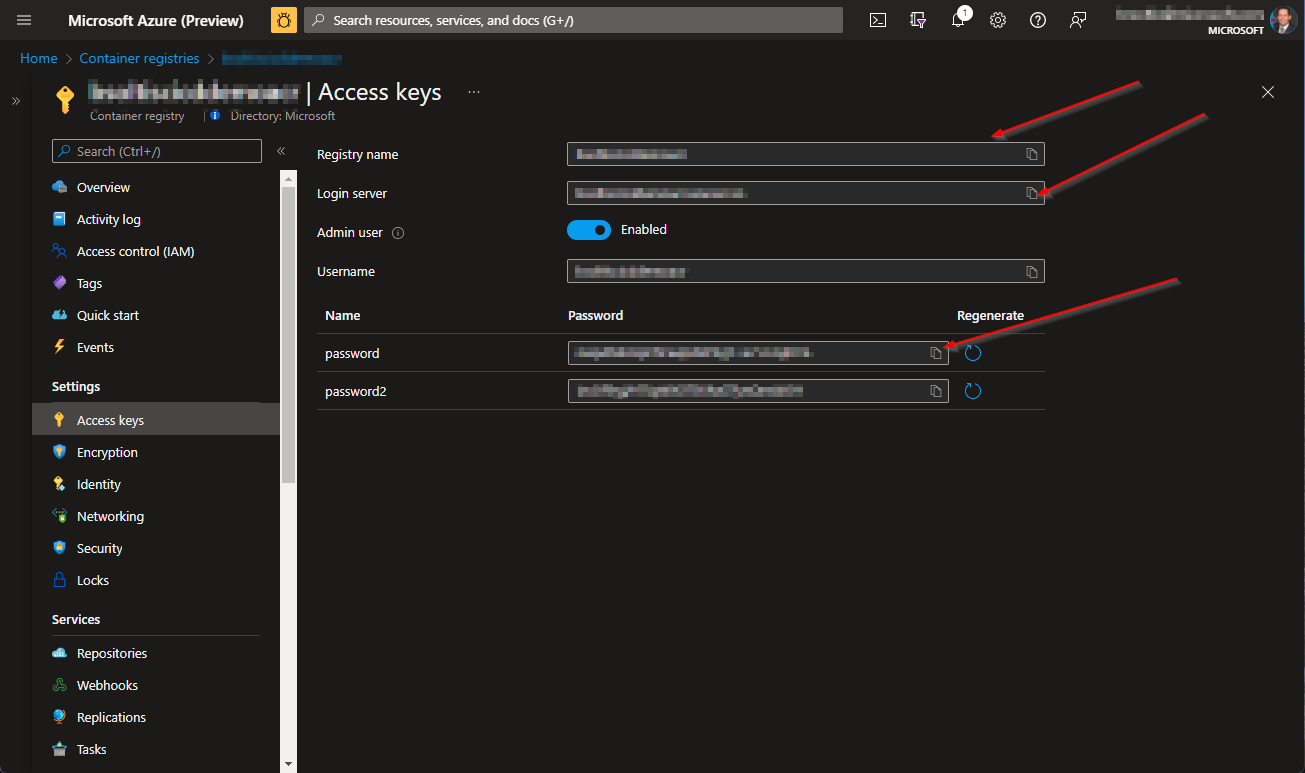
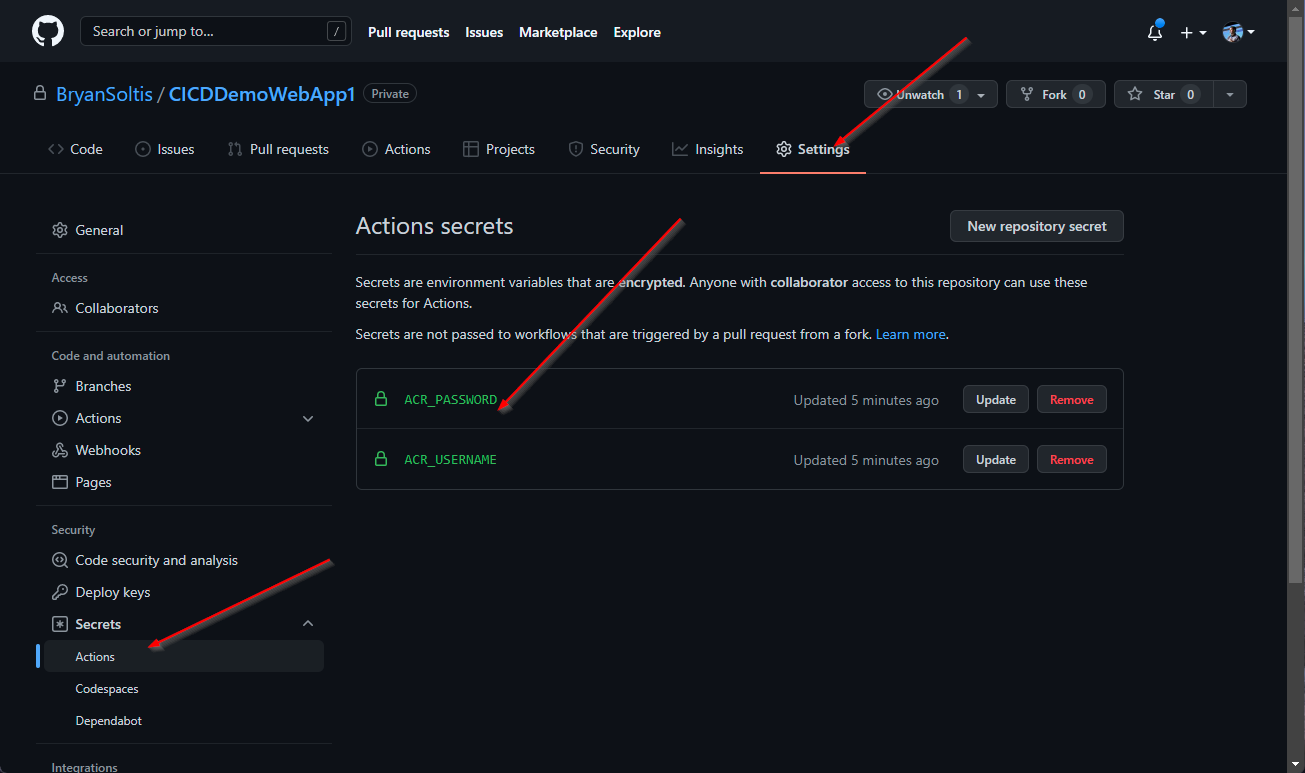
1. In my Azure Container Registry, I copied my connection information for use in my GitHub Action.
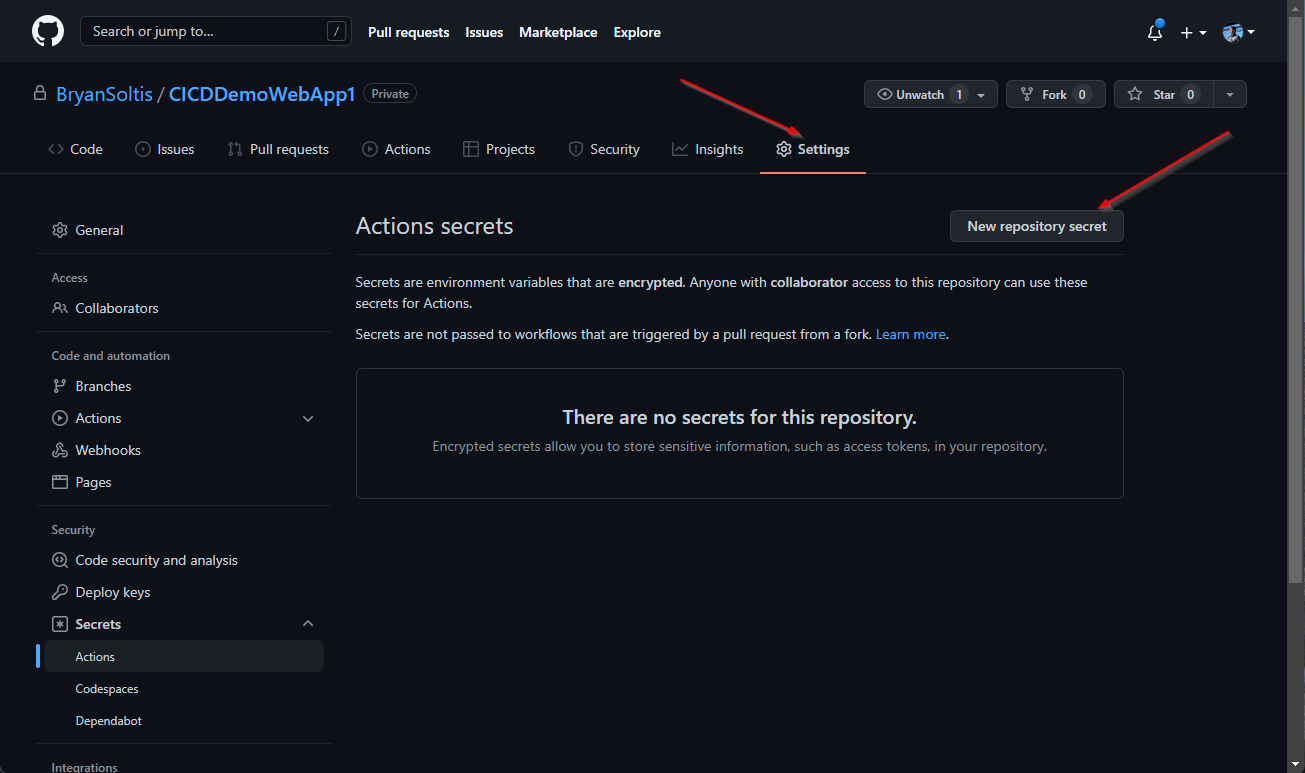
2. In my GitHub Project, I created new secrets for the ACR connection values.
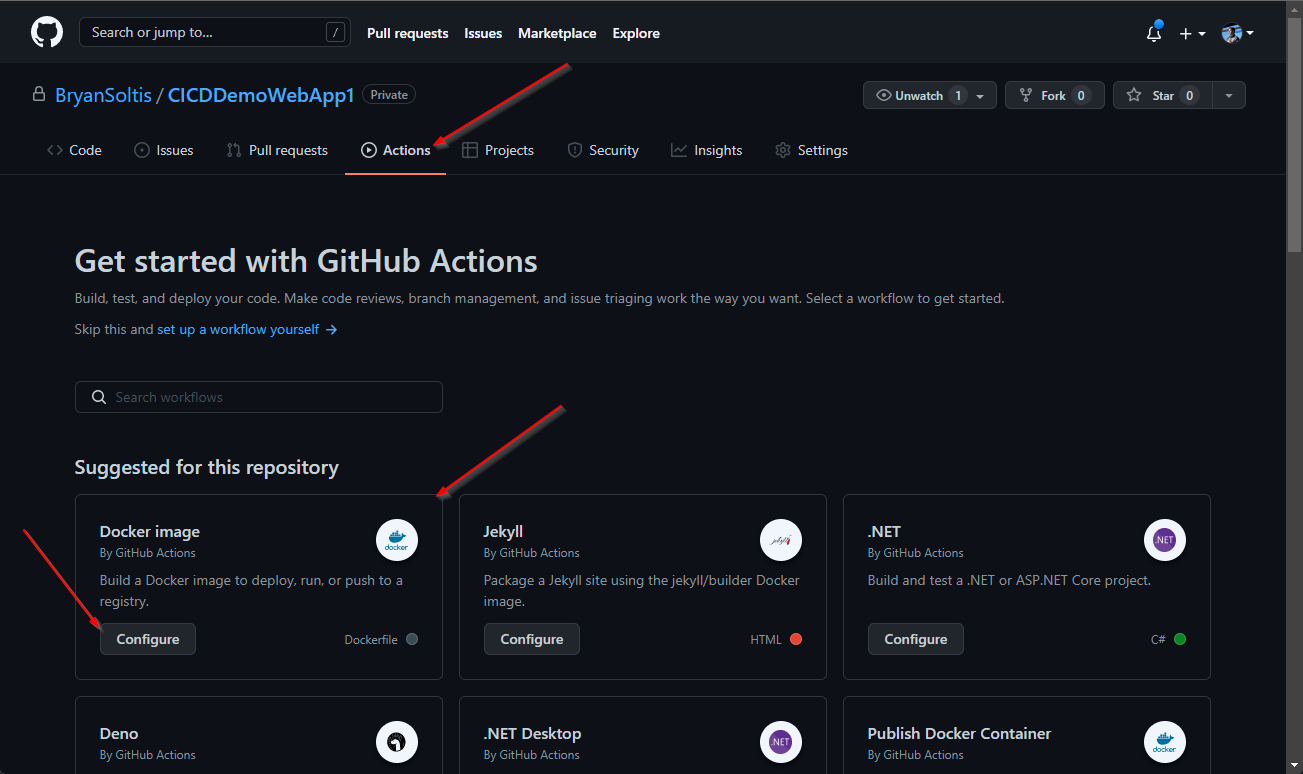
3. In my GitHub project, I created a new workflow under GitHub Actions. GitHub recognized the Docker support and recommended to the Docker image workflow template.
4. I updated the workflow with my GitHub secrets.
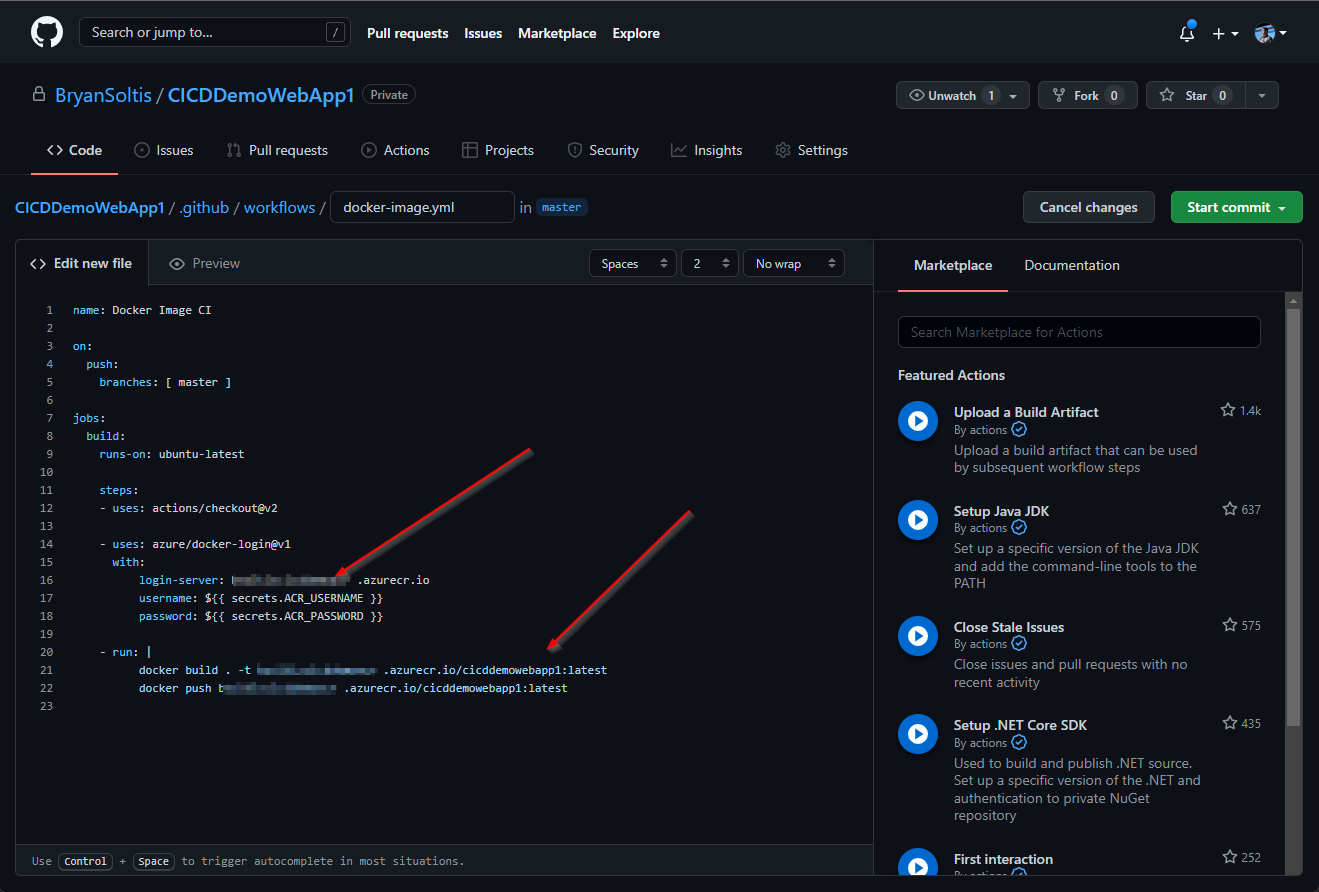
Here is the full GitHub Action content.
name: Docker Image CI
on:
push:
branches: [master]
jobs:
build:
runs-on: ubuntu-latest
steps:
- uses: actions/checkout@v2
- uses: azure/docker-login@v1
with:
login-server: [YOUR ACR NAME].azurecr.io
username: ${{ secrets.ACR_USERNAME }}
password: ${{ secrets.ACR_PASSWORD }}
- run: |
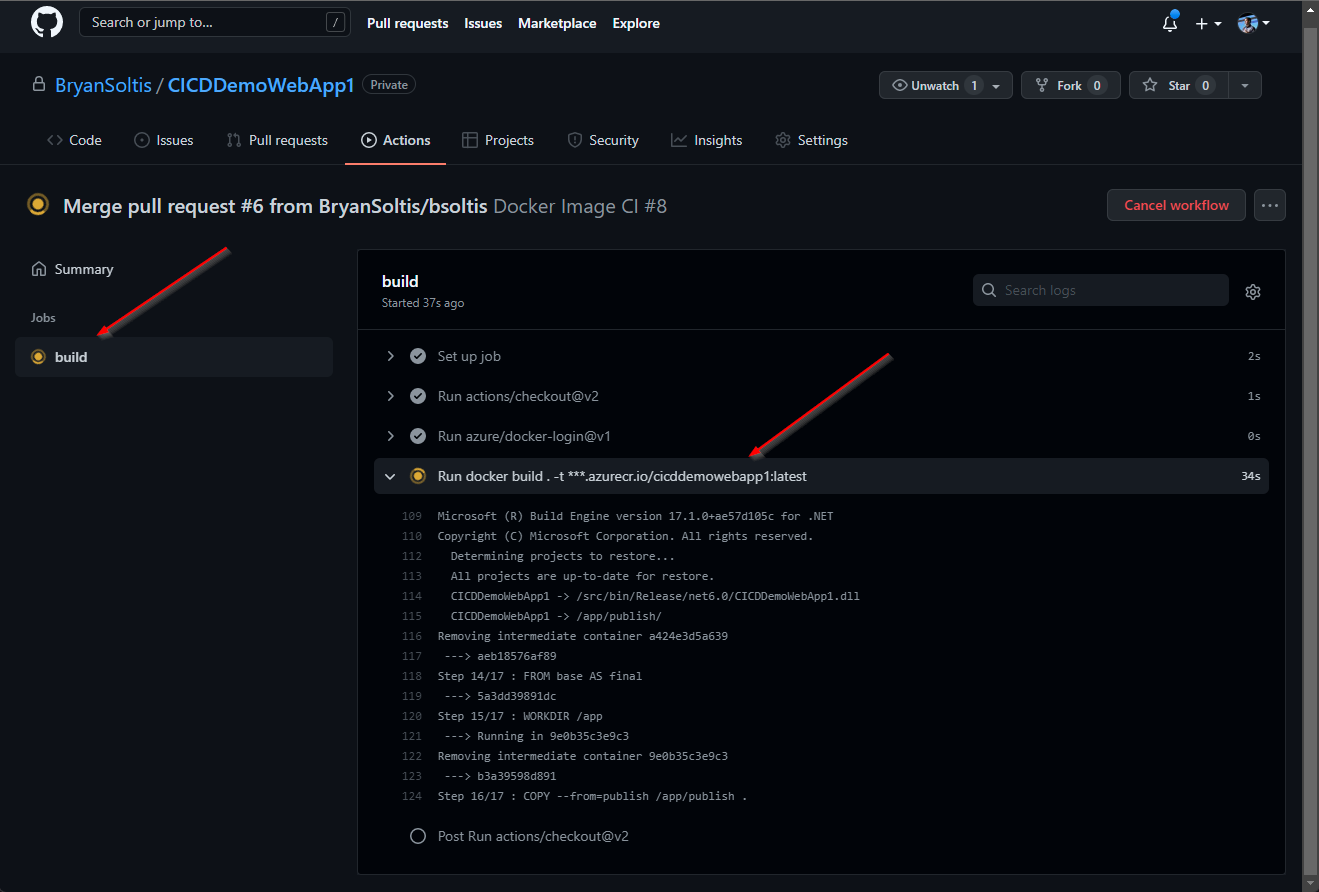
docker build . -t [YOUR ACR NAME].azurecr.io/[YOUR IMAGE NAME]:latest
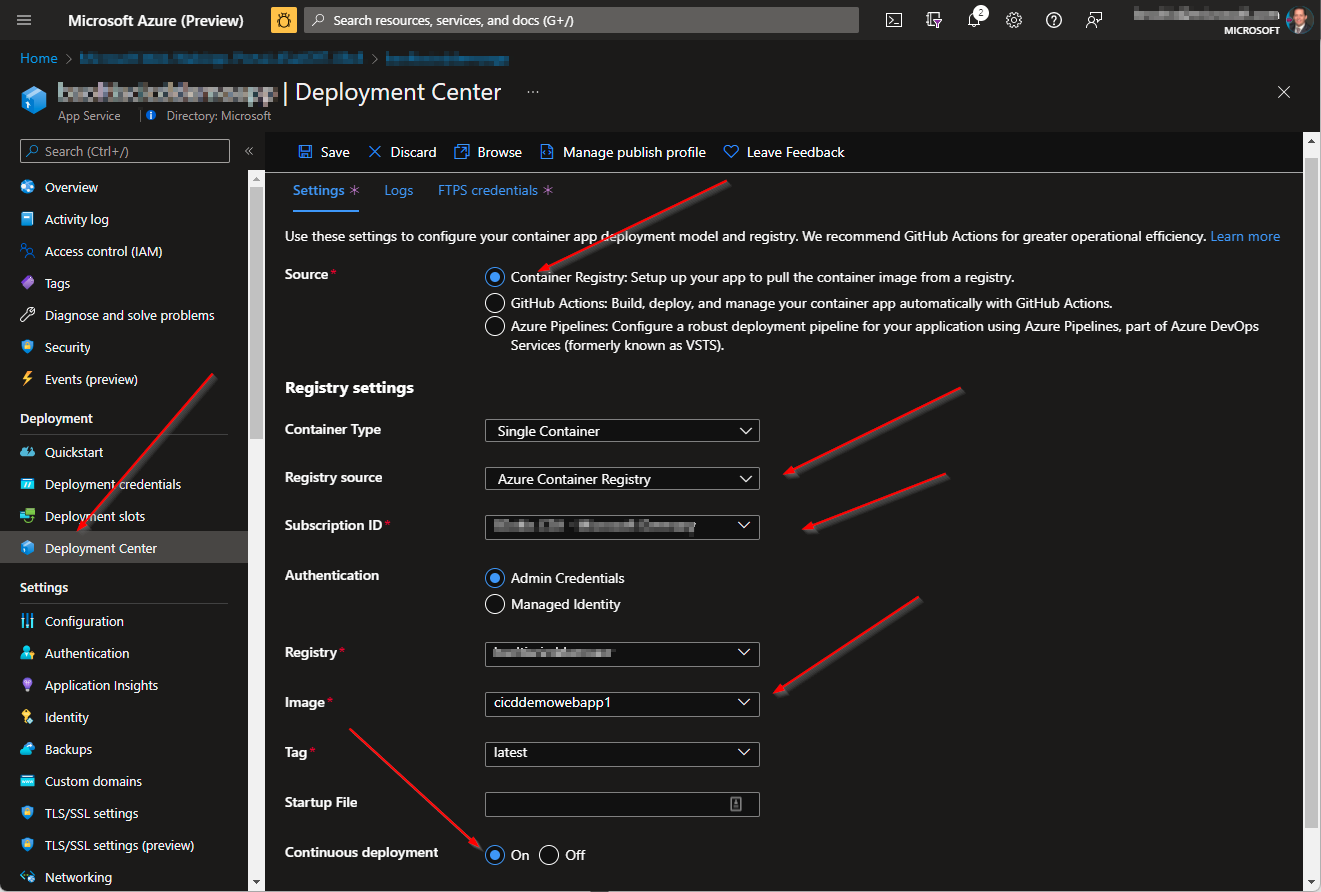
docker push [YOUR ACR NAME].azurecr.io/[YOUR IMAGE NAME]:latest 5. I configured my Azure App Service for Continuous Delivery. I selected my Azure Container Registry and specified my image. (Note: I had to push my image to my ACR prior to this step)
With the environment and setup completed, I was ready to test my process.
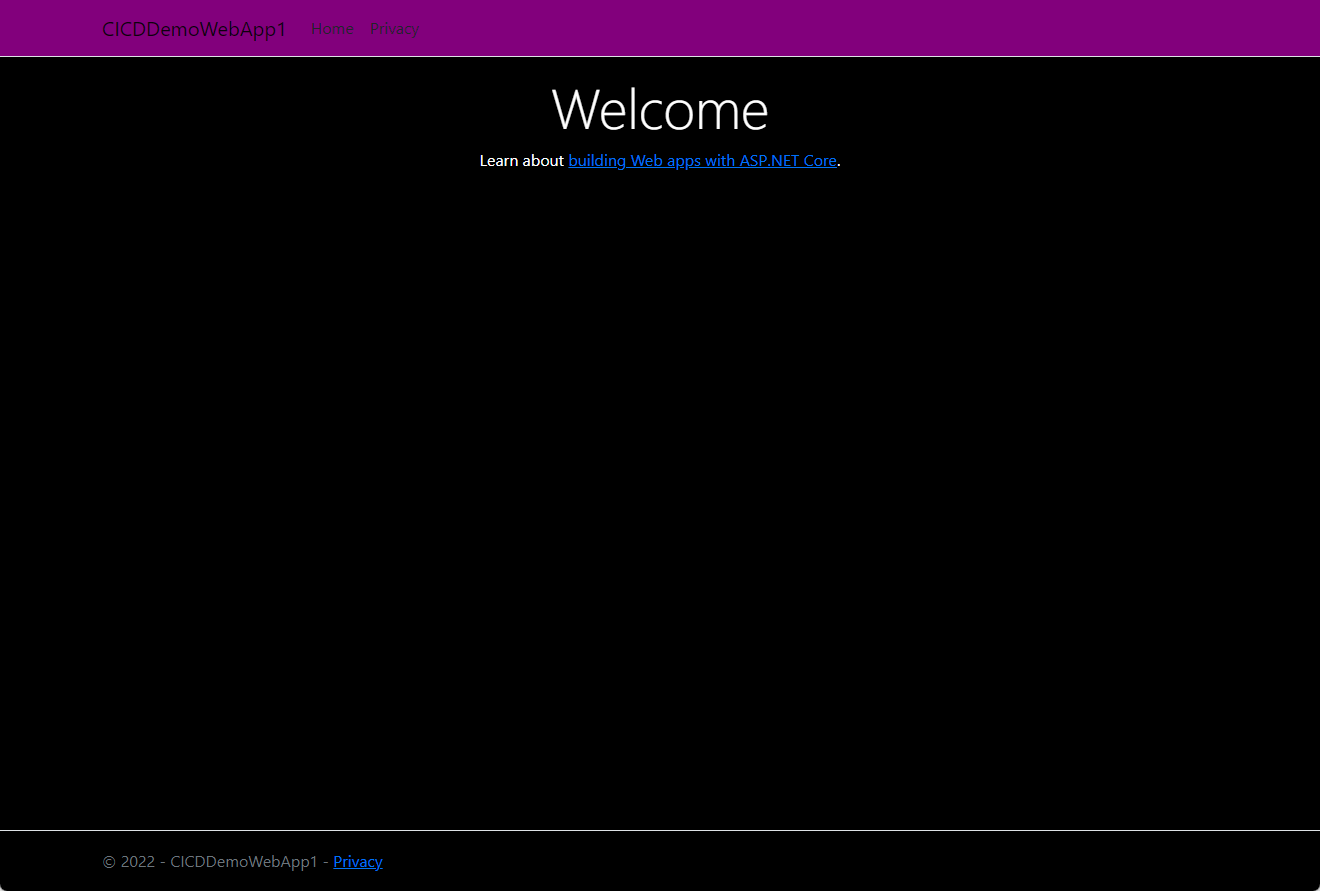
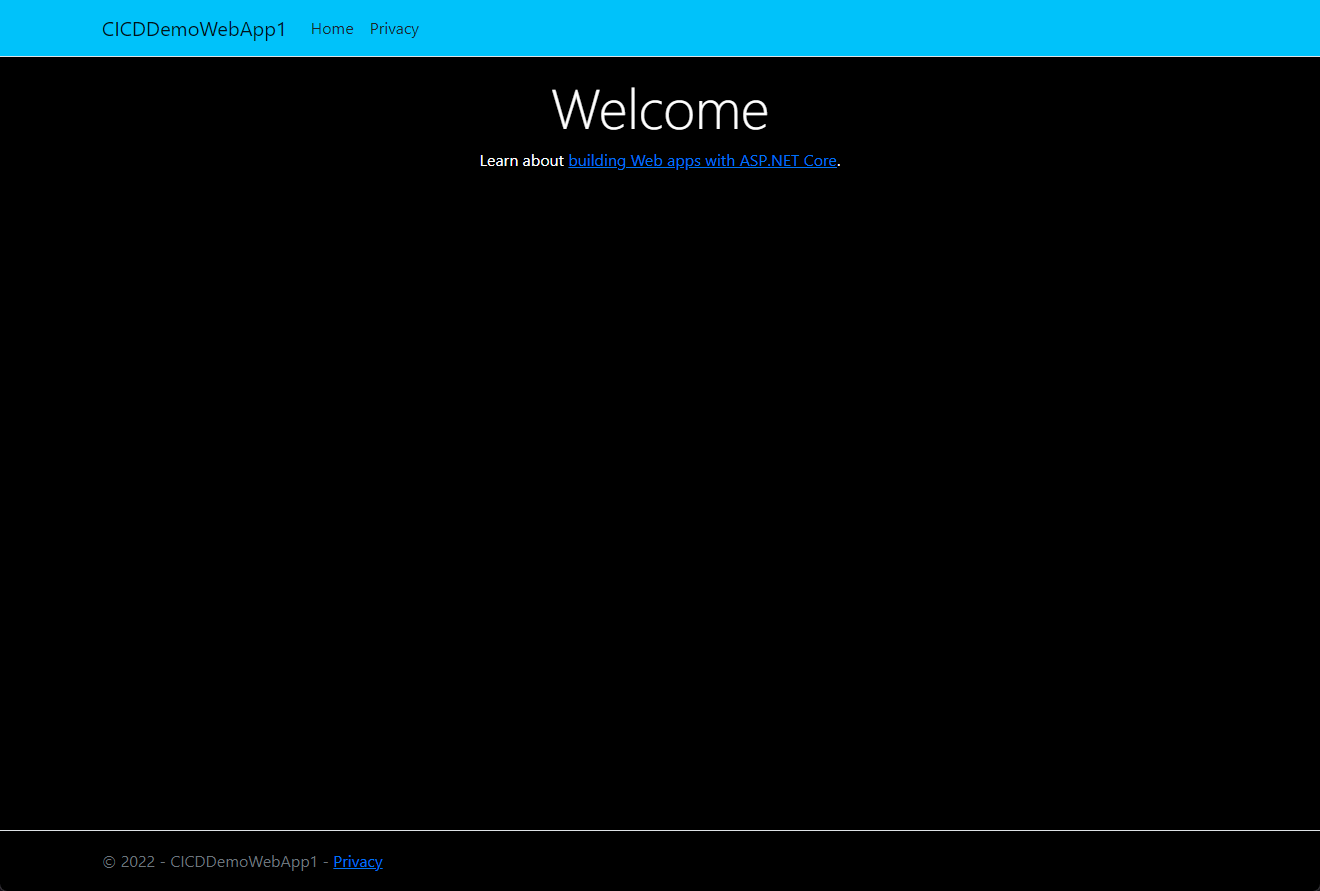
1. I confirmed my original site is running in my App Service with the stylish purple header.
2. I updated my code to change the header color.
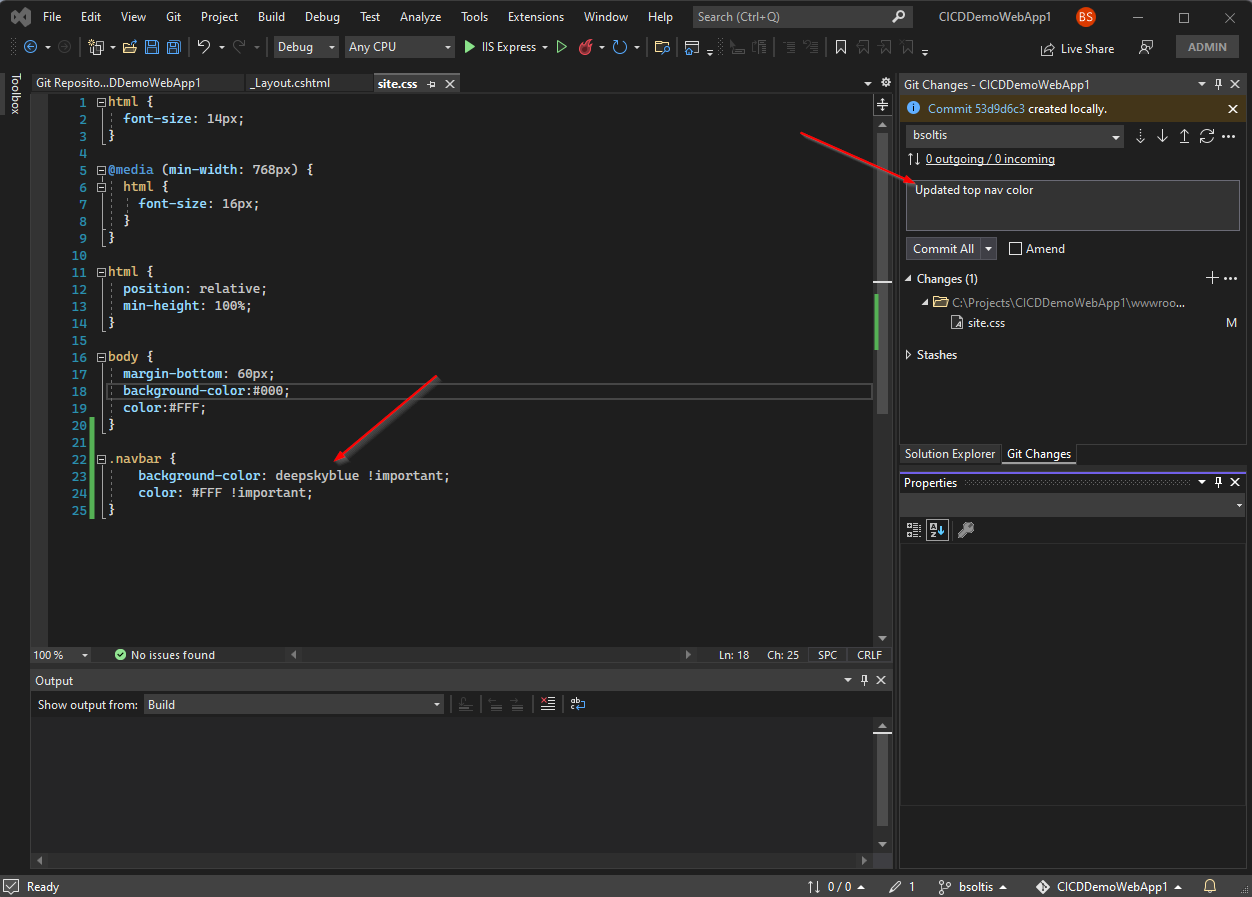
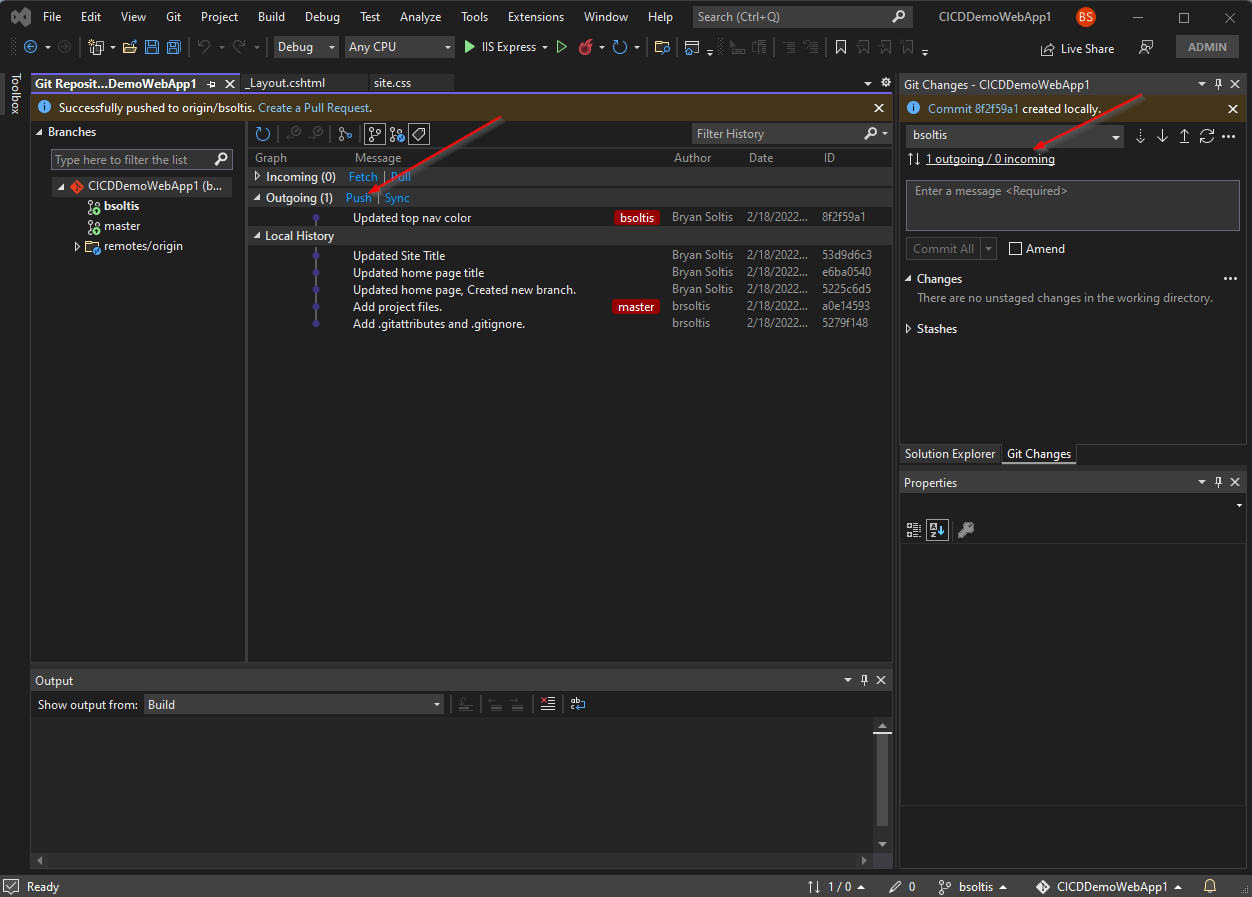
3. I committed my code and pushed the changes to my GitHub repo.
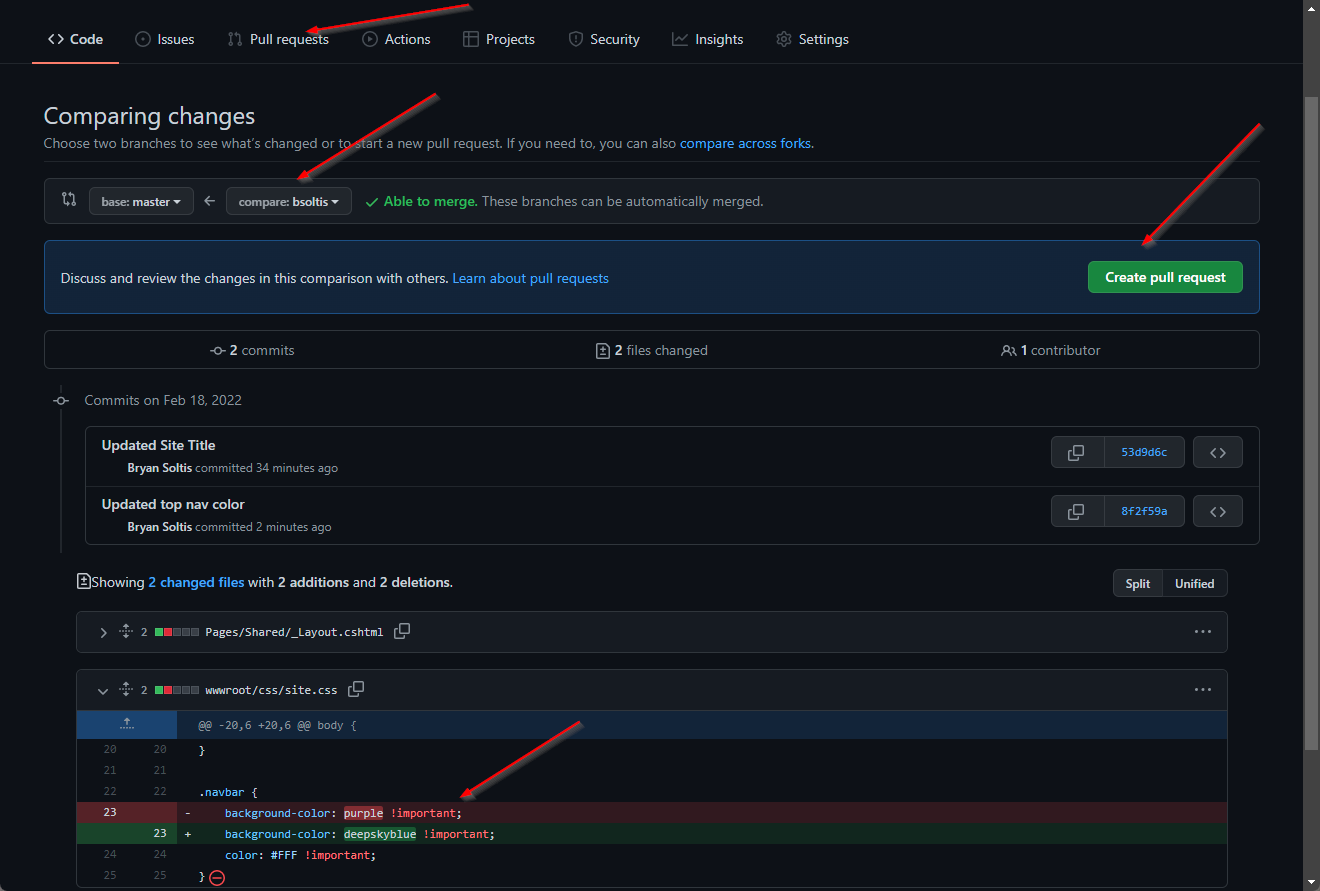
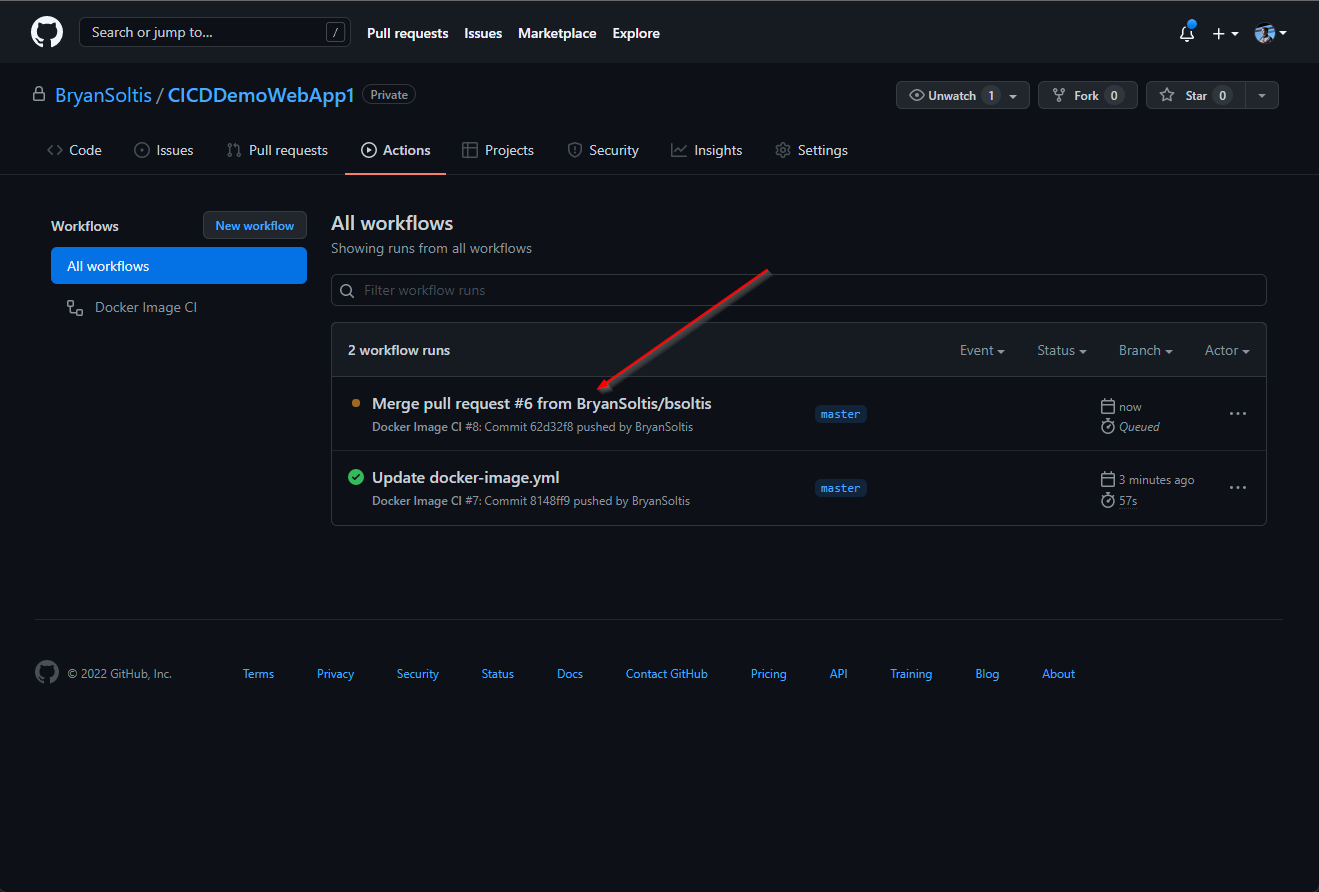
4. I created a pull request and merged my changes into the master branch.
5. I confirmed the GitHub Action executed and successfully built and pushed the image to ACR.
6. Because my App Service was configured for continuous deployment, the new ACR image was downloaded and applied to the site.
7. I confirmed my deployed site has a swank, new blue header.
As you can see, CICID takes all forms when a company implements their requirements and processes. From automatic deployments to manual gates, every step should be a meticulous, purposeful action to ensure the right action is taken at the right time. Hopefully, this article showed you how you can use GitHub and Azure to develop a seamless deployment pipeline for your projects. Good luck!