

Azure App Services continue to be one of the most feature-packed services in Azure. From GitHub integration to dynamic scaling, web apps and APIs can be deployed and managed with ease. Apps can quickly be protected using a number of identity providers, all with a few clicks within the portal.
When you add Azure API Management into the mix, things may get a little tricky. I can’t think of a single client that simply deploys APIM and that’s it. They all have very specific authentication/security requirements that (luckily) are often easy to implement using the built-in configuration, integrations, and other Azure staples.
Recently, I was curious of how an Azure AD-protected App Service could be exposed with Azure APIM. While it took me a little while to get the answer, the process is actually quite simple. In this article, I’ll show you how you can quickly expose your Azure AD-a-fied App Services with API Management.
To set up the scenario, I needed a few things in place.
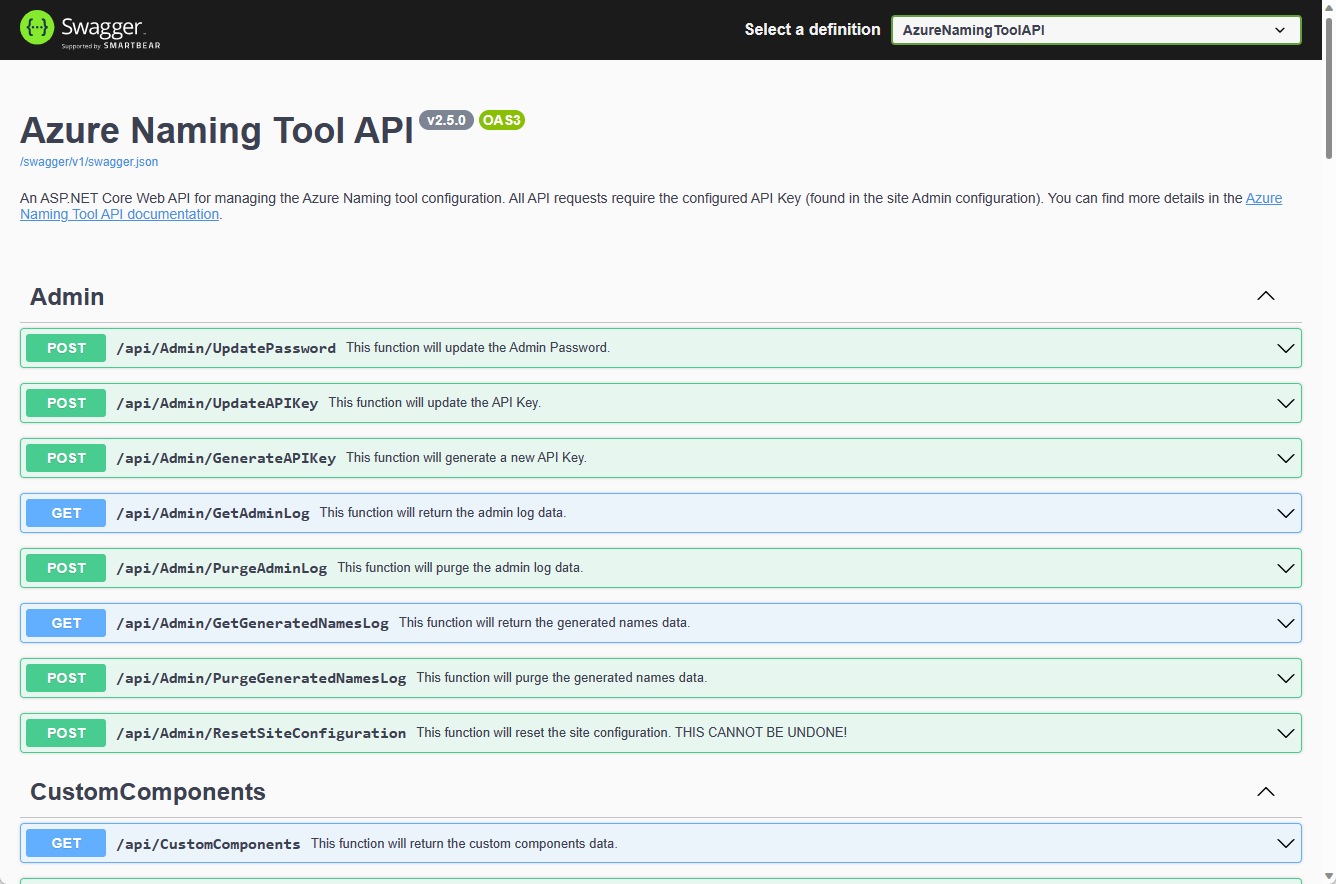
1. Azure App Service containing an API (I used my installation of the Azure Naming Tool API. Haven’t heard of it? You should check it out!)
2. Authentication using Azure AD on the App Service (Note the App (client) ID value)
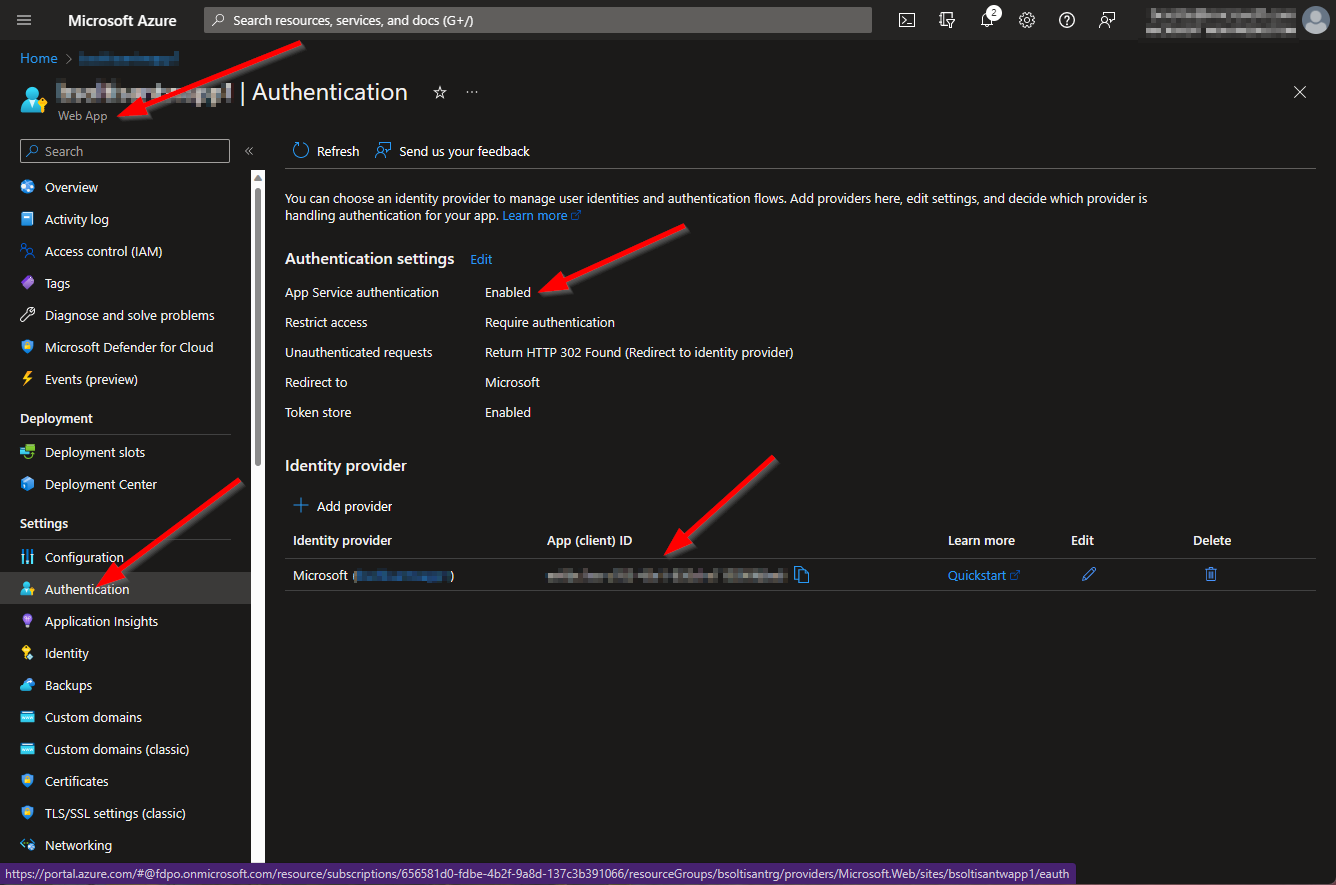
You can find out how to enable Authentication on your App Services here:
Configure Microsoft authentication - Azure App Service | Microsoft Learn
3. Azure APIM Service (any tier)
With the pre-requisites in place, I could register my API and test out the integration.
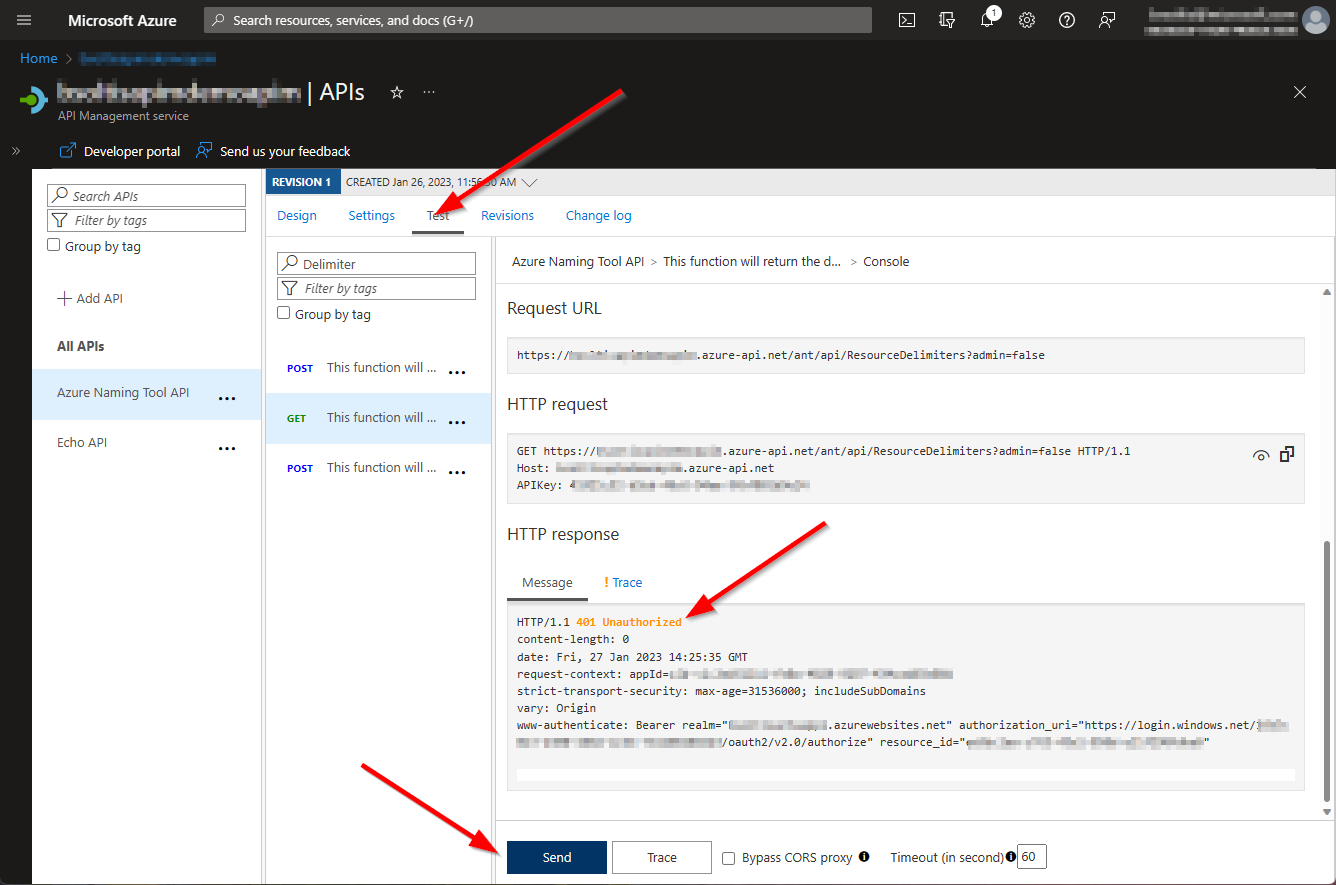
Hmm, that’s no good. Because the App Service is expecting the request to be authenticated with the identity provider, the traffic coming from APIM is failing. Let’s fix that!
The first step of the process was to create a Managed Identity for the Azure APIM service. Managed Identities are the preferred way to authenticate an Azure resource to other Azure services. Azure will keep the credentials up to date, and you can easily set permissions to allow Service X to do/not do anything you like in Service Y.
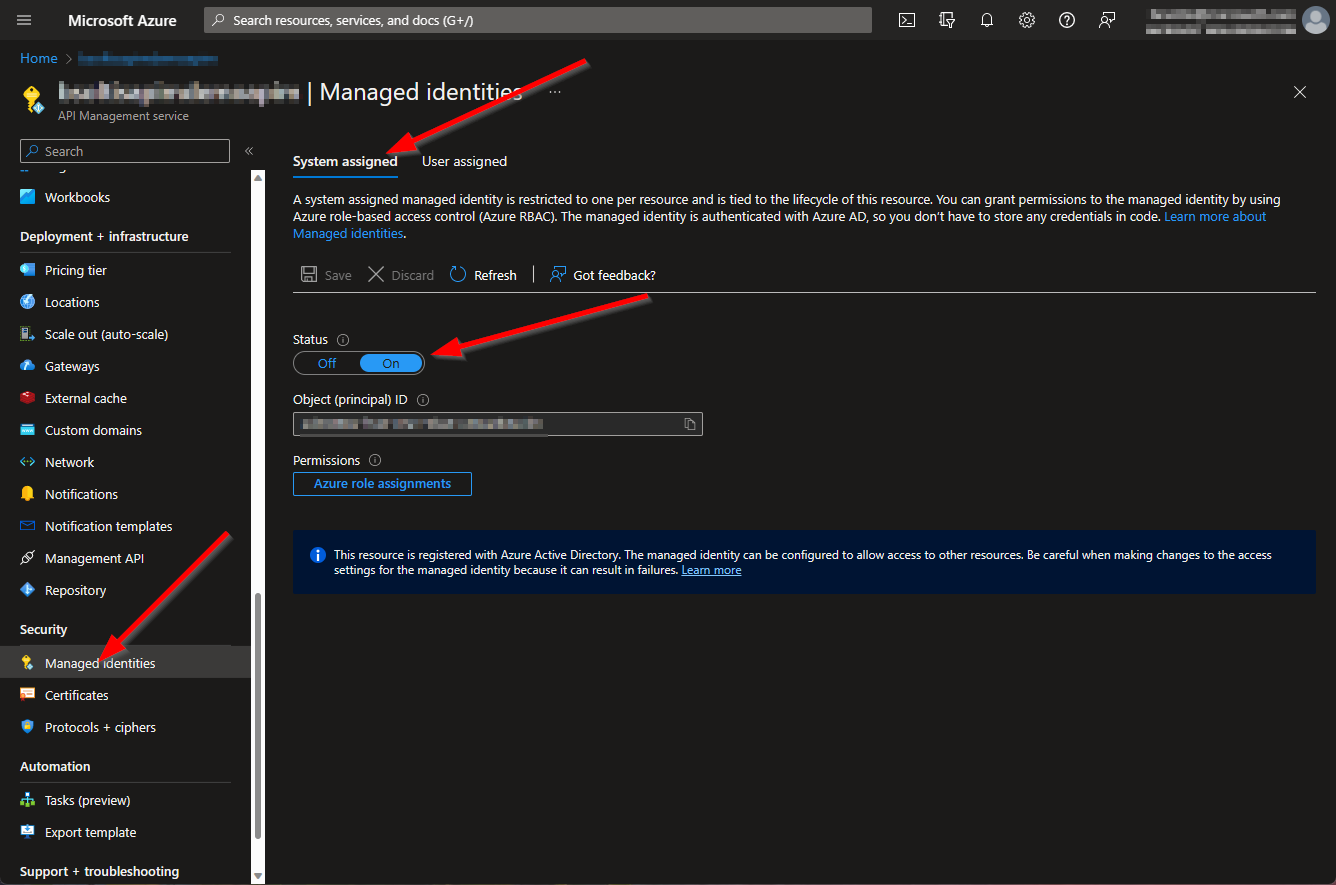
You can learn more about APIM Managed Identities here:
Use managed identities in Azure API Management | Microsoft Learn
With the Managed Identity configured, I could add the real magic: Policies. Azure APIM provides policies that can be applied to any level of the request (inbound, backend, outbound, globally, API-specific, etc.). This is an extremely powerful feature that allows you to manipulate the API requests in a ton of ways. In my case, I was interested in an Inbound Policy to get the Authentication working.
There are many types of policies, and the UI provides a great catalog of snippets to help you inject them into your configuration.
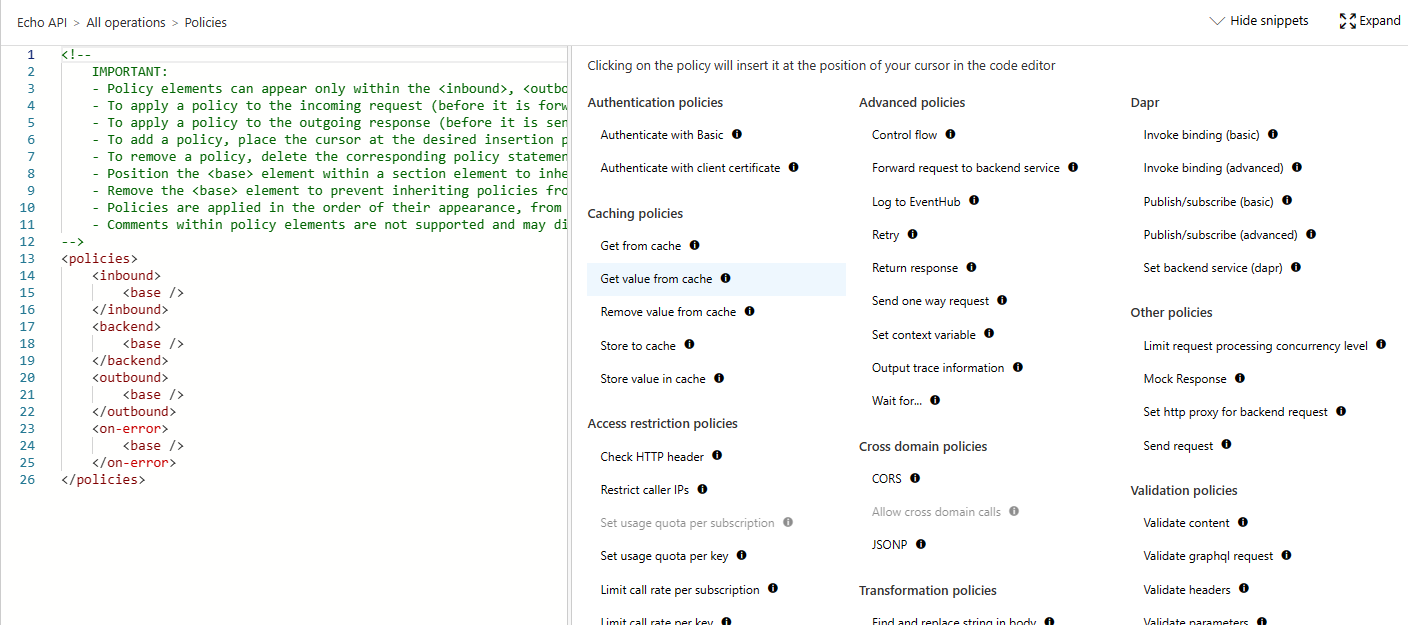
You can learn more about APIM Policies here.
Policies in Azure API Management | Microsoft Learn
The snippets are a great starting point, but there are many more policies that may not be listed. Specifically, the authentication-managed-identity policy is the one I was looking for. This policy tells APIM to include its Managed Identity in the request and send it on to the backend API. The policy expects the App ID of the backend API as the resource parameter. (That's the App (Client) Id in the Authentication UI for the App Service)
<authentication-managed-identity resource="XXXXXXXX-XXXX-XXXX-XXXX-XXXXXXXXXXXX" />
I added the policy to the inbound section for the API (all operations).
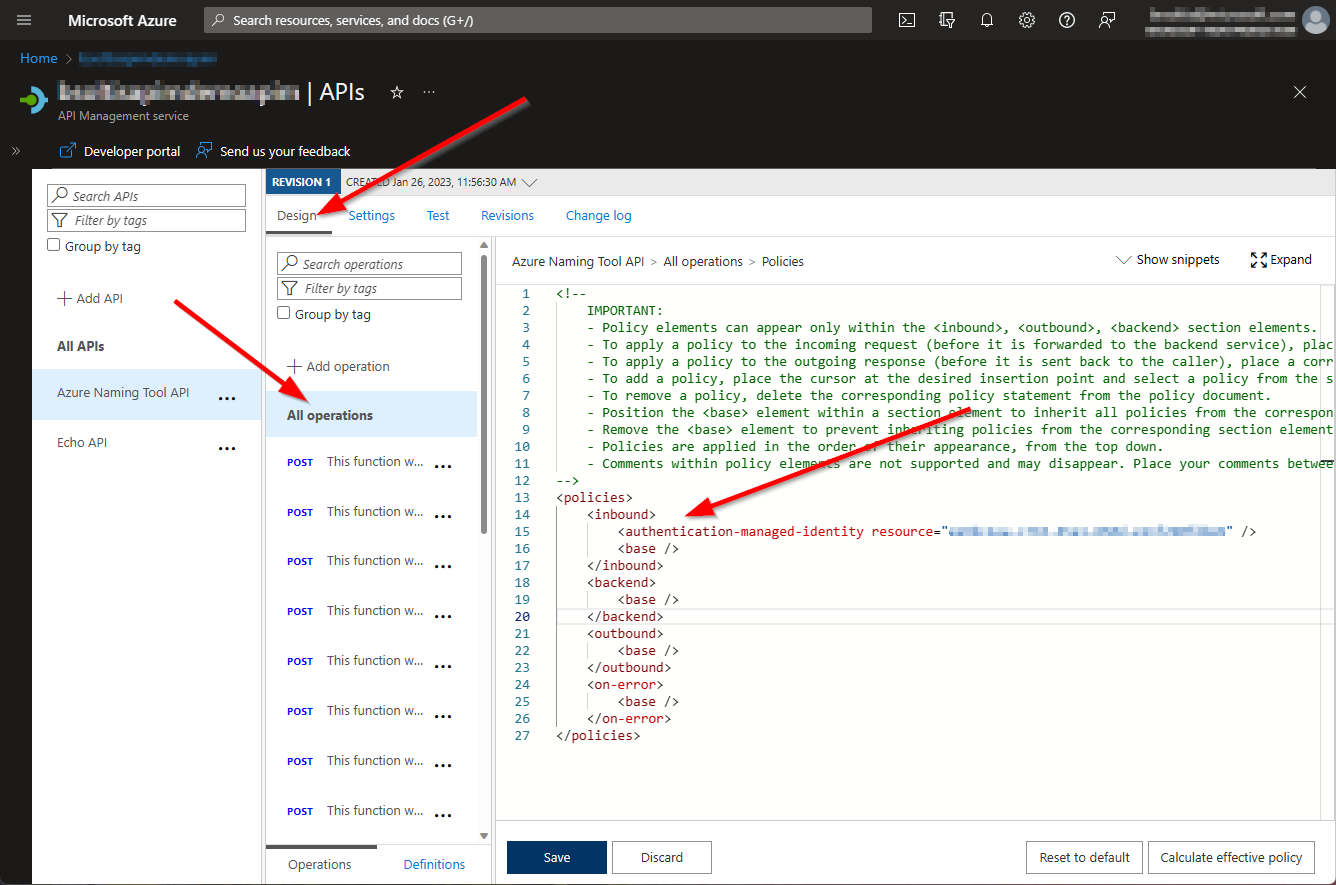
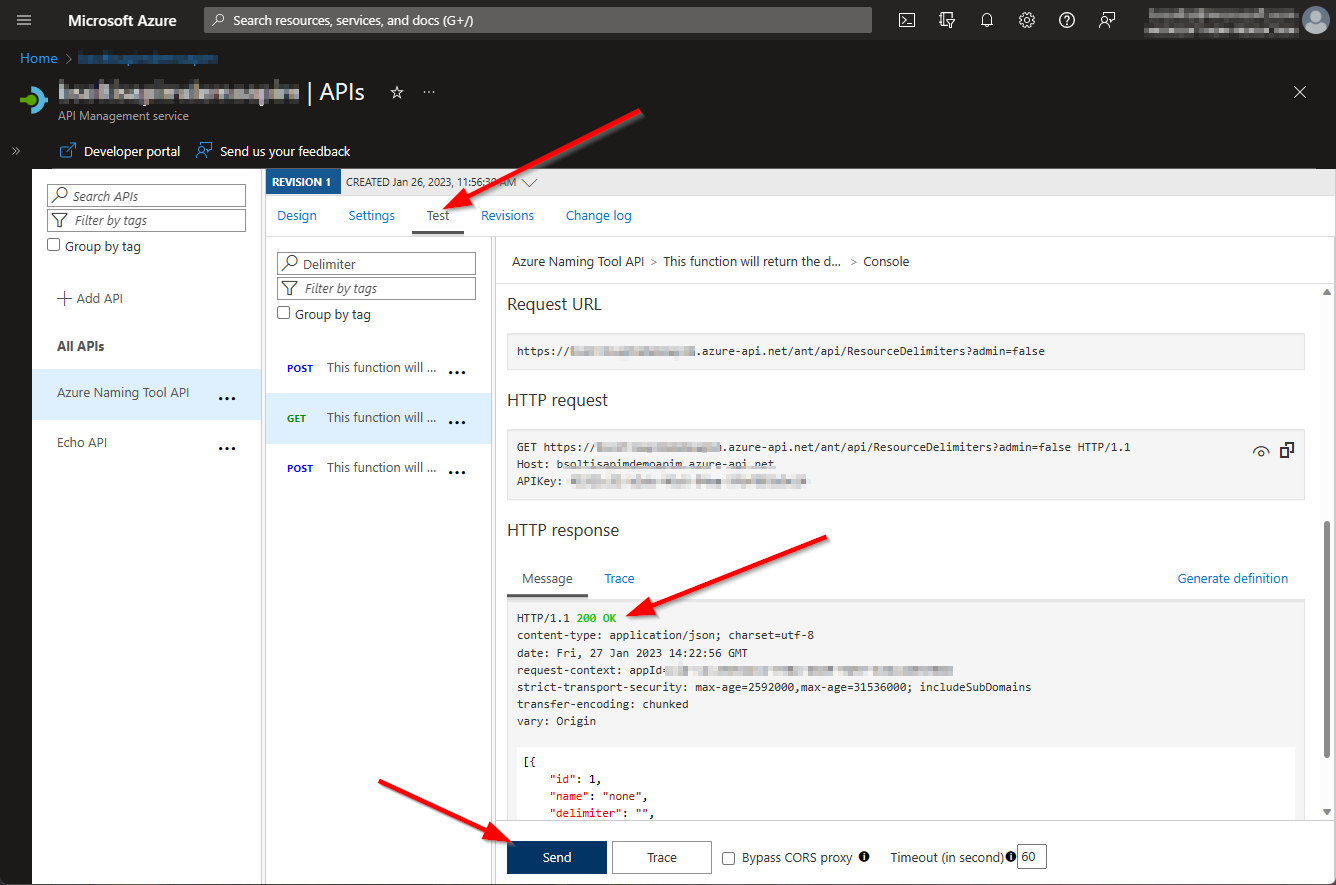
With the Managed Identity configured and policy in place, all requests passing through APIM would be authenticated when they get to the Azure App Service.
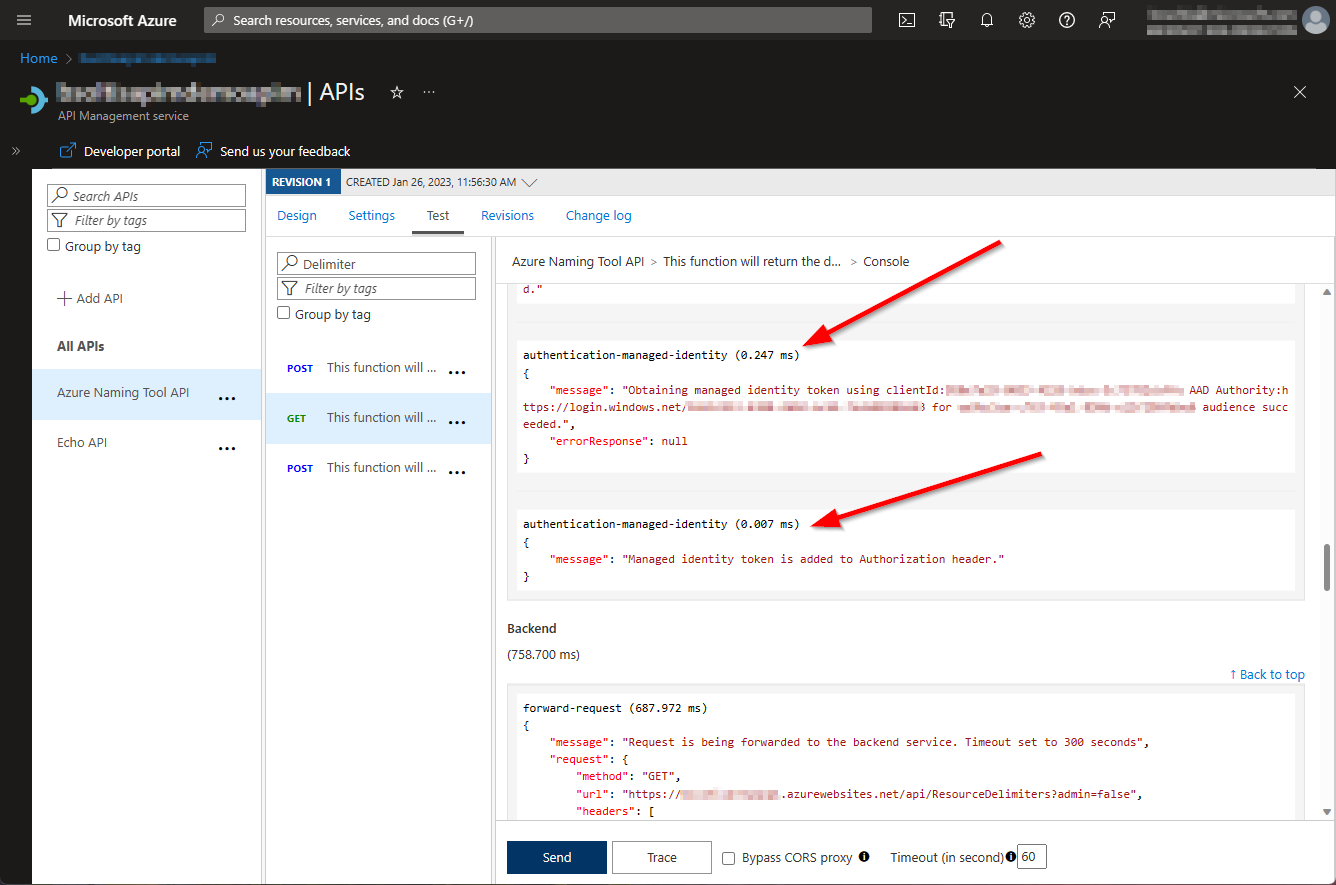
If I dig into the Trace, I can see the actually steps where the request is getting the Authorization token and adding it to the request header.
Protecting your Azure App Services with identity providers is a great way to keep your systems secure. When you add Azure APIM to the solution, you need to make sure your requests to your API are authenticated. By using inbound policies in APIM, you can control exactly what information is passed to your backend API and ensure your systems are the best of friends. Good luck!